This older video from LPGA instructor Cindy Miller kind of goes along with yesterday's post about topping... but it approaches the problem of poor ball contact from the "other side" of the swing -- the upper body, rather than the lower body.
Cindy is attacking the myth that you need to keep your lead arm straight during your swing. Now, we're not talking about bending your lead elbow at a 90° angle at the top of your backswing. (Although some players do learn to play well that way. If you do, you know it.) Rather, we're talking about trying to keep your lead arm dead straight throughout your swing.
I've mentioned this "ramrod striaght" myth many times when talking about the one-piece takeaway. You don't want your lead arm stiff -- it should be relaxed and will flex slightly as you swing to the top of your swing, then return to its address position as you make your downswing. This is a natural movement for your arm -- you do it all the time when you make any kind of sweeping motion with your arm. You want to just let it happen when you swing the club as well.
In this video Cindy mentions two problems that keeping your lead arm stiff will cause. First, it can cause you to "stand up" during your backswing, just as Andrew Reynolds mentioned yesterday in that post. Stiff arms cause you to lift up and straighten up -- but this time, you overcorrect on your way down and stick the clubhead in the ground. Can you say fat shot?
The second thing this move does is cause you to open the clubface on the way back, then you leave it open on the way down. That's because a stiff lead arm won't drop back down into your normal address position, which means your arms don't rotate back to their address position where the face was square.
Ironically, you can do this upper body lifting and yesterday's lower body "push up" at the same time. What happens? Depending on which one you exaggerate, you might hit the ball fat or thin, without any apparent logic. And if you do hit the ball, the combination will likely create an over-the-top swing with an open clubface, creating that nasty banana ball we all hate.
So hopefully this week's series of posts will help you understand how excess movement in your swing -- created by trying to reach for a bigger turn than is natural for your flexibility -- can create poor contact and unwanted ball flights. So many of these problems, both with your upper body and your lower body, are caused by unnecessary tension in your arms and legs.
Maybe I'll try to post some relaxation drills next week. Learning to relax isn't hard, but a little encouragement can't hurt!

Showing posts with label top of backswing. Show all posts
Showing posts with label top of backswing. Show all posts
Sunday, July 8, 2018

Sunday, April 15, 2018
Martin Hall on Getting More Distance (Video)
Hall did this video last week to help older players get more distance, but not understanding how to use your hands and arms keeps a lot of players from hitting it out there. This video is a very simple explanation of how it works.
Okay, there are two parts to this, and if you're too fixated on swinging around your body you'll never get the hang of it.
And yes, I have more videos to help you. I've posted them in past posts, so here are the links.
The first post teaches you how that upward cocking motion creates your "top of backswing" position. It's called Using Your Hands in the Takeaway and it features K.J. Choi's instructor Steven Bann. As I said, it will help you understand how that upward cocking action creates the so-called "textbook" position at the top.
And the other post is called Jim Flick on the TWO Pendulums in Your Swing, which I also referenced in the Nick Faldo post from yesterday. That "L-to-L" drill is a great way to learn that lead wrist upcock motion that Martin Hall is talking about.
Yes, I know I recommend a lot of drills over and over, but that's because they are proven drills that teach a number of skills and they work for almost everybody. Work with them and you'll find out for yourself.
And in this case, you'll pick up some extra distance, even if you aren't particularly old. Yet.
Okay, there are two parts to this, and if you're too fixated on swinging around your body you'll never get the hang of it.
- First, you cock your trailing elbow up and down.
- Second, you cock your lead wrist up and down.
And yes, I have more videos to help you. I've posted them in past posts, so here are the links.
The first post teaches you how that upward cocking motion creates your "top of backswing" position. It's called Using Your Hands in the Takeaway and it features K.J. Choi's instructor Steven Bann. As I said, it will help you understand how that upward cocking action creates the so-called "textbook" position at the top.
And the other post is called Jim Flick on the TWO Pendulums in Your Swing, which I also referenced in the Nick Faldo post from yesterday. That "L-to-L" drill is a great way to learn that lead wrist upcock motion that Martin Hall is talking about.
Yes, I know I recommend a lot of drills over and over, but that's because they are proven drills that teach a number of skills and they work for almost everybody. Work with them and you'll find out for yourself.
And in this case, you'll pick up some extra distance, even if you aren't particularly old. Yet.
Wednesday, December 27, 2017
James Douglas Edgar on "The Movement"
There's a good chance you don't recognize J. Douglas Edgar's name, but his work is foundational to much modern instruction and it's likely you've heard him mentioned on some of GC's instructional shows. You can check out some of Edgar's fascinating history at his Wikipedia page; I'll just mention that he still holds the record for the largest margin of victory at a PGA Tour event -- 16 strokes at the 1919 Canadian Open.
It's also likely that you've never heard of his slender book The Gate to Golf. Fortunately for you, I have a copy and today's quote comes from it.

I'll tell you what "The Movement" is in a moment. But here is Edgar's rationale behind his enthusiasm for it:
The first is that while we describe Hogan as having a flat plane, Hogan is positively upright compared to Edgar. Look at how far his hands are below his shoulders at the top of his backswing! This is the swing of players like Paul Azinger and Rosie Jones, both players who -- though not the longest of players -- are incredibly accurate ballstrikers.

And the second thing? Look at those dark blocks around the golf ball. They create the gate in the book's title. They are the aid that helps you learn to hit the ball from the inside. I'm sure you recognize the layout -- you see them used by almost every instructor from Martin Hall to Michael Breed.
As for his remark about throwing the ball to the target, that was his way of teaching the use of the hands and wrists at impact.
As I said, Edgar's book is foundational to modern teaching. And the basic idea is applicable to almost any swing method, whether your swing is flat or upright. But I think I'd try to get my hands higher than Edgar teaches. You can be very accurate that way but you won't hit the ball as far as you'd like.
It's also likely that you've never heard of his slender book The Gate to Golf. Fortunately for you, I have a copy and today's quote comes from it.
I'll tell you what "The Movement" is in a moment. But here is Edgar's rationale behind his enthusiasm for it:
The manner in which the club-head meets the ball is the essential part of the golf swing. It is in the two or three feet immediately before and after impact where the real business takes place; it is there that the master-stroke is made and the duffer's shot marred, and it is to this part of the swing that I am referring when I speak of the movement.You probably recognized a number of things in that quote that are part of modern teaching, especially the emphasis on the impact area. Edgar goes on to say that:
It is not the position of the hands, wrists, elbows, body, etc., at the top of the swing that makes the shot, nor is it a wonderful follow through. It must not be concluded, however, that the position of body and hands at the top fo the swing is of no account. On the contrary, it is a matter of considerable importance, for only an artist can be hopelessly wrong at the top and yet be able to adjust himself in time. But what I do want the reader to remember is that though the position at the top is important, far, far more essential is the movement.
However fine golf may be for the few lucky natural golfers, I think that for those who have acquired the movement -- and all can certainly do so by exercising self-control and by practice -- golf is intoxicating. It has the exhilarating effect of champagne, without the after-effects. [p18]
While addressing the ball, the player should have the feeling of being about to throw the ball to its destination, and not to lift it there. In his backward swing he should get the feeling of throwing the club round the right hip; also, he should not be afraid of letting his body go well round also. [p21]The following photo is taken from the book, and it will go a long way toward helping you understand why modern instruction so often seems contradictory. You see, "The Movement" simply means you hit the ball from the inside, and this photo shows two things.
The first is that while we describe Hogan as having a flat plane, Hogan is positively upright compared to Edgar. Look at how far his hands are below his shoulders at the top of his backswing! This is the swing of players like Paul Azinger and Rosie Jones, both players who -- though not the longest of players -- are incredibly accurate ballstrikers.
And the second thing? Look at those dark blocks around the golf ball. They create the gate in the book's title. They are the aid that helps you learn to hit the ball from the inside. I'm sure you recognize the layout -- you see them used by almost every instructor from Martin Hall to Michael Breed.
As for his remark about throwing the ball to the target, that was his way of teaching the use of the hands and wrists at impact.
As I said, Edgar's book is foundational to modern teaching. And the basic idea is applicable to almost any swing method, whether your swing is flat or upright. But I think I'd try to get my hands higher than Edgar teaches. You can be very accurate that way but you won't hit the ball as far as you'd like.
Wednesday, November 1, 2017
Justin Rose on 3-Wood Approach Shots (Video)
Here's an older Golf Digest video where Justin Rose explains his swing thought for hitting better 3-woods. This is so simple yet so effective.
When Justin says he tries to keep his back to the target at the start of his downswing, he's not suggesting anything new. This is an old thought many players have used. But I mention it because the easiest way to do this is to think about dropping from a small height and landing on your feet.
Just think about it: Your lead heel comes slightly off the ground at the top of your backswing, so if you feel as if you're just landing flatfooted as you start your downswing, you won't start to unwind so quickly. That puts you in a stronger position to move through the ball and helps prevent an over-the-top move.
Justin does this as a rehearsal but it's very effective during your actual swing as well.
Give it a try. You might be surprised how much more solidly you can hit your 3-wood... or any of your clubs.
When Justin says he tries to keep his back to the target at the start of his downswing, he's not suggesting anything new. This is an old thought many players have used. But I mention it because the easiest way to do this is to think about dropping from a small height and landing on your feet.
Just think about it: Your lead heel comes slightly off the ground at the top of your backswing, so if you feel as if you're just landing flatfooted as you start your downswing, you won't start to unwind so quickly. That puts you in a stronger position to move through the ball and helps prevent an over-the-top move.
Justin does this as a rehearsal but it's very effective during your actual swing as well.
Give it a try. You might be surprised how much more solidly you can hit your 3-wood... or any of your clubs.
Friday, August 25, 2017
A Thought on Starting Down from the Top
Today I have a simple quote from an old book called Such a Little Secret by John W. Barrett. It concerns the change of direction and the start of the downswing. I'm passing this on because it seems to be a good description of what happens, one that is helpful no matter what swing method you use.
Barrett likes to give movements numbers, so when you see Element Number Three in the text, that's just how he refers to the order of the change of direction in the swing sequence. Also, note that he assumes you're righthanded, so you lefties out there should substitute "right" for "left."
First, Barrett says "only some of the weight" is transferred, and that little bit is below the waist. He says at a later point that a "massive hip and knees slide" causes the upper body to move far too much, but that such a move is unfortunately taught all too often. If you keep those exaggerations out of the lateral move, you'll find that your upper body doesn't lurch forward when you swing. That problem is the result of using your legs incorrectly.
Second -- and this is the part that really caught my attention, because he stated it so well in that final paragraph -- is that the hips move toward the target just enough to replant the lead heel and lift the trailing heel. He also says that the hips rotate simultaneously with that small lateral move.
You got that? None of that "slide and turn" stuff. That is an exaggeration that changes all the correct posture you tried so hard to create at address! In past posts I've explained it as "almost falling" from the top of the backswing, because that lets gravity help create the small weight shift you need to get everything moving toward the target without overdoing it. But it doesn't matter how you feel it, so long as you don't overdo it!
This is a very simple tip, but it will do wonders to help improve both your accuracy and your distance, simply because it will help you deliver the clubhead to the ball with more consistency. And if there's a Holy Grail in this game, it's consistency.
Barrett likes to give movements numbers, so when you see Element Number Three in the text, that's just how he refers to the order of the change of direction in the swing sequence. Also, note that he assumes you're righthanded, so you lefties out there should substitute "right" for "left."
The correct hitting stroke should definitely commence with a transferring of the weight below the waist to the left foot and leg (Element Number Three). In many instructional articles this movement is invariably described as "shifting the weight" -- a misnomer that has bred more misunderstanding and early disenchantment with the game than anything else. If "shifting the weight" is ambiguous, then "Let the weight all flow to the left" or "Everything must move to the left with the shot" can be downright damaging. In fact it is only some of the weight which is transferred, that below the waist.Let me point out a couple of things here.
As the transfer is made, the upper body and head must retain their position in a vertical plane, remaining well behind the object to be hit.
The movement of the hips to the left should be just enough to plant the left heel firmly to the ground and lift the right heel from it as the weight transfers. Rotation of the hips occurs simultaneously with their small lateral move to the left. [p132-133]
First, Barrett says "only some of the weight" is transferred, and that little bit is below the waist. He says at a later point that a "massive hip and knees slide" causes the upper body to move far too much, but that such a move is unfortunately taught all too often. If you keep those exaggerations out of the lateral move, you'll find that your upper body doesn't lurch forward when you swing. That problem is the result of using your legs incorrectly.
Second -- and this is the part that really caught my attention, because he stated it so well in that final paragraph -- is that the hips move toward the target just enough to replant the lead heel and lift the trailing heel. He also says that the hips rotate simultaneously with that small lateral move.
You got that? None of that "slide and turn" stuff. That is an exaggeration that changes all the correct posture you tried so hard to create at address! In past posts I've explained it as "almost falling" from the top of the backswing, because that lets gravity help create the small weight shift you need to get everything moving toward the target without overdoing it. But it doesn't matter how you feel it, so long as you don't overdo it!
This is a very simple tip, but it will do wonders to help improve both your accuracy and your distance, simply because it will help you deliver the clubhead to the ball with more consistency. And if there's a Holy Grail in this game, it's consistency.
Saturday, July 22, 2017
Travis Fulton on Inbee Park's Driver Swing (Video)
Here's a quick video from GC's Travis Fulton, focusing on the things he likes best about Inbee Park's driver swing. I want you to notice one thing in particular, something that I often mention on this blog because I think it helps both your accuracy and your back.
Travis particularly likes the fact that Inbee starts her downswing by moving down rather than laterally toward the target. Travis has his reasons for liking this move, but here's my take on it.
And it's definitely something you should consider trying, especially if you have trouble hitting the ball consistently and/or have the occasional sore back after you play.
Travis particularly likes the fact that Inbee starts her downswing by moving down rather than laterally toward the target. Travis has his reasons for liking this move, but here's my take on it.
This move keeps you from "getting stuck" and pushing the shot, helps you make more consistent contact with the ball, puts you in a position to "use the ground" to create clubhead speed, and also takes some of the stress off your back.That's a whole lot of benefits from one simple move, a move that players have used at least since the days of Sam Snead. It's almost like falling from the top of your backswing and landing on both feet -- yes, it's that simple.
And it's definitely something you should consider trying, especially if you have trouble hitting the ball consistently and/or have the occasional sore back after you play.
Tuesday, February 21, 2017
A Surprise Tip to Avoid "Getting Stuck"
When you study swing mechanics as much as I do, sometimes you experience a moment of serendipity. That is, two separate things that you thought had no connection suddenly slam into each other... and a little light bulb appears over your head. That happened to me Monday.
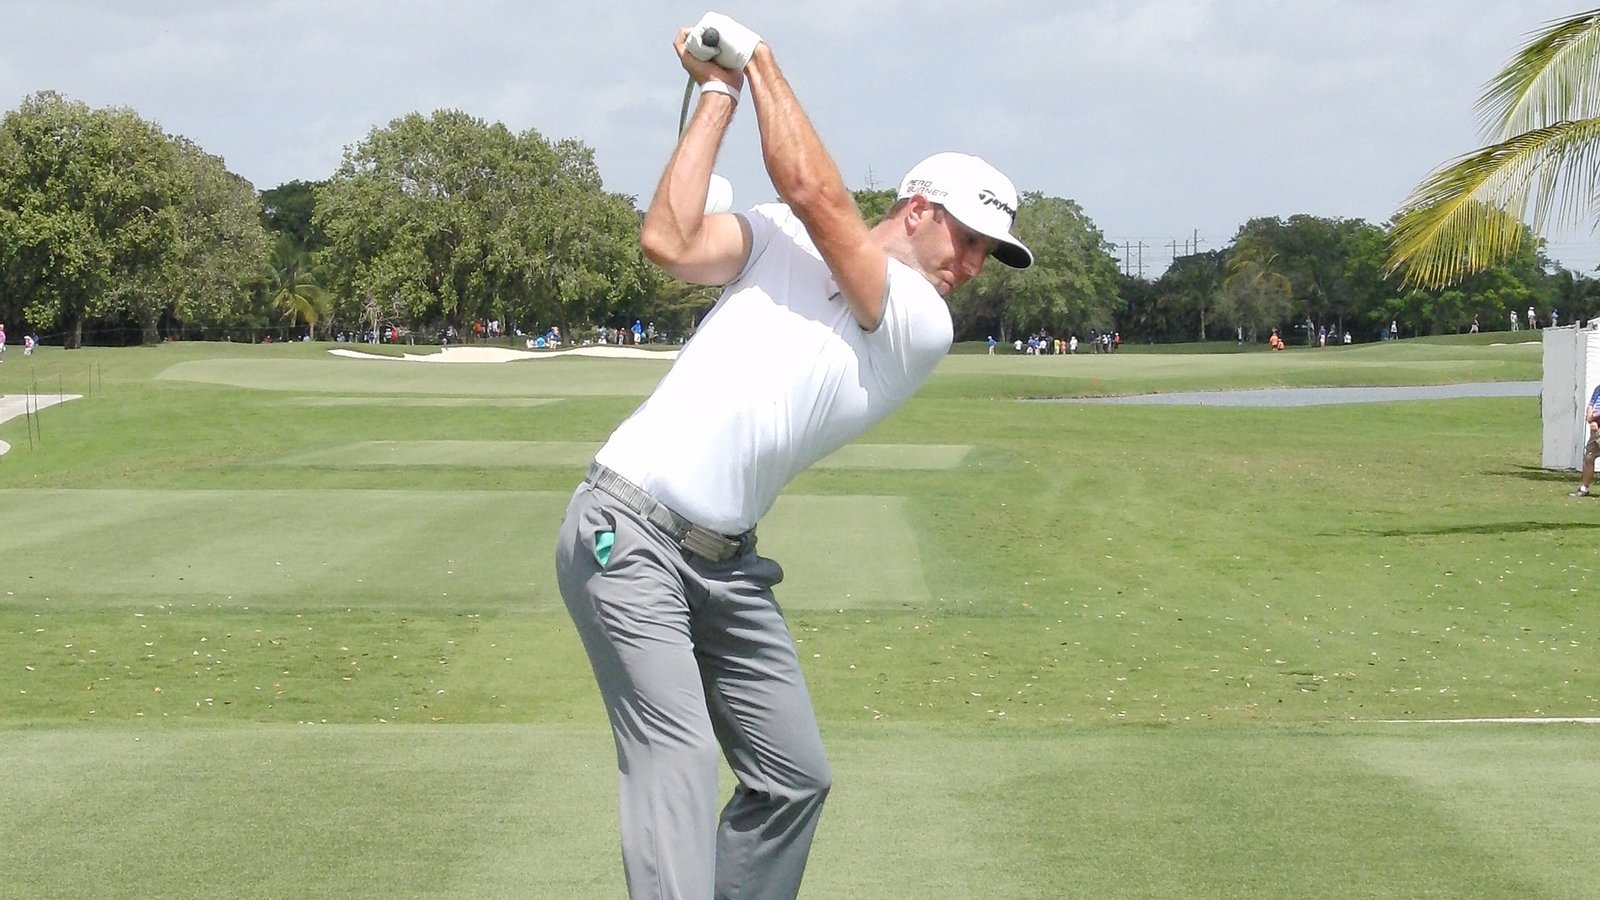
Michael Breed was on Morning Drive -- as he often is -- and was talking about DJ's change of direction at the top of his swing. Many players, Breed said, don't get a full shoulder turn like DJ. Instead, their shoulders stop and their arms just keep going, trying to make a longer swing. As a result, Breed said that their trailing elbows move too much behind them and they simply can't return them into the proper position in time to make their downswing. Their elbows literally "get stuck" behind them.
That's when my little light bulb lit up, and I decided this tip might help some of you.
In past posts I have mentioned that some players and instructors recommend pushing your trailing hand away from your head at the top of your backswing. This is supposed to help you keep more width in your swing, which should help you get more distance.
But on Monday morning I realized that, if you push your trailing hand away from your head at the top of your backswing -- that is, if you try to straighten your trailing elbow a little -- then your trailing elbow CAN'T move behind you at the top. Just try it. If you push the club away from you at the top of your backswing, your elbow HAS to move back into the proper position.
Lights suddenly went on. Voilà! No more getting stuck!
Mechanics don't get much simpler than that, folks. If you're getting stuck on your way down, just try to push your hands away from your head at the top. You'll get your trailing elbow back into position without any trouble at all. Problem solved.
I love serendipity.
The photo came from this page at golfchannel.com.
Michael Breed was on Morning Drive -- as he often is -- and was talking about DJ's change of direction at the top of his swing. Many players, Breed said, don't get a full shoulder turn like DJ. Instead, their shoulders stop and their arms just keep going, trying to make a longer swing. As a result, Breed said that their trailing elbows move too much behind them and they simply can't return them into the proper position in time to make their downswing. Their elbows literally "get stuck" behind them.
That's when my little light bulb lit up, and I decided this tip might help some of you.
In past posts I have mentioned that some players and instructors recommend pushing your trailing hand away from your head at the top of your backswing. This is supposed to help you keep more width in your swing, which should help you get more distance.
But on Monday morning I realized that, if you push your trailing hand away from your head at the top of your backswing -- that is, if you try to straighten your trailing elbow a little -- then your trailing elbow CAN'T move behind you at the top. Just try it. If you push the club away from you at the top of your backswing, your elbow HAS to move back into the proper position.
Lights suddenly went on. Voilà! No more getting stuck!
Mechanics don't get much simpler than that, folks. If you're getting stuck on your way down, just try to push your hands away from your head at the top. You'll get your trailing elbow back into position without any trouble at all. Problem solved.
I love serendipity.
The photo came from this page at golfchannel.com.
Friday, December 16, 2016
Using Your Hands in the Takeaway (Video)
A couple days back Dana left a comment on an old blog post from 2010 called Manuel de la Torre on Arm Swing. In the comments I had mentioned how the old hickory players used their hands to start their backswings and that I could post a drill if the commenter was interested. As it turns out, the commenter from 2010 wasn't... but Dana is. So let's take a look at it.
This post will actually spread over a couple of posts, since I have a lot more material on my blog to refer to now, material that may make the drill I mentioned easier to understand. You need to understand the basic principle at work here (today's post) before I can teach you to use the drill properly (the next post). Okay?
The original post started with the late Manuel de la Torre, who taught a swing based in some of Ernest Jones's teachings (his book was published in 1935), who in turn adapted his method to steel shafts from the old hickory shaft techniques. So let's start with what de la Torre said about the hands in his book, Understanding the Golf Swing. Let me pull something from the old post's comments that I copied from that book, simply because you need to know what he means by "hands" and "arms" to understand what he's saying.
Okay. Here's the quote from his book. Bear in mind that he's writing for right-handed players, so you lefties will need to substitute "left shoulder" for "right shoulder" in the first paragraph:
He's got some interesting stuff in here. Let's take it piece by piece.
Many instructors actually teach a version of this, although you probably didn't realize it. Have you heard teachers talk about trying to keep your trailing hand as far from your shoulder as you can at the top of your backswing? That's the same idea, except they're talking about pushing your hands away from you with your arms while de la Torre has your hands pulling your arms and shoulders around.
Likewise, when he says that everything moves together, this is what most instructors call "keeping the club in front of you" during your swing. But again, they're trying to push the club back while de la Torre has your hands pulling you around.
And that's where most of you will get tripped up as you try to wrap your mind around this. How can your hands pull your shoulders around? You can understand if another person grabs your hands and pulls them, but how can your hands pull you around when they're only attached to your arms? Hands don't just move on their own!
Here's the trick: During your swing, your hands are holding your club. Your club has weight and, if you start it swinging, the club's momentum can pull you around. And that's what he's describing in the last three paragraphs I quoted.
Here's a video I've posted more than once. Steven Bann is K.J. Choi's coach, and in the first minute or so of this video he demonstrates almost exactly what de la Torre is describing. Take a look, then I'll explain a bit more below the video:
Now this may just be the way I feel this movement, but I'd say the lifting motion Bann is making (and de la Torre is describing) is actually caused by bending the elbows ever so slightly. Some of you may feel it mostly at your shoulder joints, some may feel it at the wrists and some may even feel that the fingers are causing the lift. Technically, it's probably started by the fingers since the clubhead has to move first and your fingers are the closest part of your body to the clubhead.
At any rate, it's a very slight movement that starts the club moving upward, and then the club's momentum starts helping your arms move upward, so you feel as if you're just trying to move along with the club. That's what happens until the club shaft points straight up in the air.
de la Torre says you don't consciously cock the wrists. The wrists don't cock until you get to the top and the club starts to move from that vertical position and literally falls toward your shoulder. Gravity makes your wrists cock as your arms slow down. (They HAVE to slow down or you'd smack your shoulder with the shaft. That can be painful!)
You make the same sort of movement when you pick up a glass of water or just about anything, really. (Hopefully you aren't swinging it up over your shoulder and throwing water everywhere, but the motion is the same.)
Now, when Bann separates your backswing into an upward move and a rotational move, that's the key to letting your hands start your backswing. Tomorrow I'll teach you how to combine the two into a smooth backswing. Today, just get used to that upward move that Bann shows you, and then coil your shoulders so you can feel the position at the top of your backswing.
Yeah, you heard me. Practice taking your address position and lifting your club up over your trailing shoulder, then turn to the side. You've probably practiced stranger things before!
UPDATE: The next post in this series is here: Using Your Hands in the Takeaway, Part 2
This post will actually spread over a couple of posts, since I have a lot more material on my blog to refer to now, material that may make the drill I mentioned easier to understand. You need to understand the basic principle at work here (today's post) before I can teach you to use the drill properly (the next post). Okay?
The original post started with the late Manuel de la Torre, who taught a swing based in some of Ernest Jones's teachings (his book was published in 1935), who in turn adapted his method to steel shafts from the old hickory shaft techniques. So let's start with what de la Torre said about the hands in his book, Understanding the Golf Swing. Let me pull something from the old post's comments that I copied from that book, simply because you need to know what he means by "hands" and "arms" to understand what he's saying.
Earlier in the text (on page 51) he specifically defines the arm as "...that portion of the extremity from the shoulder to the elbow, the rest of it to the wrist is the forearm."Are you clear on that? de la Torre separates your arm into arm, forearm, wrist and hand in his teaching. So when you see ARM in this quote from his book, he's talking about your arm above the elbow. And when you see HAND he means your hand separate from your wrist. Got it?
Okay. Here's the quote from his book. Bear in mind that he's writing for right-handed players, so you lefties will need to substitute "left shoulder" for "right shoulder" in the first paragraph:
To produce the backswing, the player must swing the clubhead back with the hands (both hands) toward the right shoulder so that when the backswing is completed, the club is over the shoulder. The hands must be used because a coil has to be created in order to be able to generate the desired speed. The hands must be used exclusively to swing the clubhead from the ball to the end of the backswing, where the arms take over and swing the entire club to the end of the swing.There's more, but it gets into the downswing and such, which is more than we need for this discussion.
When your hands swing the clubhead in the backswing, be sure that as soon as the clubhead starts to move, everything moves with it. Clubhead and shoulders start together, stay together, and reach the end of the backswing together. The rest of the body will respond automatically if it is relaxed.
Notice that when referring to hands and arms, the plural is used. Both hands are used in the backswing and both arms are used in the forward swing.
If a player would take the address position and lift the club vertically to place it on the shoulder, the hands would be used to make this movement. No other part of the body would be considered.
You should make no effort to cock your wrists in the backswing. When a player attempts to cock the wrists, they must be cocked in the plane that corresponds to the club being swung. This would be just another "moving part" making the golf swing difficult to produce.
The wrists are cocked by the club being swung over the shoulder. It is a natural reaction to that motion. It just happens. (p50-51)
He's got some interesting stuff in here. Let's take it piece by piece.
- According to him, your hands make the backswing and your upper arms make the downswing. This isn't a distinction that most instructors would make, and it's probably just how he understands the motion -- you know, the way he feels it when he does it.
- He says the hands must be used in order to create a coil -- that is, a shoulder coil. He says the shoulders turn because the hands move the club. That might be a bit confusing, so it deserves a closer look.
Many instructors actually teach a version of this, although you probably didn't realize it. Have you heard teachers talk about trying to keep your trailing hand as far from your shoulder as you can at the top of your backswing? That's the same idea, except they're talking about pushing your hands away from you with your arms while de la Torre has your hands pulling your arms and shoulders around.
Likewise, when he says that everything moves together, this is what most instructors call "keeping the club in front of you" during your swing. But again, they're trying to push the club back while de la Torre has your hands pulling you around.
And that's where most of you will get tripped up as you try to wrap your mind around this. How can your hands pull your shoulders around? You can understand if another person grabs your hands and pulls them, but how can your hands pull you around when they're only attached to your arms? Hands don't just move on their own!
Here's the trick: During your swing, your hands are holding your club. Your club has weight and, if you start it swinging, the club's momentum can pull you around. And that's what he's describing in the last three paragraphs I quoted.
Here's a video I've posted more than once. Steven Bann is K.J. Choi's coach, and in the first minute or so of this video he demonstrates almost exactly what de la Torre is describing. Take a look, then I'll explain a bit more below the video:
Now this may just be the way I feel this movement, but I'd say the lifting motion Bann is making (and de la Torre is describing) is actually caused by bending the elbows ever so slightly. Some of you may feel it mostly at your shoulder joints, some may feel it at the wrists and some may even feel that the fingers are causing the lift. Technically, it's probably started by the fingers since the clubhead has to move first and your fingers are the closest part of your body to the clubhead.
At any rate, it's a very slight movement that starts the club moving upward, and then the club's momentum starts helping your arms move upward, so you feel as if you're just trying to move along with the club. That's what happens until the club shaft points straight up in the air.
de la Torre says you don't consciously cock the wrists. The wrists don't cock until you get to the top and the club starts to move from that vertical position and literally falls toward your shoulder. Gravity makes your wrists cock as your arms slow down. (They HAVE to slow down or you'd smack your shoulder with the shaft. That can be painful!)
You make the same sort of movement when you pick up a glass of water or just about anything, really. (Hopefully you aren't swinging it up over your shoulder and throwing water everywhere, but the motion is the same.)
Now, when Bann separates your backswing into an upward move and a rotational move, that's the key to letting your hands start your backswing. Tomorrow I'll teach you how to combine the two into a smooth backswing. Today, just get used to that upward move that Bann shows you, and then coil your shoulders so you can feel the position at the top of your backswing.
Yeah, you heard me. Practice taking your address position and lifting your club up over your trailing shoulder, then turn to the side. You've probably practiced stranger things before!
UPDATE: The next post in this series is here: Using Your Hands in the Takeaway, Part 2
Wednesday, November 9, 2016
Several Instructors on the Takeaway and Top of Backswing (Video)
I found this brand-new article at the Golf Digest website. Hank Haney is quoted in it, and he says that "wrist roll" is ruining many players' tee shots. He describes how to learn what a proper top of backswing position feels like. It's a short article so it won't take long to read.
Here's the drill Haney recommends:
And be aware that this isn't just for your tee shots. This move will help you square up the clubface on every shot you make.
In case Haney's verbal description seems a bit hard to follow, I did a post back in 2011 that included a video from K.J. Choi's instructor Steven Bann demonstrating this very drill. There are three videos in that post, but here's the one from Bann:
As you can see, this is an old drill that more players should learn. For those of you who wonder how you can just "cock your wrists upward" and still get a tilted swing plane, remember that your trailing elbow has to bend as you reach the top. That bend is what creates the tilt in your swing plane.
And in case you wonder how you make a normal swing that gets to this top of backswing position, here's my post from all the way back in 2010 on how to make a one-piece takeaway. It will teach you how to get the shaft in the proper position when the club is around waist high.
Using these various resources, you can learn how to get to the top of your backswing with your club on plane and without excessive wrist rotation. It really is a simple move to learn, and it doesn't require your to rebuild your swing. That's always good news!
Here's the drill Haney recommends:
Take your grip and set up. Pick up the club towards your torso, just using your wrists. If you kept going you'd hit yourself on the forehead with the club, but here stop when the shaft is parallel to the ground. Now, do a full body turn, and look at your position at the top. You’re back on plane -- and your wrists are in strong angles instead of that floppy, rolled over nonsense.Please note that when Haney says the shaft is parallel to the ground, he means the head of the club is hanging behind you, so you're raising your arms up to their position at the top of your backswing.
And be aware that this isn't just for your tee shots. This move will help you square up the clubface on every shot you make.
In case Haney's verbal description seems a bit hard to follow, I did a post back in 2011 that included a video from K.J. Choi's instructor Steven Bann demonstrating this very drill. There are three videos in that post, but here's the one from Bann:
As you can see, this is an old drill that more players should learn. For those of you who wonder how you can just "cock your wrists upward" and still get a tilted swing plane, remember that your trailing elbow has to bend as you reach the top. That bend is what creates the tilt in your swing plane.
And in case you wonder how you make a normal swing that gets to this top of backswing position, here's my post from all the way back in 2010 on how to make a one-piece takeaway. It will teach you how to get the shaft in the proper position when the club is around waist high.
Using these various resources, you can learn how to get to the top of your backswing with your club on plane and without excessive wrist rotation. It really is a simple move to learn, and it doesn't require your to rebuild your swing. That's always good news!
Thursday, October 20, 2016
Clearing Your Hips -- An Update
As most of you realize, I keep the comments open on all my old posts in case somebody reads one and has a question. The blog emails me anytime somebody makes a comment, and then I can zip over and see if I can help. And it's a good thing I leave them open, since a lot of you do go back and re-read the old posts.
Back in 2010 I did a post called Clearing Your Hips. And a couple days back Paul left me a question that I tried to answer but the blog wouldn't accept it. Apparently my answer was too long! So I left Paul a note that I would do a new post today for him. (I've done that for a number of you, so this is nothing new.)
In the original post I was trying to get you folks to stop moving toward the target so much when you start your downswing, so your hips would unwind more naturally. Paul's question was simple enough, and it's a logical one:

I understand why you're confused, Paul. I've made this mistake too, just like everybody else. And I've been trying to figure out a way to explain this more clearly so my answer will make more sense to you. Hopefully this will help you see what you're missing.
And I do mean see. You've forgotten about your spine angle. We have a tendency to think of our swing the way we see it in the Holmes swing sequence above -- from face-on. But there are also some important things we would only see from a down-the-line swing photo. So, in the interest of clarity, let's start with what we normally see, as in the photo above.
I want you to imagine that J.B.'s hips and spine -- and your hips and spine as well -- are connected like an upside-down T. There's a "crossbar" connecting your hips, and your spine sticks up halfway between them, like the tall line of the T, with your head at the top.
NOTE: If this were really your spine, the tall line would tilt slightly away from your target. That's because your trail hand (in your case, your right hand) is lower on the club than your lead hand, so your shoulders have to tilt a bit. But thinking of your hips and spine at 90° angles is easier.
So your head is roughly centered between your hips at address. Are you with me so far?
What you're forgetting is that your spine (the tall line) ALSO tilts toward the golf ball. You're bent over just a little.
Now, when you turn your shoulders away from the target during your backswing -- we'll say you make a standard 90° turn -- your trail shoulder (the right one) is now well behind your back -- behind your spine -- away from the ball. If you were to draw a swing plane, like the glass plane drawn in Hogan's book, your right shoulder would be well below that plane.
At the top of your backswing, your lead heel has come off the ground and your lead knee and hip have moved away from the target. But your head is still roughly halfway between your hips. Look at the first picture of Holmes in the post above; you can see that clearly.
When you start your downswing, the first thing you do is put your lead foot down flat on the ground and your lead knee moves over almost straight above it. That's your lateral move, but it isn't a big move forward. Rather, you pushed your lead foot DOWN and your hips turned back toward the ball. Your body moved DOWNWARD just a little.
And when your body moved down, so did your trail shoulder. Not out over the ball, but DOWN toward the ground. You're correct that your right shoulder is moving forward, but it was already below your swing plane and now your downward motion lowered it even more. In fact, it may still be a little behind your spine at this point.
From this point on, that trail shoulder will come at the ball from UNDER the plane, not over it, no matter how much you turn in your downswing. That's because your spine is still straight and your head is still basically halfway between your hips.
So why are you coming over-the-top? It's because of your trail knee (your right knee). I wrote about this in my book Stop Coming Over-the-Top because it happens so much. (And yes, I struggled with it for a long time before I figured it out. Like I said, it's a common problem.)
What SHOULD happen when you start down from the top is that your trail knee -- your right knee -- should stay slightly BENT. Your trail foot is flat on the ground at the top of your swing, then it rolls to the inside as you start down. That lets your hips move naturally and shift your weight to your lead foot.
But what most of us do is we try to hit the ball hard. And to do that, we STRAIGHTEN our trail knee. That pushes our trail hip UP, and that pushes our head TOWARD THE TARGET. Instead of your spine staying vertical, it leans toward the target and your head moves too far over your lead foot. That moves your right shoulder UP instead of down, so it comes over the swing plane instead of under it. Make sense?
If you want to practice the correct move, check out the "Body Movin'" drill in this post. You don't need a club and you can practice it anywhere. It's the best drill I know to teach you how the correct move feels.
So let me give you a new answer to your question above. You think, like so many instructors teach, that you start your downswing by moving laterally and then turning. THAT'S WRONG. You want to start your downswing by moving DOWN and then turning. Because of the way your hips naturally work, the downward movement creates all the lateral movement you need.
And the more you can use your body's natural movements, the easier and more consistent your golf swing will be.
Back in 2010 I did a post called Clearing Your Hips. And a couple days back Paul left me a question that I tried to answer but the blog wouldn't accept it. Apparently my answer was too long! So I left Paul a note that I would do a new post today for him. (I've done that for a number of you, so this is nothing new.)
In the original post I was trying to get you folks to stop moving toward the target so much when you start your downswing, so your hips would unwind more naturally. Paul's question was simple enough, and it's a logical one:
If you're opening up your hips the right shoulder must come out thus the over the top, isn't there a lateral component to start first ? This I can get away with with my woods and hybrids but not irons !!So first let me re-post a photo of J.B. Holmes that was in that post, since I referred to it in my answer, and then my answer will follow.
I understand why you're confused, Paul. I've made this mistake too, just like everybody else. And I've been trying to figure out a way to explain this more clearly so my answer will make more sense to you. Hopefully this will help you see what you're missing.
And I do mean see. You've forgotten about your spine angle. We have a tendency to think of our swing the way we see it in the Holmes swing sequence above -- from face-on. But there are also some important things we would only see from a down-the-line swing photo. So, in the interest of clarity, let's start with what we normally see, as in the photo above.
I want you to imagine that J.B.'s hips and spine -- and your hips and spine as well -- are connected like an upside-down T. There's a "crossbar" connecting your hips, and your spine sticks up halfway between them, like the tall line of the T, with your head at the top.
NOTE: If this were really your spine, the tall line would tilt slightly away from your target. That's because your trail hand (in your case, your right hand) is lower on the club than your lead hand, so your shoulders have to tilt a bit. But thinking of your hips and spine at 90° angles is easier.
So your head is roughly centered between your hips at address. Are you with me so far?
What you're forgetting is that your spine (the tall line) ALSO tilts toward the golf ball. You're bent over just a little.
Now, when you turn your shoulders away from the target during your backswing -- we'll say you make a standard 90° turn -- your trail shoulder (the right one) is now well behind your back -- behind your spine -- away from the ball. If you were to draw a swing plane, like the glass plane drawn in Hogan's book, your right shoulder would be well below that plane.
At the top of your backswing, your lead heel has come off the ground and your lead knee and hip have moved away from the target. But your head is still roughly halfway between your hips. Look at the first picture of Holmes in the post above; you can see that clearly.
When you start your downswing, the first thing you do is put your lead foot down flat on the ground and your lead knee moves over almost straight above it. That's your lateral move, but it isn't a big move forward. Rather, you pushed your lead foot DOWN and your hips turned back toward the ball. Your body moved DOWNWARD just a little.
And when your body moved down, so did your trail shoulder. Not out over the ball, but DOWN toward the ground. You're correct that your right shoulder is moving forward, but it was already below your swing plane and now your downward motion lowered it even more. In fact, it may still be a little behind your spine at this point.
From this point on, that trail shoulder will come at the ball from UNDER the plane, not over it, no matter how much you turn in your downswing. That's because your spine is still straight and your head is still basically halfway between your hips.
So why are you coming over-the-top? It's because of your trail knee (your right knee). I wrote about this in my book Stop Coming Over-the-Top because it happens so much. (And yes, I struggled with it for a long time before I figured it out. Like I said, it's a common problem.)
What SHOULD happen when you start down from the top is that your trail knee -- your right knee -- should stay slightly BENT. Your trail foot is flat on the ground at the top of your swing, then it rolls to the inside as you start down. That lets your hips move naturally and shift your weight to your lead foot.
But what most of us do is we try to hit the ball hard. And to do that, we STRAIGHTEN our trail knee. That pushes our trail hip UP, and that pushes our head TOWARD THE TARGET. Instead of your spine staying vertical, it leans toward the target and your head moves too far over your lead foot. That moves your right shoulder UP instead of down, so it comes over the swing plane instead of under it. Make sense?
If you want to practice the correct move, check out the "Body Movin'" drill in this post. You don't need a club and you can practice it anywhere. It's the best drill I know to teach you how the correct move feels.
So let me give you a new answer to your question above. You think, like so many instructors teach, that you start your downswing by moving laterally and then turning. THAT'S WRONG. You want to start your downswing by moving DOWN and then turning. Because of the way your hips naturally work, the downward movement creates all the lateral movement you need.
And the more you can use your body's natural movements, the easier and more consistent your golf swing will be.
Thursday, August 25, 2016
Brian Jacobs on Fixing Your Plane (Video)
I don't post a lot of in-depth instruction about swing plane. It's not that plane isn't important -- I just think we're too obsessed with it, and most of the drills are too nitpicky. But I don't mind putting up something that's both simple and useful.
GCA Coach Brian Jacobs did a really short video that gives you a simple drill to improve your swing plane. I especially like it because it doesn't require training aids, which means you can use it on the course during a round if necessary. Here, take a look:
All you do is take your finish position -- that is, your "pose" after the ball is long gone -- and then, without changing your arms or shoulders, turn 180° so you mirror that position at the top of your backswing.
I know it sounds ridiculously simple, but don't underestimate this simple drill. If your "top of backswing" position mirrors your finish position, and if you make sure they match when you make your swing from backswing to finish, you're on plane. It just doesn't get any simpler than that.
And you can use this drill anywhere you can swing a club, which means you can do it in a few spare minutes every day in your backyard. Just do the drill a few times -- pose your finish, mirror it to the backswing, then swing back to the finish -- then see if you can swing to that top of backswing position from your address position. Once you can do that slowly, gradually speed it up to your normal speed.
If your swing plane is off, this drill will help you. Just add it to your practice routine and see.
GCA Coach Brian Jacobs did a really short video that gives you a simple drill to improve your swing plane. I especially like it because it doesn't require training aids, which means you can use it on the course during a round if necessary. Here, take a look:
All you do is take your finish position -- that is, your "pose" after the ball is long gone -- and then, without changing your arms or shoulders, turn 180° so you mirror that position at the top of your backswing.
I know it sounds ridiculously simple, but don't underestimate this simple drill. If your "top of backswing" position mirrors your finish position, and if you make sure they match when you make your swing from backswing to finish, you're on plane. It just doesn't get any simpler than that.
And you can use this drill anywhere you can swing a club, which means you can do it in a few spare minutes every day in your backyard. Just do the drill a few times -- pose your finish, mirror it to the backswing, then swing back to the finish -- then see if you can swing to that top of backswing position from your address position. Once you can do that slowly, gradually speed it up to your normal speed.
If your swing plane is off, this drill will help you. Just add it to your practice routine and see.
Thursday, March 3, 2016
Jessica Korda on Hitting It Long
Here's a link to a Golf Digest article by Jessica Korda on how to get more distance by using your flexibility and rhythm. She has a number of thoughts and drills on how to do it, but I'm focusing on one in particular. Check out the photo:

What is Jessica doing? She's finding the balance point for her driver at the top of her backswing. She wants the club to feel very light so she can stay relaxed, so she swings the club up to the top with only three fingers.
This is clearly a relative thing. The club is going to feel heavier when you hold it with only three fingers than when you hold it with both hands. But what you're looking for is where the club is easiest to control.
Take note of Jessica's club position in the photo -- although you've been told to get the shaft to parallel, it isn't parallel in this photo. And the article also has a photo of Jess at the top of her backswing. While the shaft is lower than in the above picture, it still isn't quite parallel. You want to find a position where you can control the club with the least tension.
As I've said repeatedly on this blog, relaxed muscles move faster. That's what you're after with this drill -- the most relaxed position at the top that you can find.
She has other tips in the article as well, but this drill really caught my eye. It will help you become more aware of the feel of the clubhead at the top, and that's always a good thing!
What is Jessica doing? She's finding the balance point for her driver at the top of her backswing. She wants the club to feel very light so she can stay relaxed, so she swings the club up to the top with only three fingers.
This is clearly a relative thing. The club is going to feel heavier when you hold it with only three fingers than when you hold it with both hands. But what you're looking for is where the club is easiest to control.
Take note of Jessica's club position in the photo -- although you've been told to get the shaft to parallel, it isn't parallel in this photo. And the article also has a photo of Jess at the top of her backswing. While the shaft is lower than in the above picture, it still isn't quite parallel. You want to find a position where you can control the club with the least tension.
As I've said repeatedly on this blog, relaxed muscles move faster. That's what you're after with this drill -- the most relaxed position at the top that you can find.
She has other tips in the article as well, but this drill really caught my eye. It will help you become more aware of the feel of the clubhead at the top, and that's always a good thing!
Sunday, February 28, 2016
The Bent Trailing Elbow Drill, Part 7
In many ways, this is the most important of the posts in this series. If you can wrap your mind around this, you can apply it to almost any style of golf swing and create more clubhead speed.

Most of the time we focus on what I have called sidecock, specifically the way your lead wrist bends sideways during your backswing. Perhaps we focus on it too much. It's important but it's primarily caused by gravity and momentum during the swing -- or at least it should be. As you can see from my much-used photo of HaNa Jang above, the sidecock in her lead wrist is pretty much expended by the time she reaches the impact zone... and the clubhead is still far behind the ball.
Today I'm talking about what I have called backcock, the way your trailing wrist bends back toward your trailing forearm at the top of your backswing. For HaNa -- or any golfer -- to get the clubhead to the ball, the hands and arms have to travel almost parallel to the ground for quite a distance once they reach the impact zone. 2014 Long Drive Champion Jeff Flagg likened it to a baseball player's sidearm throwing motion. Starting where HaNa is in the photo, her trailing hand will be dragging the clubhead into the back of the ball and flinging the clubhead past her hands at impact.
And that flinging action is made using backcock.
I think that much is pretty clear to most players if they just stop and think about it for a minute. (And maybe try the version of the first drill from Post #4 where you keep the club parallel to the ground!) Most of us naturally create backcock at the top of our backswings. It's the result of keeping our lead wrists flat -- or in Dustin Johnson's case, severely bowed -- at the top. Make a backswing of your own and check. You've probably got a noticeable amount of backcock in your trailing wrist already.
The real problem seems to be how to FEEL that we're using that backcock on the way down. Most of us, perhaps because of our focus on sidecock, don't feel the pressure in our hands in a way that we normally associate with the 'sidearm throwing motion' Flagg talks about. Instead, we feel as if we're dragging the club down sideways, with sidecock, and so we naturally try to use sidecock all the way through our downswings.
That's where the problem is, and that's where learning a new way to think about our downswings can help. What we need to realize is that the pressure of the shaft against our hands CHANGES as the clubhead travels from the top of our backswings down to the ball. And that's because our bodies don't turn at the same speed throughout our downswings. Our bodies start out turning slowly and speed up as we near impact.
Let me repeat those two things because they are extremely important for you to understand.
At the top of our backswings, when our swings change direction, the momentum of the club presses against the heel pad of our trailing thumbs or just a bit more into our palms than that. The exact feel depends on the plane of your swing (flatter or more upright), how much shoulder turn you get (more or less than 90°), and whether your trailing elbow 'flies' or not. (Jack Nicklaus had a flying elbow and it didn't hurt him a bit.)
When we start down, that pressure increases a bit. It's because our arms are coming down faster than our shoulders are unwinding BUT the unwinding of our lower bodies and shoulders causes the head of the club to drop behind us a bit. (Well, if you're Sergio Garcia, it's A LOT. But for most of us, it's just a little.) And regardless of whether you call that 'rerouting the club', 'getting in the slot', 'laying the club off', or some other term, it has the effect of moving that shaft pressure more into the palms of our trailing hands. It's a gradual shift caused by the sidecock gradually straightening our wrists as we turn back toward the ball.
Please note that our palms are ALWAYS facing in almost exactly the same direction relative to our upper bodies during this motion. It's just that we feel the club's pressure in a more vertical direction early in the downswing, and in a more horizontal direction from waist level on down.
By the time the shaft is parallel to the ground, our bodies are turning fast and we're well into the sidearm throwing motion Flagg mentioned. We can feel the shaft pressing into our trailing palms as our trailing elbows swing close to our sides and begin to straighten. That's how the backcock we've created is released, flinging the clubhead through the hitting area and smashing the ball into orbit.
Do you follow all that? If you don't, that's okay. The new drill I've been promising you should help you get a good understanding of what's happening.
I'm presenting the drill in three versions, each one building on the previous one. Work your way through them at whatever pace is necessary for you to get the feel. I think you'll have a good idea of what you're doing when you're done... and that understanding will help you when we put it all together into an actual swing in the final post.
Version 1: In this version the shaft stays parallel to the ground until you reach the finish. Don't worry about sidecock at all with this version; both your lead arm and the shaft will be parallel to the ground.
You're going to make a good shoulder turn -- as before, 75-80° is fine -- and let your lead heel come up off the ground. Your trailing elbow will be away from your side when you start this move, and your trailing wrist should have some backcock.
Then I want you to swing forward as if you were hitting a ball teed up at waist level, letting your lead shoulder roll as you fling the club past your body into your finish. You'll get a weight shift to your lead foot, and the club will move upward after you pass the ball position and swing into your finish. (That's the easiest way to slow the club down without hurting yourself, so it should happen naturally.)
For those of you who have played tennis before, this will feel a bit like a two-handed forehand shot. If you're more familiar with baseball, it will feel more like a level swing with a bat EXCEPT that you haven't cocked the bat upward to get speed the way a batter at the plate does. You should feel as if both hands are swinging the club, not just your trailing hand.
DON'T TWIST YOUR FOREARMS AS YOU 'HIT THE BALL'. You want to feel as if you're hitting the ball with the palm of your trailing hand. That's how you hit the ball straight, and it helps you build 'clubface awareness', the ability to know where the clubface is pointed by knowing where your trailing palm is pointed. That's a very important skill if you want to be able to shape shots.
And don't try to swing hard. The point here is to learn how the pressure feels in your hand when you make this sidearm swing. And it WILL feel like a sidearm motion, because that's basically what it is.
Version 2: This version of the drill is almost identical to the first one BUT with one primary difference. It's going to look like you've added some sidecock... but actually this is the 'no sidecock' position. If you made a fist and stuck your arm out like you were going to punch someone, and then you opened your fist and gripped a club with your wrist in the same position, it would look like you've got about a 60° wrist cock. But this is the position players like J.B. Holmes are in when they say their wrists are uncocked. Are you with me so far?
Now take the club back as you did in the first version of the drill -- same shoulder turn, etc. -- but raise your arms until the club shaft is pointed either straight up in the air or at a slight angle over your shoulders, like a three-quarter swing.
After that, this version is performed the exact same way as Version 1, flat swing and all. This should help you get used to the changing feel as the club moves from the top of your backswing down to waist level. It shouldn't feel very different from Version 1 because we haven't really changed your wrist cock -- the relationship of the shaft to your forearm -- much from what it was in Version 1. It's just a longer, more natural movement for a golf swing.
Again, this is going to feel like a sidearm swing.
Version 3: In this final version we're going to duplicate Version 2 EXCEPT we're going to let gravity pull our arms all the way down so we can 'hit' a ball teed at normal height. This will help you get used to how the sidearm swing feels in the more familiar motion of hitting a golf ball.
None of these versions of the drill use any sidecock. This is all about learning how to transfer the feel of a sidearm motion to a swing on an inclined plane, which is all a golf swing is. Do it as much as you need to, as often as you need to, until you understand how to do it easily.
We'll add the sidecock and other bits of the golf swing when we put it all together in the final post next week.
Most of the time we focus on what I have called sidecock, specifically the way your lead wrist bends sideways during your backswing. Perhaps we focus on it too much. It's important but it's primarily caused by gravity and momentum during the swing -- or at least it should be. As you can see from my much-used photo of HaNa Jang above, the sidecock in her lead wrist is pretty much expended by the time she reaches the impact zone... and the clubhead is still far behind the ball.
Today I'm talking about what I have called backcock, the way your trailing wrist bends back toward your trailing forearm at the top of your backswing. For HaNa -- or any golfer -- to get the clubhead to the ball, the hands and arms have to travel almost parallel to the ground for quite a distance once they reach the impact zone. 2014 Long Drive Champion Jeff Flagg likened it to a baseball player's sidearm throwing motion. Starting where HaNa is in the photo, her trailing hand will be dragging the clubhead into the back of the ball and flinging the clubhead past her hands at impact.
And that flinging action is made using backcock.
I think that much is pretty clear to most players if they just stop and think about it for a minute. (And maybe try the version of the first drill from Post #4 where you keep the club parallel to the ground!) Most of us naturally create backcock at the top of our backswings. It's the result of keeping our lead wrists flat -- or in Dustin Johnson's case, severely bowed -- at the top. Make a backswing of your own and check. You've probably got a noticeable amount of backcock in your trailing wrist already.
The real problem seems to be how to FEEL that we're using that backcock on the way down. Most of us, perhaps because of our focus on sidecock, don't feel the pressure in our hands in a way that we normally associate with the 'sidearm throwing motion' Flagg talks about. Instead, we feel as if we're dragging the club down sideways, with sidecock, and so we naturally try to use sidecock all the way through our downswings.
That's where the problem is, and that's where learning a new way to think about our downswings can help. What we need to realize is that the pressure of the shaft against our hands CHANGES as the clubhead travels from the top of our backswings down to the ball. And that's because our bodies don't turn at the same speed throughout our downswings. Our bodies start out turning slowly and speed up as we near impact.
Let me repeat those two things because they are extremely important for you to understand.
- The pressure of the shaft against our hands CHANGES as the clubhead travels from the top of our backswings down to the ball.
- Our bodies don't turn at the same speed throughout our downswings. Our bodies start out turning slowly and speed up as we near impact.
At the top of our backswings, when our swings change direction, the momentum of the club presses against the heel pad of our trailing thumbs or just a bit more into our palms than that. The exact feel depends on the plane of your swing (flatter or more upright), how much shoulder turn you get (more or less than 90°), and whether your trailing elbow 'flies' or not. (Jack Nicklaus had a flying elbow and it didn't hurt him a bit.)
When we start down, that pressure increases a bit. It's because our arms are coming down faster than our shoulders are unwinding BUT the unwinding of our lower bodies and shoulders causes the head of the club to drop behind us a bit. (Well, if you're Sergio Garcia, it's A LOT. But for most of us, it's just a little.) And regardless of whether you call that 'rerouting the club', 'getting in the slot', 'laying the club off', or some other term, it has the effect of moving that shaft pressure more into the palms of our trailing hands. It's a gradual shift caused by the sidecock gradually straightening our wrists as we turn back toward the ball.
Please note that our palms are ALWAYS facing in almost exactly the same direction relative to our upper bodies during this motion. It's just that we feel the club's pressure in a more vertical direction early in the downswing, and in a more horizontal direction from waist level on down.
By the time the shaft is parallel to the ground, our bodies are turning fast and we're well into the sidearm throwing motion Flagg mentioned. We can feel the shaft pressing into our trailing palms as our trailing elbows swing close to our sides and begin to straighten. That's how the backcock we've created is released, flinging the clubhead through the hitting area and smashing the ball into orbit.
Do you follow all that? If you don't, that's okay. The new drill I've been promising you should help you get a good understanding of what's happening.
I'm presenting the drill in three versions, each one building on the previous one. Work your way through them at whatever pace is necessary for you to get the feel. I think you'll have a good idea of what you're doing when you're done... and that understanding will help you when we put it all together into an actual swing in the final post.
Version 1: In this version the shaft stays parallel to the ground until you reach the finish. Don't worry about sidecock at all with this version; both your lead arm and the shaft will be parallel to the ground.
You're going to make a good shoulder turn -- as before, 75-80° is fine -- and let your lead heel come up off the ground. Your trailing elbow will be away from your side when you start this move, and your trailing wrist should have some backcock.
Then I want you to swing forward as if you were hitting a ball teed up at waist level, letting your lead shoulder roll as you fling the club past your body into your finish. You'll get a weight shift to your lead foot, and the club will move upward after you pass the ball position and swing into your finish. (That's the easiest way to slow the club down without hurting yourself, so it should happen naturally.)
For those of you who have played tennis before, this will feel a bit like a two-handed forehand shot. If you're more familiar with baseball, it will feel more like a level swing with a bat EXCEPT that you haven't cocked the bat upward to get speed the way a batter at the plate does. You should feel as if both hands are swinging the club, not just your trailing hand.
DON'T TWIST YOUR FOREARMS AS YOU 'HIT THE BALL'. You want to feel as if you're hitting the ball with the palm of your trailing hand. That's how you hit the ball straight, and it helps you build 'clubface awareness', the ability to know where the clubface is pointed by knowing where your trailing palm is pointed. That's a very important skill if you want to be able to shape shots.
And don't try to swing hard. The point here is to learn how the pressure feels in your hand when you make this sidearm swing. And it WILL feel like a sidearm motion, because that's basically what it is.
Version 2: This version of the drill is almost identical to the first one BUT with one primary difference. It's going to look like you've added some sidecock... but actually this is the 'no sidecock' position. If you made a fist and stuck your arm out like you were going to punch someone, and then you opened your fist and gripped a club with your wrist in the same position, it would look like you've got about a 60° wrist cock. But this is the position players like J.B. Holmes are in when they say their wrists are uncocked. Are you with me so far?
Now take the club back as you did in the first version of the drill -- same shoulder turn, etc. -- but raise your arms until the club shaft is pointed either straight up in the air or at a slight angle over your shoulders, like a three-quarter swing.
After that, this version is performed the exact same way as Version 1, flat swing and all. This should help you get used to the changing feel as the club moves from the top of your backswing down to waist level. It shouldn't feel very different from Version 1 because we haven't really changed your wrist cock -- the relationship of the shaft to your forearm -- much from what it was in Version 1. It's just a longer, more natural movement for a golf swing.
Again, this is going to feel like a sidearm swing.
Version 3: In this final version we're going to duplicate Version 2 EXCEPT we're going to let gravity pull our arms all the way down so we can 'hit' a ball teed at normal height. This will help you get used to how the sidearm swing feels in the more familiar motion of hitting a golf ball.
None of these versions of the drill use any sidecock. This is all about learning how to transfer the feel of a sidearm motion to a swing on an inclined plane, which is all a golf swing is. Do it as much as you need to, as often as you need to, until you understand how to do it easily.
We'll add the sidecock and other bits of the golf swing when we put it all together in the final post next week.
Friday, February 5, 2016
Rickie Fowler's Four Checkpoints for Solid Iron Shots
Rickie Fowler has already won in Abu Dhabi this year and he's tied for the lead in Scottsdale after the first round. If you've been watching him blast his irons at the pin -- and, more times than not, hit them right where he intended them to go -- and you wonder what he thinks about when he swings, then you might be interested in Rickie's four-point checklist that he gave Golf Digest on how to hit more greens.
The reason this is important is because... well, there's nothing special about it. Anybody can check these four things at any time during their round if they're having problems with their approach shots.

The four tips are:
Those are dreadfully simple, aren't they? You may even feel embarrassed to mention them. But in golf, as with most things in life, it's usually the simplest things that trip us up.
And perhaps because they're so simple, Rickie says not to worry about them if your first few shots are good. Why? Because -- and I think this could be a fifth tip -- the fewer things you think about when you play, the better.
We make a big deal of how much Butch has helped Rickie improve his game. But is it really any surprise that Rickie has become so consistent when his approach is this simple?
The reason this is important is because... well, there's nothing special about it. Anybody can check these four things at any time during their round if they're having problems with their approach shots.
The four tips are:
- Make sure your feet, knees, hips and shoulders are square
- Check your posture and make sure you're not too stooped over
- Avoid overswinging at the top of your backswing
- Be sure you're hitting the ball before you hit the ground
Those are dreadfully simple, aren't they? You may even feel embarrassed to mention them. But in golf, as with most things in life, it's usually the simplest things that trip us up.
And perhaps because they're so simple, Rickie says not to worry about them if your first few shots are good. Why? Because -- and I think this could be a fifth tip -- the fewer things you think about when you play, the better.
We make a big deal of how much Butch has helped Rickie improve his game. But is it really any surprise that Rickie has become so consistent when his approach is this simple?
Saturday, January 30, 2016
Hank Haney on Head Tilt
They say a picture is worth a thousand words. In this case it is. Hank Haney's article at the Golf Digest site about head tilt is very short, and this picture is probably the reason why. You can pop over and read the article -- it won't take long! -- but here's the picture (click on it to see a bigger version).

The guy on the left tilted his head toward the target during his backswing. As a result, he can't possibly see his intended aim line properly.
The guy on the right didn't tilt his head toward the target during his backswing. He CAN see his intended aim line properly.
Do you know why you're supposed to keep your eyes on the road when you're driving? It's because you tend to drive toward what you're looking at. If you want to drive the ball toward your target, you have to be able to see that target properly.
A few minutes in front of a mirror should help you learn what a 'level head turn' feels like. And then, when you drive the ball where you're looking, there's a good chance you'll actually hit your target.
The guy on the left tilted his head toward the target during his backswing. As a result, he can't possibly see his intended aim line properly.
The guy on the right didn't tilt his head toward the target during his backswing. He CAN see his intended aim line properly.
Do you know why you're supposed to keep your eyes on the road when you're driving? It's because you tend to drive toward what you're looking at. If you want to drive the ball toward your target, you have to be able to see that target properly.
A few minutes in front of a mirror should help you learn what a 'level head turn' feels like. And then, when you drive the ball where you're looking, there's a good chance you'll actually hit your target.
Friday, January 29, 2016
How Sergio Gets So Much Lag
This isn't necessarily something I would recommend that you do, but I think it's important to understand. This is something that players do -- or don't do, as the case may be -- and don't even realize how it affects their swings.
This photo comes from a slideshow at the Golf Digest site about Sergio's keys to getting more distance and accuracy. (It's the fifth one, fyi.) Note that Sergio doesn't tell you to do this, but it definitely has an effect on how he swings. This photo is a view from the rear, which really helps you see it.

See how close to his side that trailing elbow is? You Hogan fans out there will recognize that this is a position very similar to Hogan at the top of his swing. This goes against what most instructors teach. They want you to form a 90° angle between your trailing upper arm and forearm at the top, and to get that club shaft parallel to the ground.
But Sergio is trying to create as much leverage as possible, so he can force the stiff shafts of his clubs to flex (or load, if you want the technical term). And trust me, this move requires stiff shafts! To use this position, you have to make sure you have a solid grip and that you don't get 'flippy' at the top of your backswing. If you have a little too much 'give' in your wrists at the top, you will likely be rewarded with the shaft smacking your shoulders or back.
Sergio maintains this position all the way down with a specific swing thought that he mentions in both the fifth and sixth photos in the slideshow -- namely:
The thing I most dislike about this move is that it's much harder to stop being tense during your swing -- which has a number of repercussions for your swing, like ruining your rhythm and feel -- and that's why I don't recommend it. I prefer a swing motion that's based on relaxation (because relaxed muscles move faster, and I focus on speed in a golf swing) and rhythm, which tends to create a bigger arc and faster clubhead speed with less stress on your body.
Let me put it this way: You can play power golf or you can play speed golf. Bubba and Phil play speed golf, while Sergio is one of those guys who plays power golf. It's not so much a question of right and wrong as a matter of preference.
And if you want to play power golf, Sergio's way is as good as any.
This photo comes from a slideshow at the Golf Digest site about Sergio's keys to getting more distance and accuracy. (It's the fifth one, fyi.) Note that Sergio doesn't tell you to do this, but it definitely has an effect on how he swings. This photo is a view from the rear, which really helps you see it.
See how close to his side that trailing elbow is? You Hogan fans out there will recognize that this is a position very similar to Hogan at the top of his swing. This goes against what most instructors teach. They want you to form a 90° angle between your trailing upper arm and forearm at the top, and to get that club shaft parallel to the ground.
But Sergio is trying to create as much leverage as possible, so he can force the stiff shafts of his clubs to flex (or load, if you want the technical term). And trust me, this move requires stiff shafts! To use this position, you have to make sure you have a solid grip and that you don't get 'flippy' at the top of your backswing. If you have a little too much 'give' in your wrists at the top, you will likely be rewarded with the shaft smacking your shoulders or back.
Sergio maintains this position all the way down with a specific swing thought that he mentions in both the fifth and sixth photos in the slideshow -- namely:
My thought from the top: Imagine you're pulling a chain down with both hands.This swing thought keeps his trailing elbow close to his side all the way down to impact, which gives him a very compact swing. It also creates a very flat swing plane -- which can easily become too flat -- and narrows your swing arc. It also makes it harder to play from the rough. (Upright swing planes are better for that.) But it does create a lot of power, if that's what your swing is built on. (And many players do focus on power in their swing, which is why you need to know how this works.)
The thing I most dislike about this move is that it's much harder to stop being tense during your swing -- which has a number of repercussions for your swing, like ruining your rhythm and feel -- and that's why I don't recommend it. I prefer a swing motion that's based on relaxation (because relaxed muscles move faster, and I focus on speed in a golf swing) and rhythm, which tends to create a bigger arc and faster clubhead speed with less stress on your body.
Let me put it this way: You can play power golf or you can play speed golf. Bubba and Phil play speed golf, while Sergio is one of those guys who plays power golf. It's not so much a question of right and wrong as a matter of preference.
And if you want to play power golf, Sergio's way is as good as any.
Sunday, November 29, 2015
Cristie and Inbee's Swings... The Physical Side 2
Before I go on to today's topic -- the downcock at the top of Cristie and Inbee's swings -- I want to add a bit more to what I wrote yesterday. It may help some of you catch on to this quicker.
While the movements I wrote about yesterday are actually very natural movements, some of you may have run into the problem that Bobby Jones observed (and that I wrote about in this post) -- namely, that you may have unintentionally interfered with your natural movements while trying to learn the game, and now the natural movements don't feel so natural anymore. Learning to get out of your own way again can be frustrating.
Unlike a lot of modern swings which are based on angles and positions, this Hammer Swing is based more on feel and movement. (Again, that's why some TV commentators have trouble understanding how it works.) You really don't have to learn any positions -- but if you're looking for one, the closest I've been able to come is shown in this photo, which I put in yesterday's post:

The important "position," if you can call it that, is the relationship of your hands and trailing elbow as you enter the hitting zone, which I wrote about at length yesterday. This is what happens during the move that helps you keep your wrist cock long enough to create a lot of clubhead speed at impact.
The irony here is that it's the same position you get into during a short game shot. It's just that you aren't swinging fast during your short game! And since you aren't swinging so fast, it's easier for you to be relaxed. If you're having trouble, it's tightness that's giving you fits -- you're too tight during your full swing.
So, for those of you who found that getting into this position was a little awkward when you made a full swing, try practicing it with a pitch shot. Just swing from waist high to waist high at a comfortable speed. As you start down, your trail elbow will be separated just a little from your side, then you'll just let it drop into the "position" in the above photo and keep swinging through to waist high for your finish.
Once you feel comfortable with that, lengthen the swing to shoulder height, keeping that relaxed feeling. Gradually speed up the swing while staying relaxed until you can swing quickly and smoothly. And then, when you're comfortable with that, stretch it out to a full swing and go through the same routine. It's just a matter of learning to swing relaxed rather than tight. You aren't lifting weights here, so you don't have to create "grunt" power.
NOW let's talk about the downcocking move. Please understand that this is a very personal move -- your natural tendencies play a huge part in how you do it. You don't just say "I want to make this move the way Inbee does" because her move may not be the way you instinctively do it. As a result, my instructions may sound a bit... well, sketchy. But there's more than enough here to help you find the way you do it best.
So let's get on with it.
I don't know if you've been watching the Australian Open but if you have, you might have seen long hitter Lincoln Tighe use this downcock move during Saturday's round. He had a very restricted backswing -- no longer than the photo position Cristie and Inbee are in at the start of this post -- and he used a version of the downcock to create more clubhead speed. (And he used it very effectively too!) This is a very versatile technique once you understand it.
The downcocking move can be fast or slow, long or short, with or without a pause, in any length backswing. It's this versatility that makes it hard for some players to understand. Way back when I started this blog I did a post showing the basics of the move using a flyswatter. I'm going to use that diagram again -- I'll put it just below this paragraph so you don't have to keep going back to the old post -- to help me explain how you use it and how the variations look.

In this diagram I showed a large downcock, as evidenced by the flyswatter "shaft" getting nearly parallel to the ground in Figure 3, because it was both easier to illustrate and more common when using a flyswatter. But regardless of how big or small the downcock is, there are two things that always happen:
Obviously it's a bit more complicated in a golf swing because both hands are holding the flyswatt--uh, I mean the club, and the lead elbow isn't bent. Otherwise we wouldn't need to talk about it -- it wouldn't be any different than swinging a tennis racket. But even when we take both hands and arms into account, it's really not as different as you might think. Why?
Because, as Inbee demonstrates, neither the cock nor the down has to be very large at all. The arms and hands work as a unit, and the moves may feel more like a flexing than a bending:
And remember that you can go back to the original post and watch both Cristie and Inbee's swings -- and find videos of Stricker's swing as well -- if you need to see the swing in action to get a feel for the rhythm. Each player uses a slightly different method for the downcock, so you'll get to see a variety.
An important thing to remember is that the length of your golf swing doesn't determine what your downcocking move looks like. Take mine for instance. No matter how long or short my swing is on any particular day, and no matter how flexible I may be when making my shoulder turn, I ALWAYS end up using a big slow downcocking motion. That's what's natural to me. If I try to make a short quick one like Inbee, it feels wrong and I simply can't make it work consistently.
The idea here is to make your swing feel as natural and easy to repeat as possible. And if for some reason you can't find a downcocking move that works for you, just stick with the regular Hammer Swing. Once you start hitting that ball consistently on the sweet spot, which that swing will help you do, you'll get more distance from your swing than you might expect.
And that should be enough to get you all going. If you have specific questions, just post them in the comments below or send me an email. I'll try to give you a helpful answer.
Just remember: this is YOUR swing. Take ownership of it and it will serve you well.
While the movements I wrote about yesterday are actually very natural movements, some of you may have run into the problem that Bobby Jones observed (and that I wrote about in this post) -- namely, that you may have unintentionally interfered with your natural movements while trying to learn the game, and now the natural movements don't feel so natural anymore. Learning to get out of your own way again can be frustrating.
Unlike a lot of modern swings which are based on angles and positions, this Hammer Swing is based more on feel and movement. (Again, that's why some TV commentators have trouble understanding how it works.) You really don't have to learn any positions -- but if you're looking for one, the closest I've been able to come is shown in this photo, which I put in yesterday's post:
The important "position," if you can call it that, is the relationship of your hands and trailing elbow as you enter the hitting zone, which I wrote about at length yesterday. This is what happens during the move that helps you keep your wrist cock long enough to create a lot of clubhead speed at impact.
The irony here is that it's the same position you get into during a short game shot. It's just that you aren't swinging fast during your short game! And since you aren't swinging so fast, it's easier for you to be relaxed. If you're having trouble, it's tightness that's giving you fits -- you're too tight during your full swing.
So, for those of you who found that getting into this position was a little awkward when you made a full swing, try practicing it with a pitch shot. Just swing from waist high to waist high at a comfortable speed. As you start down, your trail elbow will be separated just a little from your side, then you'll just let it drop into the "position" in the above photo and keep swinging through to waist high for your finish.
Once you feel comfortable with that, lengthen the swing to shoulder height, keeping that relaxed feeling. Gradually speed up the swing while staying relaxed until you can swing quickly and smoothly. And then, when you're comfortable with that, stretch it out to a full swing and go through the same routine. It's just a matter of learning to swing relaxed rather than tight. You aren't lifting weights here, so you don't have to create "grunt" power.
NOW let's talk about the downcocking move. Please understand that this is a very personal move -- your natural tendencies play a huge part in how you do it. You don't just say "I want to make this move the way Inbee does" because her move may not be the way you instinctively do it. As a result, my instructions may sound a bit... well, sketchy. But there's more than enough here to help you find the way you do it best.
So let's get on with it.
I don't know if you've been watching the Australian Open but if you have, you might have seen long hitter Lincoln Tighe use this downcock move during Saturday's round. He had a very restricted backswing -- no longer than the photo position Cristie and Inbee are in at the start of this post -- and he used a version of the downcock to create more clubhead speed. (And he used it very effectively too!) This is a very versatile technique once you understand it.
The downcocking move can be fast or slow, long or short, with or without a pause, in any length backswing. It's this versatility that makes it hard for some players to understand. Way back when I started this blog I did a post showing the basics of the move using a flyswatter. I'm going to use that diagram again -- I'll put it just below this paragraph so you don't have to keep going back to the old post -- to help me explain how you use it and how the variations look.
In this diagram I showed a large downcock, as evidenced by the flyswatter "shaft" getting nearly parallel to the ground in Figure 3, because it was both easier to illustrate and more common when using a flyswatter. But regardless of how big or small the downcock is, there are two things that always happen:
- The hand moves slightly in the direction the backswing was moving. That's the cock.
- The elbow moves slightly downward just after the hand starts moving. That's the down.
Obviously it's a bit more complicated in a golf swing because both hands are holding the flyswatt--uh, I mean the club, and the lead elbow isn't bent. Otherwise we wouldn't need to talk about it -- it wouldn't be any different than swinging a tennis racket. But even when we take both hands and arms into account, it's really not as different as you might think. Why?
Because, as Inbee demonstrates, neither the cock nor the down has to be very large at all. The arms and hands work as a unit, and the moves may feel more like a flexing than a bending:
- The wrist cock may be no bigger than a wiggle.
- Your straight lead elbow doesn't have to bend; it only needs to give a little as you start down.
- And while you may think a pause would happen before the downcock, it may actually happen briefly BETWEEN the cock and the down.
- The bigger you make the wrist cock, the slower it will be. Likewise, small wrist cocks tend to be fast wrist motions.
- It works exactly the opposite with the elbow drop. A big drop is usually a faster drop, a small drop generally happens slower.
- Small wrist cocks generally work best with big drops, while big wrist cocks tend to work best with small drops. Sounds counter-intuitive, I know, but think about it for a minute. A small wrist cock would be lost too quickly if you dropped your hands slowly. And a big cock/big drop combo would probably throw you off-plane and off-balance.
- Likewise, if your downcock move includes a brief pause, the pause is most likely to come IN-BETWEEN the cock and the down if you use a large wrist cock. The larger your wrist cock, the more time you'll need to "gather yourself at the top" and make a smooth change of direction. Small wrist cocks may not include a pause at all but, if they do, the pause will most likely come BEFORE the initial cocking action.
And remember that you can go back to the original post and watch both Cristie and Inbee's swings -- and find videos of Stricker's swing as well -- if you need to see the swing in action to get a feel for the rhythm. Each player uses a slightly different method for the downcock, so you'll get to see a variety.
An important thing to remember is that the length of your golf swing doesn't determine what your downcocking move looks like. Take mine for instance. No matter how long or short my swing is on any particular day, and no matter how flexible I may be when making my shoulder turn, I ALWAYS end up using a big slow downcocking motion. That's what's natural to me. If I try to make a short quick one like Inbee, it feels wrong and I simply can't make it work consistently.
The idea here is to make your swing feel as natural and easy to repeat as possible. And if for some reason you can't find a downcocking move that works for you, just stick with the regular Hammer Swing. Once you start hitting that ball consistently on the sweet spot, which that swing will help you do, you'll get more distance from your swing than you might expect.
And that should be enough to get you all going. If you have specific questions, just post them in the comments below or send me an email. I'll try to give you a helpful answer.
Just remember: this is YOUR swing. Take ownership of it and it will serve you well.
Wednesday, November 11, 2015
Jeff Ritter on Making a Solid Swing
According to Golf Digest, "Jeff Ritter is founder of MTT Performance, a Golf Channel Academy located at Poppy Hills Golf Course in Pebble Beach." Therefore he should know his stuff.
Jeff has an instructional article at golfdigest.com called Five Steps To A Solid Swing. It's a slideshow with five slides and commentary about what he considers the five main positions you should swing through if your golf swing is solid. For this post I want to focus on the third slide, the top of the backswing, because I noticed something a bit unusual -- especially since I've done several posts on shoulder turn lately.
Here's the slide:

Now the caption says, in part:
Note also that Jeff is using an iron in this photo. I think that's important as well. Typically your iron shots are made with the ball resting on the ground. If you try to make your shoulder turn too big, it becomes more difficult to maintain your spine angle from your address. As a result, your upper body ends up moving around and it's harder to make solid contact with the ball. Therefore you're more likely to hit your iron shot fat or thin.
However, if you're hitting driver and your ball is on a tee, making solid contact isn't as hard. If you hit the ball a bit low or high on the face, you might lose a few yards but you can still hit the ball solidly. So working to get that bigger shoulder turn -- and a potentially less accurate hit -- is a fair trade-off to get the distance.
My point is that you don't have to swing full out on every shot. Your approach shots off the ground don't require quite the shoulder turn that you try to get with the driver off a tee. Bear this in mind during your round and you may be able to cut a few shots from your score without any extra practice.
Jeff has an instructional article at golfdigest.com called Five Steps To A Solid Swing. It's a slideshow with five slides and commentary about what he considers the five main positions you should swing through if your golf swing is solid. For this post I want to focus on the third slide, the top of the backswing, because I noticed something a bit unusual -- especially since I've done several posts on shoulder turn lately.
Here's the slide:
Now the caption says, in part:
...Golfers hear all the time that it's important to have a "wide swing arc," but that image alone often falls short. A good thought to get and maintain width is, Play keep away. As in, keep your right hand as far from your right shoulder as possible (pictured). Maintain that feeling throughout the backswing.Take a good look here, folks. Jeff is NOT getting a 90° shoulder turn! He's getting a good turn, with his hands quite a way from his trailing shoulder, but he's not stretching and turning so hard that he loses his spine angle from his address position.
Note also that Jeff is using an iron in this photo. I think that's important as well. Typically your iron shots are made with the ball resting on the ground. If you try to make your shoulder turn too big, it becomes more difficult to maintain your spine angle from your address. As a result, your upper body ends up moving around and it's harder to make solid contact with the ball. Therefore you're more likely to hit your iron shot fat or thin.
However, if you're hitting driver and your ball is on a tee, making solid contact isn't as hard. If you hit the ball a bit low or high on the face, you might lose a few yards but you can still hit the ball solidly. So working to get that bigger shoulder turn -- and a potentially less accurate hit -- is a fair trade-off to get the distance.
My point is that you don't have to swing full out on every shot. Your approach shots off the ground don't require quite the shoulder turn that you try to get with the driver off a tee. Bear this in mind during your round and you may be able to cut a few shots from your score without any extra practice.
Tuesday, October 13, 2015
That Crazy Thing Fitzpatrick Does
European Tour rookie Matthew Fitzpatrick was the 2013 US Amateur champ, and he got his first win at the British Masters this past weekend. He jumped up to 59th in the OWGR -- making him the youngest player in the Top100 -- and 12th in the Race to Dubai with the win. Not bad for a 21-year-old!
He's not incredibly long; his 2015 average is just short of 288 yards. Still, he makes good use of that distance, as he manages to hit just over 71% of his fairways and nearly 76% of his GIR.
But Matt has one of the more unusual moves you'll see in a golf swing. This slow-mo video from teacher Rob Chruszcz shows the swing in more detail, but I've isolated a few key frames in the picture farther down in this post.
At address Matthew doesn't look very different from anybody else. In fact, he doesn't look that different when his hands are at waist level or at shoulder level either. But take a look at that top of the backswing position!

As you can see if you watch the video, Matthew uses his hands a lot more than most players. He loops the club at the top, not only "laying the club off" (which makes the club face point up to the sky like Dustin Johnson) but also dipping the club head way below parallel, then dropping his hands on the way down to get back on plane.
It's interesting to compare Zach Johnson with Matthew. Both turn very rapidly as they bring the club down to hit the ball, but Zach hits the ball with his right hand -- that is, Zach's right hand is moving a bit faster than his left at impact, causing him to "fling" the club head at the ball and uncock his wrists. If you look at a photo of Zach at impact, the club shaft and his left arm form a fairly straight line.
Matthew, by comparison, swings both hands at roughly the same speed, which causes him to retain some wrist cock. His hands are still ahead of the ball when the club head makes contact. However, the two players are almost the same height and drive it about the same distance -- Matthew is maybe 5 yards longer -- and their accuracy is about the same.
It will be interesting to see how Matthew does going forward, since he's on track to qualify for all the majors in 2016. (He only needs to make the Top50 in the OWGR to do that.) It's clear that loop is natural to his swing and he's very good at repeating it. Let's hope that nobody tries to change it and ruins his game.
He's not incredibly long; his 2015 average is just short of 288 yards. Still, he makes good use of that distance, as he manages to hit just over 71% of his fairways and nearly 76% of his GIR.
But Matt has one of the more unusual moves you'll see in a golf swing. This slow-mo video from teacher Rob Chruszcz shows the swing in more detail, but I've isolated a few key frames in the picture farther down in this post.
At address Matthew doesn't look very different from anybody else. In fact, he doesn't look that different when his hands are at waist level or at shoulder level either. But take a look at that top of the backswing position!
As you can see if you watch the video, Matthew uses his hands a lot more than most players. He loops the club at the top, not only "laying the club off" (which makes the club face point up to the sky like Dustin Johnson) but also dipping the club head way below parallel, then dropping his hands on the way down to get back on plane.
It's interesting to compare Zach Johnson with Matthew. Both turn very rapidly as they bring the club down to hit the ball, but Zach hits the ball with his right hand -- that is, Zach's right hand is moving a bit faster than his left at impact, causing him to "fling" the club head at the ball and uncock his wrists. If you look at a photo of Zach at impact, the club shaft and his left arm form a fairly straight line.
Matthew, by comparison, swings both hands at roughly the same speed, which causes him to retain some wrist cock. His hands are still ahead of the ball when the club head makes contact. However, the two players are almost the same height and drive it about the same distance -- Matthew is maybe 5 yards longer -- and their accuracy is about the same.
It will be interesting to see how Matthew does going forward, since he's on track to qualify for all the majors in 2016. (He only needs to make the Top50 in the OWGR to do that.) It's clear that loop is natural to his swing and he's very good at repeating it. Let's hope that nobody tries to change it and ruins his game.
Wednesday, October 7, 2015
Why Trailing Arm Arc Is Important
I know you probably expected a post about the Presidents Cup but we've got plenty of time for that this week. Instead, I want to look in more detail at something Michael Breed discussed on Monday's Golf Fix. (I looked for a video clip at the GC website but it's not up yet.)
Breed called that something TRAIL ARM ARC but many players and teachers refer to it differently. Annika Sorenstam, for example, has talked about how she tried to feel as if she was pushing her trailing hand away from her shoulder when she reached the top of her backswing. Breed's 'trail arm arc' is the same thing.
The reason I decided to write about it is because this 'move' helps you create more clubhead speed, although the logic behind it may not be readily apparent to you. But the concept itself is really simple to understand.
To help explain this I'm using another of my stick figure drawings. The reason I use stick figures and not photos is because ten people can be in the exact same position and all will look different. However, stick figures always show the same angles, and those angles are what you need to understand. So here's the drawing:

Let's focus on the top two figures first.
Are you with me so far?
Now, you may have heard that the 'textbook' amount of bend in your trailing elbow (that's 'a' in the drawings) is around 90 degrees. And if you look at my drawings, you'll see that the LONG arc is just a little over 90 degrees. That's because it's really hard to push your hands very far away from your trailing shoulder at the top of your swing.
You should be asking yourself, "Why?" The answer to this question is why pushing your trailing hand away from your trailing shoulder creates more clubhead speed.
When you push your trailing hand away from your trailing shoulder, you force yourself to make a bigger shoulder turn -- or 'coil' if you prefer that word.
Look at the difference in 'b' between those two drawings. The SHORT arc gets the hands to the top of your backswing without out creating very much shoulder coil at all! However, the LONG arc creates a much bigger shoulder coil, which lengthens your swing and gives you more time to build speed during your downswing.
And if you look at the bottom drawing in the the gray box, you'll see a drawing with the SHORT arc's shoulder turn but the LONG arc's hand position. See how the hands are nowhere near the top of the backswing? That's because the swing is so much shorter, and that's why it doesn't create as much swing speed.
So let me sum this up: The reason you want a LONG Trailing Arm Arc is because it forces you to make a bigger shoulder turn, and a bigger shoulder turn helps you create more swing speed.
I hope that helps you understand why Breed made such a big deal out of this, and why so many players and teachers talk about pushing your hands away from your trailing shoulder at the top of your backswing. It's all about creating a big shoulder coil.
Breed called that something TRAIL ARM ARC but many players and teachers refer to it differently. Annika Sorenstam, for example, has talked about how she tried to feel as if she was pushing her trailing hand away from her shoulder when she reached the top of her backswing. Breed's 'trail arm arc' is the same thing.
The reason I decided to write about it is because this 'move' helps you create more clubhead speed, although the logic behind it may not be readily apparent to you. But the concept itself is really simple to understand.
To help explain this I'm using another of my stick figure drawings. The reason I use stick figures and not photos is because ten people can be in the exact same position and all will look different. However, stick figures always show the same angles, and those angles are what you need to understand. So here's the drawing:
Let's focus on the top two figures first.
- The thick dark lines represent your shoulders and the thin black vertical line represents your spine. The letter 'b' represents the angle your shoulders turn.
- The straight blue line represents your lead arm, which is straight of course, and the small black circle represents your hands.
- The bent black line represents your trailing arm, which is bent at the elbow. The angle of that bend is labeled 'a'.
- And the thin green line extending across the drawing represents where your hands are at the top of your backswing. The club shaft would be pointing down this line, over your shoulders and toward your target.
Are you with me so far?
Now, you may have heard that the 'textbook' amount of bend in your trailing elbow (that's 'a' in the drawings) is around 90 degrees. And if you look at my drawings, you'll see that the LONG arc is just a little over 90 degrees. That's because it's really hard to push your hands very far away from your trailing shoulder at the top of your swing.
You should be asking yourself, "Why?" The answer to this question is why pushing your trailing hand away from your trailing shoulder creates more clubhead speed.
When you push your trailing hand away from your trailing shoulder, you force yourself to make a bigger shoulder turn -- or 'coil' if you prefer that word.
Look at the difference in 'b' between those two drawings. The SHORT arc gets the hands to the top of your backswing without out creating very much shoulder coil at all! However, the LONG arc creates a much bigger shoulder coil, which lengthens your swing and gives you more time to build speed during your downswing.
And if you look at the bottom drawing in the the gray box, you'll see a drawing with the SHORT arc's shoulder turn but the LONG arc's hand position. See how the hands are nowhere near the top of the backswing? That's because the swing is so much shorter, and that's why it doesn't create as much swing speed.
So let me sum this up: The reason you want a LONG Trailing Arm Arc is because it forces you to make a bigger shoulder turn, and a bigger shoulder turn helps you create more swing speed.
I hope that helps you understand why Breed made such a big deal out of this, and why so many players and teachers talk about pushing your hands away from your trailing shoulder at the top of your backswing. It's all about creating a big shoulder coil.
Subscribe to:
Posts (Atom)