ATTENTION, READERS in the 28 EUROPEAN VAT COUNTRIES: Because of the new VAT law, you probably can't order books direct from my site now. But that's okay -- just go to my Smashwords author page.
You can order PDFs (as well as all the other ebook formats) from there.
Showing posts with label change of direction. Show all posts

Sunday, June 10, 2018

Harvey Penick's Magic Move (Video)

This is a decidedly mechanical video, which I generally try to avoid. But Harvey Penick was a legendary teacher, and this video from The Art of Simple Golf does a good job of explaining this technique. Done slowly as a drill, a mechanical action like this can teach you a basic swing feel.


Whether you lift your lead heel or not, let me restate the "Magic Move" so you understand what it is:
To start your downswing, let your lead knee move back toward the target so your lower leg -- that is, from knee to ankle -- is vertical. AT THE SAME TIME, swing your trailing arm down so your upper arm -- from shoulder to elbow -- is vertical as well. Your trailing forearm will point straight "toward the camera" from this position.
That is a very technical description, and I don't expect you to swing with any kind of speed while thinking about this complex motion. Rather, the way to use this is as a slow-motion drill. Swing to the top of your backswing, then swing down to the "magic" position very slowly. And I do mean SLOWLY -- take a four-count to do it. This way, you will get used to how your muscles move and your weight shifts without developing a lot of bad habits.

Here's one more thought that will make this downswing drill translate more easily to your actual swing: Don't try to point the club shaft parallel to your foot line, as it appears in the video. At the "magic" position, although your club shaft will be roughly parallel to the ground, it should actually point outward at a 20° to 30° angle away from you. The reason is because, during an actual swing, your wrists will be starting to uncock at this point, so the club will be starting to move down into impact position. By practicing with this slight angle, it will feel more like an actual swing.

Again, this is a very mechanical drill and, if you use it, make the downswing move very slowly. Some of you won't find much use for it, but it can be very helpful if you're uncocking your wrists too early in your downswing.

Just remember, DO IT VERY SLOWLY. That's how martial artists train to use unfamiliar moves for rapid movement, and you'll learn new moves better that way as well.

Thursday, May 31, 2018

Martin Hall Remembers Manuel de la Torre (Video)

One of my favorite golf teachers is the late Manuel de la Torre, who taught many pros like LPGA legend Carol Mann (who died just a week or so ago). However, he devoted most of his life to teaching amateurs and is best known for the simplicity of his teaching methods.

Martin Hall did this short video focusing on just one of de la Torre's many teachings about the golf swing, and this one may help many of you hit better shots with very little practice.


"Leave it alone." It's deceptively simple advice that few players consciously work on these days.

When you tighten your grip on the club during your swing, you change the position of the clubface and sometimes even your swing plane... and you do it without ever consciously trying to. If you don't understand why, just sit down in an armchair, rest your elbow and forearm on the chair's arm and make a loose fist. Then rhythmically tighten and loosen that fist -- your forearm will bounce up and down on the chair arm like you're having convulsions!

While tightening and loosening your grip during your swing won't have quite as dramatic a result, it will cause unintended changes in clubface angles. To battle this, you MUST CONSCIOUSLY try to keep a nice, even grip and forearm tension throughout your swing. I can tell you from personal experience that it helps to try and relax all of your upper body muscles -- shoulders, neck, back and even jaw muscles -- as you swing.

As Martin says, you won't be able to keep that tension perfectly the same all the way through your swing. But your goal is to minimize the changes. It will not only improve your ball contact (and as a result, your distance and accuracy), but it will improve your rhythm, the smoothness of your change of direction at the top of your swing, and even help minimize the stress on your back.

And once you get good at it, you'll find that you can make a faster swing without losing control of the club. Sounds crazy, I know, but it's true. Proper rhythm does that for you.

So give it a try. You might be surprised at the results.

Thursday, March 1, 2018

Martin Hall on Mickey Wright (Video)

This was Martin Hall's Night School video from last Friday. It's hard to go wrong with anything that copies the legendary Mickey Wright -- even Hogan said she had the best swing he'd ever seen. This video has a Wright tip that Martin found.


I like this tip because it's deceptively simple -- just curl your lead fingers around the club handle as you start your downswing. Essentially all you're doing is tightening your grip a little. Mickey said this would help prevent a slice.

PLEASE NOTE: This isn't the same thing as Dustin Johnson bowing his wrist! You aren't manipulating the clubface in any way. You're just firming up your grip so you don't (a) let the club twist in your hand or (b) get sloppy with your wrists and rotate the clubface open. This is just a way to make sure that you start down in the same position that you went up!

I like simple tips like this. It's pretty easy to make them a regular part of your swing without an excessive amount of practice.

Thursday, November 30, 2017

Peter Kostis on Jonas Blixt's Golf Swing (Video)

This is a clip from CBS coverage of the 2014 Greenbriar Classic but anytime Peter Kostis compares your swing to Sam Snead's, it's worth a look. Jonas Blixt has been playing well down in Australia so this is as good a time as any.


I'd like to add a couple of observations to what Kostis says.
  • Snead's swing looks more flexible than Blixt's in part because of his equipment. Snead began his career with hickory shafts, which means he learned to create clubhead speed through rhythm rather than power. He focused more on motion than leverage, which is why his swing had a greater range of motion than Blixt's.
  • Facts are, Snead was far more flexible than most modern players, even into his later years. Snead himself said he used yoga stretches as part of his training, and the stories about him are legendary. I've heard more than one of his contemporaries say he could kick the top of a doorjamb from a standing position underneath. (Just for the record, Snead was the first player to use weight training, not Gary Player. The difference is that Snead kept it quiet; he liked to keep his training methods to himself.)
Snead used his flexibility to his advantage. In his teaching (he was originally the Greenbriar's teaching pro, you know) he stressed the need to remain relaxed during your golf swing. That also contributes to the extreme "lag" at the top of his backswing; being so flexible, he could start his downswing while the club was still going back. And by staying so relaxed, he didn't put the stress on his back that so many modern players do.

But there certainly are a number of similarities between Blixt and Snead. While Snead's hips turn more in his backswing and open more in his finish, the movement is rotary not lateral. This is more clearly seen in face-on videos, of which there are many on YouTube. Both men are rotating rather than sliding during their swings, which allows them to return the clubface to the ball more consistently. They don't move back and forth over the ball, so the ball position doesn't change between backswing and downswing.

Blixt is struggling a bit this week at the Australian PGA, perhaps because of all the rain they've had down there. (He was -3 at one point but fell back to even on the back nine while I was watching.) But his swing is fundamentally solid and it surprises me how streaky he is. I suspect he tends to think too much about his mechanics so he's never as relaxed as Snead was. When you have as good a swing as Blixt does, sometimes the best thing you can do is just trust it... and focus on where you want the ball to go.

As he proved with his runner-up finish last week, he's more than capable of getting the job done.

Friday, November 24, 2017

Shanshan Feng's Change of Direction (Video)

This Morning Drive video comes from just before the CME Group Tour Championship. Travis Fulton talks about how Shanshan hits the ball so accurately.

Many of you are trying to get that "reroute" move he mentions, but you're having trouble. Let's see if I can't help you out.


First, let's get one thing straight. Travis says Shanshan doesn't hit the ball very far. Shanshan is 5'7" tall and drives the ball 250 yards on average. Admit it -- most of you, even you men out there, would kill to consistently drive the ball 250 yards AND hit the fairway 81% of the time. (Yes, that's from her LPGA stats page.) I'm REALLY getting tired of TV teachers acting like you have to hit the ball 300 yards or you're "short." And given that she beat the "long ballers" THREE TIMES in 2017, length might be a bit overrated.

Alright, rant over. Let's get to that downswing move...

If you check out the video around the 1:09 mark, you'll see Travis has stopped her swing where her lead arm is parallel to the ground. He points out that the club is moving more vertically for her than for most players... but he doesn't tell you why.

I want you to look at her elbows. See how you can draw a straight line along her lead arm and it will cross her trailing elbow as well? That's because she's doing something many great players (like Annika) do -- during her backswing she's trying to push the handle of the club as far from her trailing shoulder as she can for as long as she can. As a result, she's keeping both arms relatively straight for a long time.

Now you don't want to get tense while doing this. As you can see, her trailing elbow is still bent a bit at that 1:09 position. Your trailing elbow is going to bend some as you turn. But you don't want it to be a BIG bend. Rather, you just want it to flex a bit as you swing up. That's the reason her club swings on a more upright path -- with both elbows fairly straight, her wrists hinge upward in a more upright plane. It just happens that way.

Then Travis stops it again at around 1:25 in the video, just after she starts down. He's talking about how she "shallows out the club." But take a good look at that freeze frame. Surprise! Her trailing elbow is now a bit lower than her lead arm! That's why the club is now on a shallower plane. When her trailing elbow bends, her trailing hand pulls the club a bit sideways and it rotates her lead arm at the shoulder joint.

Just like the "push away" move on the backswing, you don't need to exaggerate this move. If you just relax your trailing elbow a bit as you start down, you'll create that slight shallowing move naturally. In addition, it will increase your wrist cock a little at the top so you don't straighten your wrists out too soon in your downswing.

This is something you'll have to practice, simply because your tendency will be to bend your trailing elbow too much. It doesn't take all that much movement at your elbow to get a big movement at the clubhead. Just start off by swinging a bit more slowly to get the feel for that slight relaxation at the top that will shallow out the club shaft, then gradually speed up to your normal speed.

Friday, November 17, 2017

Claude Brousseau on Giving Up Control (Video)

GC posted this drill from instructor Claude Brousseau that teaches you to gain control of your swing by giving up control. Sound crazy? It's not. It's about learning how to trust your natural movements.


What this drill teaches you is what instructors used to call "feeling the clubhead." By using this drill, you'll learn how to feel pressure changes in the shaft at the change of direction, which is caused by the clubhead's reaction to gravity as it changes direction from backswing to downswing.

Really, it's much easier to feel than it is to explain.

By taking your trailing hand off the club's handle and placing it on top of your lead hand, those pressure changes will be focused on your lead wrist. Brousseau wants you to swing slowly because, if you aren't used to it, your first experiments with this drill might HURT if you swing fast. You don't want to injure your wrist, so take it easy to start!

Once you get used to this, however, you'll be able to speed up your swing. Why? Because this drill teaches you how to feel the rhythm of your swing. Once you start to feel it, you'll learn how to move with it and create more speed with less effort.

Btw, you may be surprised to find that this drill helps you square up the clubface better than you usually do. That's because the natural movement of your lead arm will square up the clubface if you don't impede it. That's where the often-heard advice to "control the club with your lead side" comes from. But actually, you just need to let both hands and arms work together... which is exactly what this drill teaches you.

Try it without a golf ball at first. When you feel more comfortable with the drill, try hitting some golf balls. I think you'll have fun working with this drill, and your ball striking will improve.

Tuesday, November 7, 2017

A Quick Look at Shanshan Feng's Swing (Videos)

Shanshan Feng (aka Jenny Money) has moved up to #3 in the Rolex World Rankings this week, less than a quarter point behind long-hitting Sung Hyun Park.. I thought it might be instructive to take yet another look at one of the simplest yet most effective swings in women's golf.

This first video shows her swing from straight on, and it includes a slo-mo view of her hands at impact.


And this second video shows her swing from a variety of angles.


Let me point out a few simple things you can learn from Shanshan -- simple things that you can put into action immediately.
  • Simple setup. Note that her lead wrist is bent a bit more than most teachers would recommend, but that's because she has the butt end of the shaft pointing at her belly button. In other words, she has the end of the shaft pointing at the center of her body, so it's pointing at her spine.
  • She cocks the club a bit earlier than some players, but there's nothing contrived here. She just takes it back in a way that feels comfortable to her, so it's consistent.
  • Her backswing isn't extremely long, even with a driver -- it looks more like a three-quarter swing -- but she gets a good shoulder turn and she doesn't slide away from the ball.
  • Yes, she starts down by moving her hips forward... but no, she doesn't make some powerful forward thrust with her hips. Physics demand that your lower body has to move first in order to start your downswing, but Shanshan doesn't exaggerate the move. She just moves in a natural way, stepping from her trail foot to her lead foot as she turns toward the target.
  • She really uses her hands, arms and shoulders, so her wrists uncock as she hits the ball. The shaft is pointing at her belly button at impact, just the way she set up to the ball. She isn't worried about getting her wrists in some special position; she just points the shaft straight at the ball.
  • Her footwork is very simple during her downswing. Again, all she does is just step from her trail foot to her lead foot as her shoulders turn completely into her finish. Since she doesn't stop her shoulders from turning, the club doesn't flip over as she hits the ball. As a result, the ball flies pretty straight.
Nothing fancy, nothing that requires a swing monitor to keep it in check. Shanshan plays golf, not golf swing. She just worries about where the clubface is pointing at impact, and she controls that with her hands -- exactly the same way any other athlete aims a bat or racket or hockey stick.

And bear in mind that Shanshan is notorious for NOT PRACTICING. If you want a dependable swing that doesn't need a lot of attention, you could do a lot worse than copying Jenny Money!

Wednesday, November 1, 2017

Justin Rose on 3-Wood Approach Shots (Video)

Here's an older Golf Digest video where Justin Rose explains his swing thought for hitting better 3-woods. This is so simple yet so effective.


When Justin says he tries to keep his back to the target at the start of his downswing, he's not suggesting anything new. This is an old thought many players have used. But I mention it because the easiest way to do this is to think about dropping from a small height and landing on your feet.

Just think about it: Your lead heel comes slightly off the ground at the top of your backswing, so if you feel as if you're just landing flatfooted as you start your downswing, you won't start to unwind so quickly. That puts you in a stronger position to move through the ball and helps prevent an over-the-top move.

Justin does this as a rehearsal but it's very effective during your actual swing as well.

Give it a try. You might be surprised how much more solidly you can hit your 3-wood... or any of your clubs.

Thursday, October 26, 2017

The Art of Swatting Flies, Part 2 (Video)

About a week ago I posted a video from instructor Trent Wearner on how to create more clubhead speed with a flyswatter action. (You can click the link to see Wearner's video.) Today I want to expand on the idea a bit, try to help you feel it a bit more clearly.

In that post I also linked to another post I had done called The Wall Slap Drill. That drill should have helped you get a solid lower body action, one that would make the flyswatter action easier to create and apply to the ball.

Today I want to link to yet another post I did, this one on hitting sand shots with soft arms. The instructor, Rob Strano, likened it to the Carlton Dance -- but his video was specific to hitting sand shots. In today's post I'm going to show you how to combine that technique with the flyswatter motion and apply it to your regular shots.

First, here's the Strano video again:


Now, what you can take directly from that video is the whole "soft arms" idea, the dancing feel. But if you try to do it the way Strano suggests when you play your normal shots, you'll run into a couple of problems:
  • First, you'll create an angle of attack that's much too steep for a standard shot. In a sand shot you want hit the sand first and throw the ball out of the trap, but from a normal lie you want to hit the ball first.
  • Second, if you bend your elbows as much as Strano indicates, you create a very narrow swing arc -- that's why the angle of attack is so steep -- which automatically reduces your shoulder turn. That's going to cut your top clubhead speed.
So the question becomes how to create that soft arm dance feel while creating a big arc and a shallower angle of attack.

Fortunately, the adjustments aren't difficult.

The wall slap drill does more than give you a solid move into the ball. I originally designed it to help to help players extend their arms more. This is something that many of the pros say they consciously work on (Annika is one who comes to mind). That will help you get a bigger shoulder coil with a shallower angle of attack, to take better advantage of the clubhead speed created by the flyswatter motion.

The only other change you should make for regular shots is the amount of elbow bend created by the Carlton Dance feel. As you can see in the video, Strano's elbows are so soft that his elbows bend quite a bit. To create that flyswatter feel, your elbows STILL have to flex during your swing's change of direction. They just don't need to flex as much during a standard swing.

And I won't leave you to guess the amount of flex you need. You're going to bend your elbows straight up for this. (When you do the actual wall slap drill, your arms will automatically create a swing plane because of your combined shoulder coil and elbow bend. What I'm teaching you here will just keep you from exaggerating it.) Here's how you do it:
  • Set up for the wall slap drill and swing your arms up so they're parallel to the ground (the top of the wall slap drill). Get as close to a 90° shoulder turn as you can, which should be easier since you aren't making a full swing. Your trailing hand should point straight out to the side, at just about the height of your armpit.
  • With your arms in that position, change position so your foot line is perpendicular to the wall (you start the drill with your foot line parallel) and your trailing hand's fingertips are touching the wall.
  • Now, bend your lead elbow just enough that your fingertips move four to six inches higher on the wall.
  • Finally, without bending your elbows any more, cock your trailing wrist just a little. This is the position you want to swing to during the drill. The sequence with a club will feel like this: (1) arms swing up to armpit height, (2) lead elbow flexes slightly as arms stop moving upward, (3) weight of club causes wrists to cock, (4) arms start down and then (5) you consciously try to smack the ball by swinging the shaft just past the ball. Yes, the flyswatter move is an actual swatting motion; you use effort (both arms and legs) to swing the clubhead through the ball! When you do the drill WITHOUT a club, this is the feel you are imagining.
By combining the Carlton Dance feel with the wall slap drill, you'll learn the sequence to create a lot more clubhead speed without tensing up during your downswing. You aren't trying to feel as if you're tense and exerting a lot of power. Rather, you want to feel that you are loose and swinging FAST! You're not a weightlifter, you're a sprinter.

I think that's the best I can explain it right now. Learning how your swing should feel is one of the most difficult things to learn because everybody feels it a bit differently, but it's not impossible. It just takes a little imagination.

And as usual, if you have questions, just put them in the comments and I'll do my best to answer them.

Saturday, October 7, 2017

The Key Area in Brooke Henderson's Swing

At least, this is what I see as the key area. And unlike other aspects of her swing, this is something you can learn from and -- even if you can't do it the way she does -- you can use some of it.

The photos below come from a Golf Digest article about Brooke's swing. The article focuses on her lower body and makes the point that most of us can't do it. Why? The word they use to describe her hips is "hypermobile," which means she is inhumanly flexible. But what I see in the photos isn't mentioned at all.

Take a look at the last position in this photo:

Brooke from setup to halfway down
and the first position in this photo:

Brooke from halfway down to finish
Granted, I doubt that you can get the amount of wrist cock Brooke does in that first photo. That just looks painful to me! It's not as dramatic as it looks though; Brooke flattens her swing plane on the way down, so the angle isn't quite as sharp as it looks from our point of view.

But I want you to notice how little her arms have moved from the end of photo 1 to the start of photo 2... and yet how much her wrists have uncocked in that same amount of time! This is the key thing I see in the photos.

Many of you lose clubhead speed because you uncock your wrists between the third and fourth positions in photo 1. That's much too early in your downswing. The key to keeping your wrists cocked until you reach that fourth position is a combination of relaxed wrists and letting the inertia of the clubhead keep them cocked. It's all in how you make your change in direction.

The question is... how do you learn to do this? It's a progressive thing you learn a little at a time. Here's my drill:
  1. Start by only swinging back to position 4 in photo 1 -- in other words, make a short backswing and stop there. Don't worry about getting as much wrist cock as Brooke because you probably won't. If you create a 90° angle between your club shaft and lead arm, you're golden.
  2. Now swing down slowly to position 1 in photo 2. Please note that the club shaft/lead arm angle is STILL 90°! During an actual swing, your change of direction will create enough motion to keep relaxed wrists in this position. Keep your wrists as relaxed as you can while you move GENTLY between these two positions. You don't have to hit a ball, just move between the two positions. Move as slowly as necessary; this is a feel drill.
  3. After you do that a few times and feel fairly good about it, try moving SLOWLY AND SMOOTHLY from the first position all the way down to impact -- position 2 in photo 2. Study this last position -- the shaft points straight out from your lead arm to a point that's a few inches in front of the ball. This is all about sequence -- position 4 in photo 1, to position 1 in photo 2, to position 2 in photo 2. DO IT AS SLOWLY AS NECESSARY TO CREATE THE PROPER SEQUENCE.
  4. Once you get the hang of that, try to make an actual swing -- A SLOW ONE -- from setup to position 4 in photo 1, to position 1 in photo 2, to position 2 in photo 2, and let the momentum take you to whatever finish you need. (It'll probably be short.)
What you're training yourself to do is feel the proper cocking and uncocking sequence to create clubhead speed. Do this sequence until it feels pretty good. You'll gradually pick up a little speed but don't worry about that too much -- after all, this is a short swing so it won't create a whole lot of speed. But it will create more speed than you expect!

And once you get comfortable with that, start lengthening the swing. Just remember that the uncocking action ALWAYS HAPPENS AT THE SAME PLACE. The longer swing will automatically create more speed and, once you feel comfortable at a certain speed, you can TRY to swing a bit faster. But as I said, just remember that the uncocking action ALWAYS HAPPENS AT THE SAME PLACE. That means you CAN learn to repeat this.

This is more of a mental adjustment than a physical one. You need to get used to WHERE you create speed. And once you do, it will start to take hold very quickly. Give yourself a month and I bet you'll be surprised at how much speed you can create.

Wednesday, September 13, 2017

Kyle Morris on Chipping VS Full Swing (Video)

On a previous post about swinging, I mentioned some things that Dana asked me to expand upon if possible. Here's my first post to try and help explain them. This chipping video from GC instructor Kyle Morris talks about how chipping is different from your full swing.


One of the things I mentioned in the classic swing post was that modern pros have to learn two different swings because good short game players use classic technique for their short game instead of the modern swing techniques used in their full swings. The reason is that full swings focus on generating power while short games focus much more on touch. The short gamers use the bounce more while the long gamers are using the leading edge of the club.

I'm not telling you anything new here. I've done numerous posts on how you use the bounce and how to use the leading edge, as have almost every instructor you've watched on GC's shows. And if you're using stiffer shafts -- which you need to use if you use a modern swing for your full game; otherwise the shaft will flex too much and you'll lose accuracy -- you have to consciously change your technique as you go from one to the other. The process of creating power to flex the shaft requires different timing, as Kyle demonstrates in the above video.

However, Dana's teacher is a disciple of the late Manuel de la Torre, who taught a more classic technique based in the Ernest Jones method. In their more classic swing, there is no difference between long and short swings. I know you're wondering how that can be, especially given Kyle's explanation.

The classic swing isn't dramatically different in terms of technique, but it's a different mental approach. Perhaps the best way to explain it is to think of using a flyswatter, which is an image I use frequently. Flyswatters are very flexible, so you create more speed by "flicking" the swatter rather than trying to "hit" the fly with it. In fact, if you try to "hit" with an old metal flyswatter, you'll actually bend the handle and never hit the fly at all.

That's because you can't "flick" with power. The soft shaft requires you to do it with technique.

The classic swing, for lack of a better term, uses a softer shaft and a "flicking" motion to create clubhead speed. And as the swing lengthens, the speed of the clubhead increases. Now, here's the trick: That speed increase, coupled with the "flicking" motion, means that the conscious change Kyle is demonstrating between long and short swings is automatically created by the speed increase in a classic swing.

Modern technique requires a firmer grip and therefore less flexible wrists. You have to consciously relax your wrists at the right moment, which is why it takes so much practice to create consistency.

Classic technique, on the other hand, uses a more relaxed grip and therefore your wrists act more like unpowered hinges. The sequencing of the change of direction in a full swing is therefore different than the sequencing of the change of direction in a short swing. AUTOMATICALLY. And if that's hard to understand, don't feel bad. Like I said, it's a different mental approach and it's harder for many if not most people to understand. (It gave me problems too. But once I got it, it seemed dreadfully simple.)

Just for the record, my Quick Guides are sort of a halfway house. They use a more modern approach, but I've removed much of the exaggeration required in a modern technique. In other words, I've incorporated some very fluid Sam Snead moves into the more mechanical Hogan techniques. That way, you can get some of the benefits of both without having to relearn things. (Pure classic swing uses that slight difference in hand technique, coupled with that different mental approach which actually changes how the swing feels. I'm planning a book on it, but it's going to be a while.)

So anyway, I hope that gives you folks a start at understanding how classic swing and modern swing, while using basically the same techniques, can work so differently. I'll be doing more on this topic in the future, because we now have the equipment to use either swing effectively... but modern instruction apparently hasn't realized it yet.

Friday, August 25, 2017

A Thought on Starting Down from the Top

Today I have a simple quote from an old book called Such a Little Secret by John W. Barrett. It concerns the change of direction and the start of the downswing. I'm passing this on because it seems to be a good description of what happens, one that is helpful no matter what swing method you use.

Barrett likes to give movements numbers, so when you see Element Number Three in the text, that's just how he refers to the order of the change of direction in the swing sequence. Also, note that he assumes you're righthanded, so you lefties out there should substitute "right" for "left."
The correct hitting stroke should definitely commence with a transferring of the weight below the waist to the left foot and leg (Element Number Three). In many instructional articles this movement is invariably described as "shifting the weight" -- a misnomer that has bred more misunderstanding and early disenchantment with the game than anything else. If "shifting the weight" is ambiguous, then "Let the weight all flow to the left" or "Everything must move to the left with the shot" can be downright damaging. In fact it is only some of the weight which is transferred, that below the waist.

As the transfer is made, the upper body and head must retain their position in a vertical plane, remaining well behind the object to be hit.

The movement of the hips to the left should be just enough to plant the left heel firmly to the ground and lift the right heel from it as the weight transfers. Rotation of the hips occurs simultaneously with their small lateral move to the left. [p132-133]
Let me point out a couple of things here.

First, Barrett says "only some of the weight" is transferred, and that little bit is below the waist. He says at a later point that a "massive hip and knees slide" causes the upper body to move far too much, but that such a move is unfortunately taught all too often. If you keep those exaggerations out of the lateral move, you'll find that your upper body doesn't lurch forward when you swing. That problem is the result of using your legs incorrectly.

Second -- and this is the part that really caught my attention, because he stated it so well in that final paragraph -- is that the hips move toward the target just enough to replant the lead heel and lift the trailing heel. He also says that the hips rotate simultaneously with that small lateral move.

You got that? None of that "slide and turn" stuff. That is an exaggeration that changes all the correct posture you tried so hard to create at address! In past posts I've explained it as "almost falling" from the top of the backswing, because that lets gravity help create the small weight shift you need to get everything moving toward the target without overdoing it. But it doesn't matter how you feel it, so long as you don't overdo it!

This is a very simple tip, but it will do wonders to help improve both your accuracy and your distance, simply because it will help you deliver the clubhead to the ball with more consistency. And if there's a Holy Grail in this game, it's consistency.

Tuesday, August 15, 2017

Learning from Justin Thomas's Swing (Video)

A couple of years back, David Leadbetter did an analysis of JT's swing for Golf Digest. I'm going to suggest a drill that might help you gain some accuracy without sacrificing distance.


If you compare JT's wrist set at the :13 second mark (top of the backswing) and the :14 second mark (halfway down), you'll see that his wrists are not fully cocked at the top and are only at 90° halfway down.. and they lose that cock very quickly. This is part of the reason why he's so accurate -- at least, he's accurate for someone who swings as hard as he does!

When you eliminate the extremes of wrist cock at the change of direction, you eliminate a lot of your inaccuracy. (I'll come back to this in a moment.)

Then, if you check out JT's lead arm as he nears impact, you'll see that he keeps his upper arm close against his chest. This helps him to better square up the clubface.

What I want you to do, as you make your downswing, is try and get your upper arm close to your side when you hit the ball. Perhaps the best way to do this is to think about rolling your upper arm down, across your chest, so your lead elbow is almost against your side at impact. This not only helps you square the clubface, but it forces you to keep turning your shoulders through to your finish.

This drill -- making a full swing without a full wrist cock at the top and then hitting the ball with your lead arm and elbow close to your side -- will help you learn to square up the club at impact. As you get better at it, you can start letting your wrists cock more at the top. With a little practice you'll be able to create a lot of clubhead speed while still squaring the clubface.

In addition, this can form the basis of a go-to shot (if you don't have one). As I said earlier, this move eliminates a lot of inaccuracy. When you absolutely have to get the ball in the fairway, using this drill just might be the key.

Saturday, July 22, 2017

Travis Fulton on Inbee Park's Driver Swing (Video)

Here's a quick video from GC's Travis Fulton, focusing on the things he likes best about Inbee Park's driver swing. I want you to notice one thing in particular, something that I often mention on this blog because I think it helps both your accuracy and your back.


Travis particularly likes the fact that Inbee starts her downswing by moving down rather than laterally toward the target. Travis has his reasons for liking this move, but here's my take on it.
This move keeps you from "getting stuck" and pushing the shot, helps you make more consistent contact with the ball, puts you in a position to "use the ground" to create clubhead speed, and also takes some of the stress off your back.
That's a whole lot of benefits from one simple move, a move that players have used at least since the days of Sam Snead. It's almost like falling from the top of your backswing and landing on both feet -- yes, it's that simple.

And it's definitely something you should consider trying, especially if you have trouble hitting the ball consistently and/or have the occasional sore back after you play.

Thursday, May 18, 2017

A Quick Look at Byron Nelson's Swing (Video)

Since the AT&T Byron Nelson starts today, I thought I'd give you a quick lesson on how he hit the ball so straight. This is his swing in 1945, when he set all those records.


This video starts with a regular-speed swing, then runs it in extremely slow motion. There are other videos that use this footage, but this one made it easier to see both of the things I want to point out.

First thing: Everybody talks about Hogan's waggle, but there are other ways to start your swing. This video clearly shows how Nelson bent his trailing knee toward the ball to start his backswing. He's not the only player to have done this -- Gary Player comes to mind -- but he may have been the first.

Second thing: And this is the key to his accuracy. You know how every teacher tells you to start your hips before you start your shoulders, so you can increase the angle between your shoulders and hips on the way down to increase power? Nelson doesn't do it! Instead, you can clearly see that the angle between his shoulders and hips doesn't change. In fact, his upper body moves forward, toward his target.

Personally, I'd rather you didn't move your upper body so far forward as you start your downswing. That causes you to lose some clubhead speed. But Nelson starts with so much weight on his lead leg that it can't really be helped -- he has to move away from the target during his backswing or he'll reverse pivot during his downswing. You'll want to keep your weight more centered when you address the ball so you don't have to move your upper body so much.

However, keeping that shoulder-hip angle fairly constant as you start your downswing is a key to increasing your accuracy. When you increase that angle, you do increase power -- but you also alter your spine angle, and that changes your downswing plane, sometimes dramatically. (This dramatic change is a cornerstone of Hogan's downswing, btw. Virtually every good ballstriker's downswing plane is a bit flatter than the backswing plane, but a big change costs you accuracy.)

While you may lose a bit of clubhead speed with this move, you'll also hit the ball more solidly. Given the design of modern equipment, that will add some distance on its own.

And just for the record, the Nelson approach is easier on your lower back as well. More accuracy means more consistent ball contact, and less back pain means... well, less back pain. It's a win-win situation.

Sunday, May 7, 2017

Butch Harmon on Finding Your Driver Rhythm (Video)

Butch Harmon has an article at the Golf Digest site called Finding Your Rhythm With The Driver. It's short but it uses a drill you've probably seen before.

Butch Harmon's driving rhythm drill

Butch says the trick to creating distance with the driver is finding out how fast you can swing it without losing control. To teach you how to do it, he recommends the old drill where you tee up three balls and hit them, one after the other, without stopping. You hit one, step up to the next one as you swing the driver back, then hit that ball and repeat with the third ball.

Essentially, you're just hitting each ball as you walk forward, swinging your driver in time with your walk. This little guy isn't walking very smoothly, but at least he's got the swing rhythm down pat:


The idea here is that if your rhythm is off, you'll lose your balance during the drill. But if your rhythm is correct, there's a good chance you'll hit each ball solidly. And as you get better, you can swing faster without losing your balance.

A simple drill with an easy-to-measure result. And if Butch likes it, it's probably a pretty good drill!

Wednesday, April 19, 2017

Cristie Kerr's Downswing Move #2 (Video)

Yesterday I posted a face-on video of Cristie Kerr smacking a driver, to help you learn a better move down to the ball. Today I want to add a bit to that instruction, and I'm using a down-the-line video of Cristie's drive to help you see this part better.


I quoted this from the Golf Digest article I referred to in yesterday's post:
"Most amateurs are moving their hands hard down toward the ball and moving their bodies toward the target. The key move is to avoid letting your right hip rotate toward the target too early as you move your hands and the club away."
And I said that it's easier to get that result if you focus on your arm and shoulder motion by keeping your trailing elbow straighter, rather than focusing on lower body action. I'm not changing that at all. However, I'm going to tie that advice to another tip I've mentioned many times, a tip that works very well with the arm motion I recommended.

In fact, this tip will make the arm motion much easier to learn.

I have often written that I would rather see you move DOWN to start your downswing, not forward toward the target the way many teachers suggest. That's how Sam Snead used to do it, and they didn't call him "Slammin' Sam" for nothing! Cristie does this as well, and the above video will not only help you understand why I recommend this move, but it will help you start your downswing smoothly.

The second and third swings on the above video are slow -- and the third one is REALLY slow, just like yesterday's video, so it's the easiest one to see the move in. When Cristie gets to the top of her backswing, her trailing knee (her right one) is almost straight. But to start her downswing, she bends that knee. That starts her weight moving downward, and that in turn helps pull the club down without changing the amount of bend in her trailing elbow.

But it does more. Bending her trailing knee -- a mini-squat, if you like -- pulls her trailing hip forward, toward the ball, and shifts her weight onto her lead leg. (It has to. If it didn't, she'd lose her balance and fall down!) It's almost as if she fell onto her lead leg and braced herself with it... and since her lead knee is already bent, it automatically "loads up" to push her upward at impact, effectively "using the ground."

That one downward move -- bending her trailing knee to start her downswing and pull her arms downward without changing the angles created at the top by her trailing elbow -- creates both hip rotation AND weight shift without any kind of dramatic hip or leg action... and that means you stay stable over the ball, creating better contact. It also stops you from uncocking your wrists too early in your downswing, so you create more clubhead speed as well.

If you watch both videos and try to feel the rhythm of her backswing-to-downswing move, and then try it out on your own, I think you'll be pleased with the results you get after just a little practice. It's a simple, natural way to use the physics of your swing to create more clubhead speed with less effort.

Tuesday, April 18, 2017

Cristie Kerr's Downswing Move (Video)

Golf Digest did a short post called Change Directions Like Cristie Kerr to Fix Your Driver. (Pretty self-explanatory, to be honest.) Here's the video they included, which I may have used several months back; I don't remember. It's a good video.


The article says, "Most amateurs are moving their hands hard down toward the ball and moving their bodies toward the target. The key move is to avoid letting your right hip rotate toward the target too early as you move your hands and the club away."

That's good advice, but I think it could be simpler. We're just too hung up on driving our lower body -- we think everything has to be described in terms of leg drive. Let me give you a drill that will teach you the move a bit more simply.

What you want to focus on is keeping your trailing elbow straighter. Don't fold your trailing elbow so much as you swing to the top of your backswing. I know, I know -- it feels as if it stops you from turning your shoulders fully, it feels as if it shortens your backswing. it feels too upright. Ignore these feelings! Here's the drill, which will translate very easily to your swing:
As you take the club away from the ball, keep your trailing elbow fairly straight for as long as possible. I say "fairly straight" because your elbow HAS to bend some. You can keep it straight longer if you let your lead knee bend toward the center of your stance and your lead heel come off the ground. Stop swinging before you get near a 90° bend in your trailing elbow.

Now, to start your downswing, try to plant your lead heel back on the ground AND swing your arms down without bending your trailing elbow AT THE SAME TIME. Basically, it feels as if you're just holding your arms in the same position while you pivot them down from your shoulder joints. It's like a karate chop with both hands. IF YOU BEND YOUR TRAILING ELBOW EVEN MORE AS YOU START DOWN, YOU'RE DOING IT WRONG!
You may not be able to do this very fast at first, but you'll get used to it. It won't take long. Try it in your backyard until it feels a bit more natural, then try hitting some balls at the range.
It won't take long to catch onto the rhythm of this move. It feels a bit awkward because it keeps your trailing hip from moving forward too quickly. After you get used to the move, your swing speed will pick up and you'll start to naturally bend your elbow a bit more... but you'll also start to create more wrist cock on your downswing. If you watch the third swing in the video, which is in much slower motion, you'll see that Cristie's trailing elbow is bent around 100° and her wrist cock increases before her hands reach waist high on her downswing. That will start to happen naturally.

An added benefit of this move: You'll get more consistent contact because this motion makes it easier to tell where the bottom of the club is. That means fewer fat and thin shots.

UPDATE: I've added a second post at this link, with an extra tip that may make this move easier to learn.

Tuesday, February 21, 2017

A Surprise Tip to Avoid "Getting Stuck"

When you study swing mechanics as much as I do, sometimes you experience a moment of serendipity. That is, two separate things that you thought had no connection suddenly slam into each other... and a little light bulb appears over your head. That happened to me Monday.

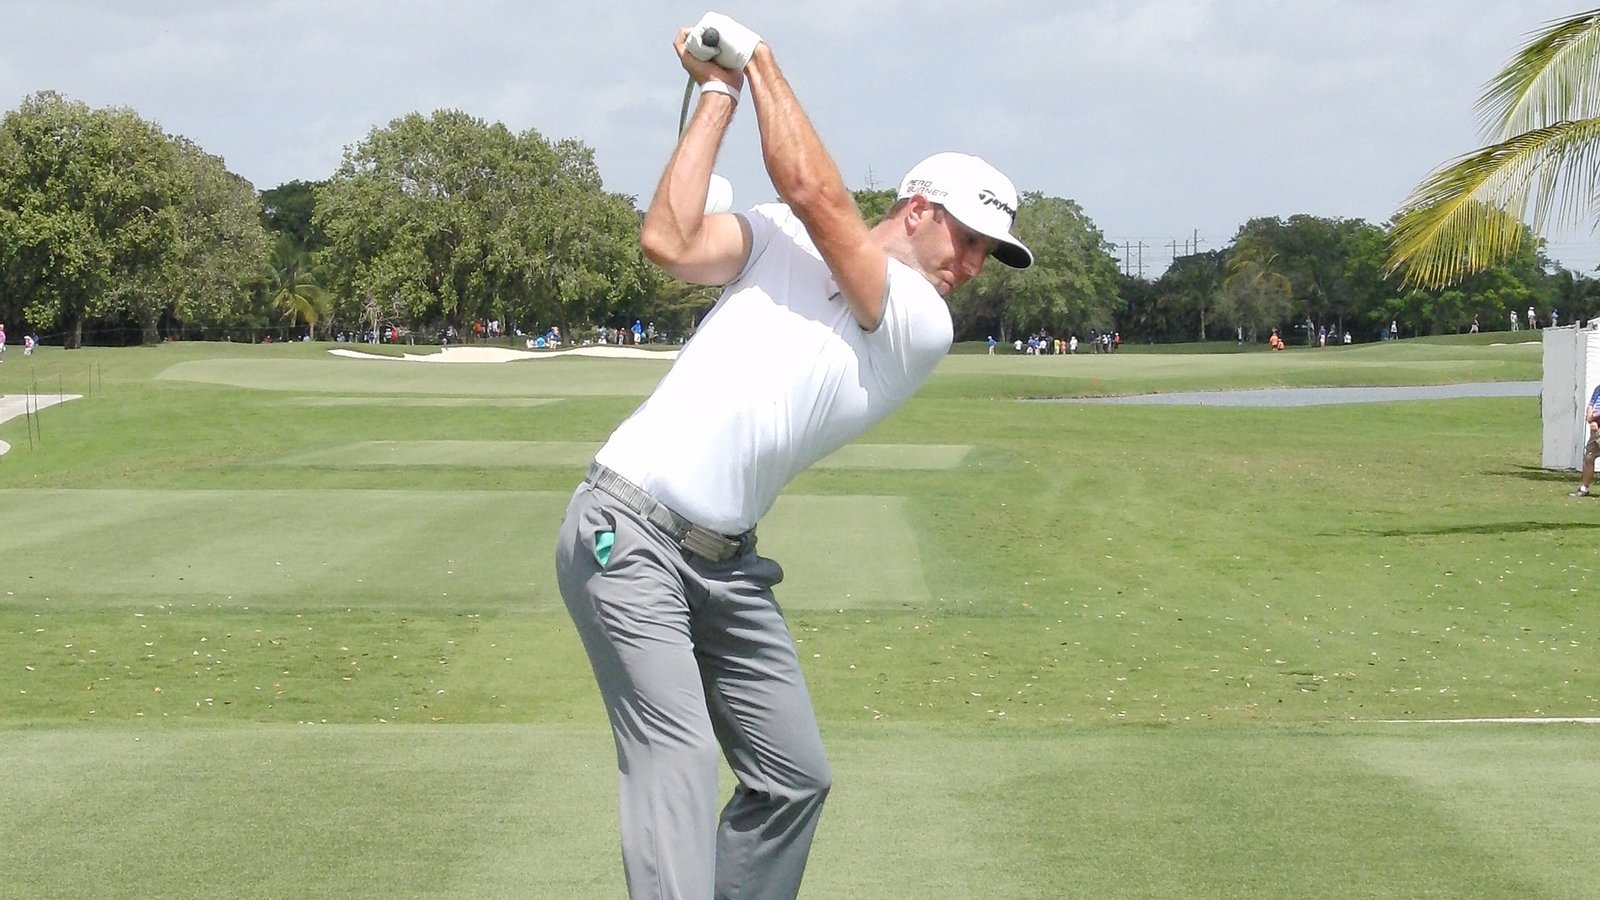
Dustin Johnson at top of backswing

Michael Breed was on Morning Drive -- as he often is -- and was talking about DJ's change of direction at the top of his swing. Many players, Breed said, don't get a full shoulder turn like DJ. Instead, their shoulders stop and their arms just keep going, trying to make a longer swing. As a result, Breed said that their trailing elbows move too much behind them and they simply can't return them into the proper position in time to make their downswing. Their elbows literally "get stuck" behind them.

That's when my little light bulb lit up, and I decided this tip might help some of you.

In past posts I have mentioned that some players and instructors recommend pushing your trailing hand away from your head at the top of your backswing. This is supposed to help you keep more width in your swing, which should help you get more distance.

But on Monday morning I realized that, if you push your trailing hand away from your head at the top of your backswing -- that is, if you try to straighten your trailing elbow a little -- then your trailing elbow CAN'T move behind you at the top. Just try it. If you push the club away from you at the top of your backswing, your elbow HAS to move back into the proper position.

Lights suddenly went on. Voilà! No more getting stuck!

Mechanics don't get much simpler than that, folks. If you're getting stuck on your way down, just try to push your hands away from your head at the top. You'll get your trailing elbow back into position without any trouble at all. Problem solved.

I love serendipity.

The photo came from this page at golfchannel.com.

Tuesday, February 7, 2017

Sorting Out the Matsuyama Downswing

So you wonder if you should copy Hideki Matsuyama's pause at the top. (Let's be blunt here. It's not a pause, it's a full stop.) Instructor Michael Jacobs over at Golf Digest says you shouldn't copy the pause, but you should copy his hand action at the start of his downswing.

I'm going to suggest a modification to his instruction, one that will give you the same sort of action but with a much simpler motion. And I give you this suggestion based on my own experience.

You see, the motion Jacobs says Hideki makes is one that Davis Love was making when he first came out on tour... and Davis himself described it as "a slippery little move."

Hideki Matsuyama

I don't have a copy of the magazine, but memory seems to say it was a Golf Magazine cover story in the mid- to late-1980s called The Secret Move. (But don't quote me on that. That kind of memory is a "slippery little" thing in itself.) And it detailed the technique, because Davis was not only long but he could create extra yardage when he needed it.

This move -- where you start your downswing by moving your hands away from both your body and the target -- widens your downswing, and does so in a way that increases your wrist cock on the way down. (I've written extensively about downcocks in this blog, often in relation to Inbee Park and J.B. Holmes.) Jacobs says you want to move your hands straight out from your body first, then start down. And if that sounds a little tricky, understand that it's basically the same move a fly fisherman makes when he casts his rod.

The reason it's a tricky move is that the fisherman casts his (or her) rod using only one hand, and in the direction he (or she) is facing. Coordinating a two-handed move away from your body IN THE OPPOSITE DIRECTION OF WHICH YOU'RE TURNING is extremely complex.

I know. I tried for quite a while to get that move down and discovered that Davis was right -- it IS a slippery little move. I finally gave up. HOWEVER...

You can get a similar effect with a much simpler move, one I use myself.

Most of you are bending your trailing elbow as you start down. DON'T DO IT. Instead, feel like you're straightening that elbow as you start down.

Instead of moving your hands out THEN down, you'll be moving them out AND down simultaneously. Instead of moving parallel to the ground and then dropping, it will feel like your hands are sliding down an incline as they move down. Then, when your hands are somewhere between shoulder and waist high, let that trailing elbow bend and smack that ball! You'll find that you get the same sort of result, but it will be a lot easier to do.

And, on the way down, you'll feel the increased pressure against your wrists as they retain their cock later into the downswing.

Just as a side note: Davis eventually said he had to reign this move in a little to gain more accuracy. So don't get upset if you pick up some distance but lose some control. There's a balance you'll have to find if you want to use this technique. But keeping your trailing elbow straighter as you start your downswing won't be as hard to control as that "slippery little move."