ATTENTION, READERS in the 28 EUROPEAN VAT COUNTRIES: Because of the new VAT law, you probably can't order books direct from my site now. But that's okay -- just go to my Smashwords author page.
You can order PDFs (as well as all the other ebook formats) from there.
Showing posts with label approach shot basics. Show all posts

Thursday, July 12, 2018

Martin Hall on Drawing a Wedge (Video)

Here's a technique I haven't posted before, so you can thank Martin Hall for this one. Here's Martin demonstrating how to hit a draw with a wedge.


Most of this sounds like typical instruction for playing a draw with any club. I'll use Martin's description, which is for a righthander, and I'll put the lefthander's version in brackets:
  • Aim the clubface at the spot where you want the ball to finish.
  • Aim your body to the right [left] of your target.
  • Twist your forearms as you hit the ball and follow through to close the face. Martin uses a bucket to demonstrate the motion.
I admit that I don't care for all that twisting. While there are times where extra forearm action is needed -- hooking the ball sharply around a tree comes to mind -- you'd generally like to keep your forearms as quiet as possible. However, hooking a wedge is difficult, so I can see where you might need some extra "stuff" to make the wedge shot hook. (I'll have to try it myself and see, when I get a chance. It clearly worked for Bubba at Augusta!)

However, here's an extra key thought that you may never have heard before, and it might help you when you need to draw the ball with other clubs as well. Martin says you want to keep your trailing shoulder high, which may be a bit misleading. It's more like you avoid dropping your shoulder as much as you normally would. (After all, your trail hand is lower on the grip than your lead hand, so obviously your trail shoulder has to be a bit lower than your lead shoulder -- and it will be unless you do something strange. If you do something strange, you'll probably pull the shot as well as hook it... and that's not good.)

Anyway, this is a good thing to remember when you absolutely have to hit a draw with any club, but especially a wedge. Feel as if you're making a level shoulder turn and that should help you get that extra curve you need. The ball should fly lower and hit the green with a lot of spin.

Wednesday, May 9, 2018

Fred Griffin on Iron Shots That Stop Quickly (Video)

GCA coach Fred Griffin shared a feel-oriented approach to hitting a high iron shot that lands softly on the green. It's simpler than many methods you might have heard.


Fred gives you three simple steps.
  • Put the ball slightly forward of center in your stance. If you stop the video around the :54 second mark, there's a good ground level image of the ball position. You can see that the ball is still inside your lead heel. You don't want to put the ball too far forward or you'll hit it thin.
  • He says to feel as if you "sink" a bit on your backswing, but he just wants you to keep your trailing knee slightly flexed on the way back. You don't want to straighten your trail knee when you make this shot! This gives you a more level approach to the ball, as opposed to (a) raising up and hitting it thin or (b) dropping during your downswing and hitting it low.
  • And then there's that "waiter's tray" image. He wants you to swing to a high finish, and that's a good image to help you straighten up as you finish your swing. Yes, if you stayed level during your downswing, you'll be using the ground here!
The key to hitting the ball high is to make a small adjustment to the ball position -- just a little forward -- and then hit the ball cleanly. And a ball that flies high drops down more vertically onto the green, which means it doesn't bounce forward as much.

Make sure you understand the images. If you can imagine how the shot feels, you'll be able to hit it much better than you expect. Never underestimate the value of a good mental image of your shot!

Sunday, March 11, 2018

Robert Damron on Repeatable Wedge Yardages (Video)

This short video from Robert Damron has a neat twist on learning how to hit your wedges consistent distances. I think you'll find the concept useful.


Robert's approach is different... but it's one I've used myself, although not to the degree he does. Still, it's a very useful way to learn a repeatable swing.

Instead of hitting your wedges to a certain distance and trying to remember the swing, Robert makes a swing he can easily repeat and then measures the distance. For example, if a slow shoulder-height swing feels natural to you, you make that swing ten times, measure the distances and get an average distance. Now, when you need to hit that distance on the course, you can recreate it by feel rather than by mechanical thoughts.

So why post the video? Because Robert has some unusual ways to create those "natural-feeling" swings, and seeing how he does it might help you find some easy-to-repeat swings that you wouldn't have thought of otherwise.

As crazy as it may sound, I think you'll get some very useful ideas from this video. Give it a try.

Friday, March 2, 2018

Johnny Miller on Hitting Solid Irons (Video)

Sorry this one's late, folks. The weather took out our cable service last night.

This video tip from Johnny Miller is a simple one -- in fact, you can do it as a drill -- that should help you hit crisper iron shots.


This idea of getting your lead shoulder (Johnny says left because he's a righty -- it's the right shoulder for you lefties!) back to where it was at setup is a simple one, but it can be misleading if you don't think it through.

Many players mistakenly try to do what Johnny says BUT they do it by pushing their lead shoulder TOO FAR FORWARD on the downswing. That will cause problems. You don't want to lean TOWARD the target at impact. Rather, you just want to get your shoulder back to your setup position.

Pay close attention to Johnny's demonstrations in the video. You'll note that in his practice swings his left shoulder is directly above his left foot at the finish, but in his actual swings it isn't quite over his left foot. That's because his upper body is rotating more during the actual swing.

When hitting an iron, this will help you hit down slightly on the ball. You'll "trap" it against the ground and get more spin -- hence, a more solid shot.

Johnny's tip is intended to prevent a reverse pivot, where you lean away from the ball during your backswing and hang back on your trailing foot during the downswing. Depending on your swing tendencies, from that position you'll either hit a push-slice or a duck-hook.

One last thought: Note that Johnny says this can help "a little" with the driver. Under normal circumstances, you want to stay behind the ball at impact with a driver so you can hit up on the ball. (That's why it's teed up, after all, and why you set up with your head a bit more behind the ball. Your lead shoulder will set up AND finish a bit farther behind the ball on a drive than it does with an iron shot.) But if you have a problem with a reverse pivot, this drill can help. And it can also help in a headwind, where you want your tee ball to fly a bit lower. In that case, you'll also want to tee the ball lower.

Friday, February 23, 2018

Bobby Jones on Short Irons (Video)

This old video lesson from Bobby Jones has a surprise in it, one that I've not heard anybody mention before. Can you tell what it is?


The video is full of all kinds of advice on playing short irons. (Depending on who you ask, the mashie-niblick is closest to what we call a 7-iron or even an 8-iron these days.) And you can learn a lot just by watching his rhythm.

But if you pay attention to his swings, especially near the end of the video where he is shown from several angles (in front, behind, above), you'll see that Bobby Jones chicken-winged his left arm just like Jordan Spieth. Surprised?

I guess there really isn't anything new under the sun.

Wednesday, November 1, 2017

Justin Rose on 3-Wood Approach Shots (Video)

Here's an older Golf Digest video where Justin Rose explains his swing thought for hitting better 3-woods. This is so simple yet so effective.


When Justin says he tries to keep his back to the target at the start of his downswing, he's not suggesting anything new. This is an old thought many players have used. But I mention it because the easiest way to do this is to think about dropping from a small height and landing on your feet.

Just think about it: Your lead heel comes slightly off the ground at the top of your backswing, so if you feel as if you're just landing flatfooted as you start your downswing, you won't start to unwind so quickly. That puts you in a stronger position to move through the ball and helps prevent an over-the-top move.

Justin does this as a rehearsal but it's very effective during your actual swing as well.

Give it a try. You might be surprised how much more solidly you can hit your 3-wood... or any of your clubs.

Friday, October 13, 2017

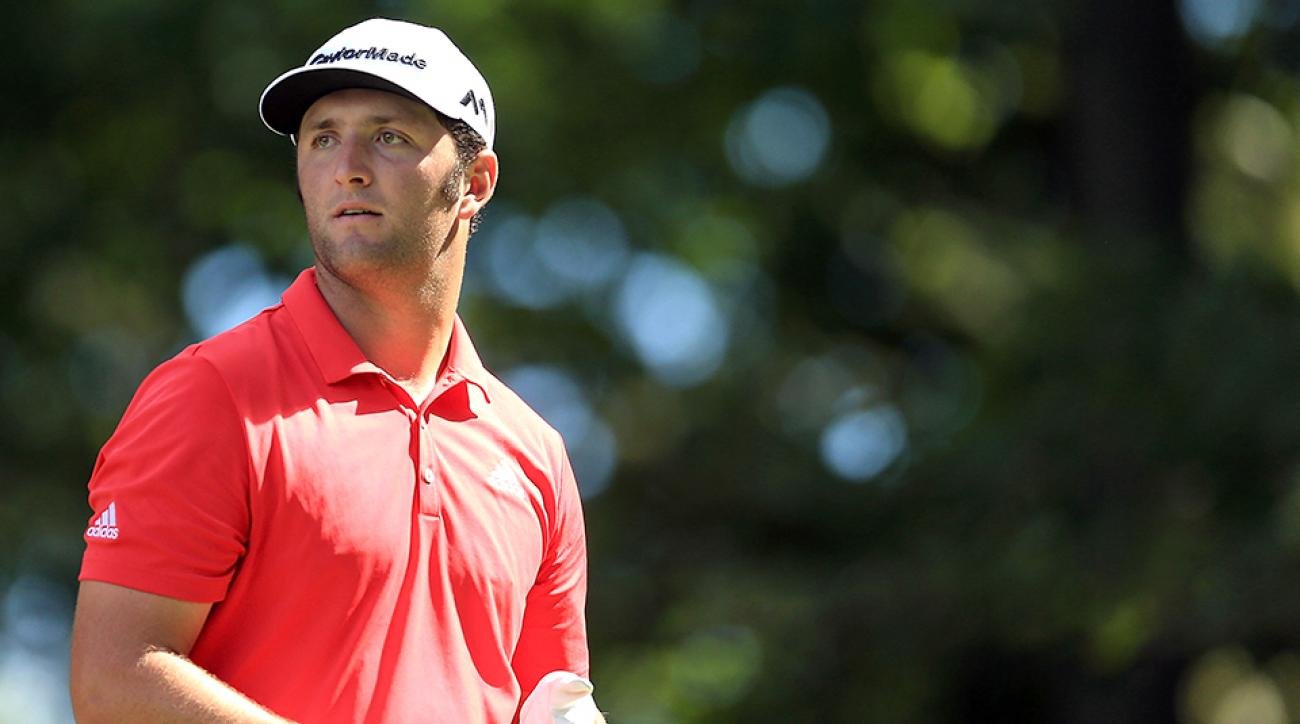
Jon Rahm on Three-Quarter Shots

Jon Rahm did a short Golf Digest article on what he's learned about hitting three-quarter shots. He says it lets him hit and hold more greens, so let's take a quick look at his keys.

Jon Rahm

Jon doesn't use a club longer than a 7-iron. He says the longer clubs hit the ball too low to be of any use UNLESS there's a lot of wind.

He plays the ball back in his stance. He doesn't give specifics here but he says "slightly." I would take that to mean it's just a little back of center.

In terms of mechanics, he makes the three-quarter swing with less than full wrist cock. He makes sure he gets a full shoulder turn so his downswing isn't too steep, and he cuts off his finish just a bit -- hands at roughly shoulder height with the club pointing straight up. (At least, that's what the header photo shows.)

Jon says the shot creates less spin but flies straighter and is easier to control the distance. And he quotes Lee Trevino: "Hit the ball only as high as you need to."

Sounds like good advice to me.

Wednesday, September 13, 2017

Kyle Morris on Chipping VS Full Swing (Video)

On a previous post about swinging, I mentioned some things that Dana asked me to expand upon if possible. Here's my first post to try and help explain them. This chipping video from GC instructor Kyle Morris talks about how chipping is different from your full swing.


One of the things I mentioned in the classic swing post was that modern pros have to learn two different swings because good short game players use classic technique for their short game instead of the modern swing techniques used in their full swings. The reason is that full swings focus on generating power while short games focus much more on touch. The short gamers use the bounce more while the long gamers are using the leading edge of the club.

I'm not telling you anything new here. I've done numerous posts on how you use the bounce and how to use the leading edge, as have almost every instructor you've watched on GC's shows. And if you're using stiffer shafts -- which you need to use if you use a modern swing for your full game; otherwise the shaft will flex too much and you'll lose accuracy -- you have to consciously change your technique as you go from one to the other. The process of creating power to flex the shaft requires different timing, as Kyle demonstrates in the above video.

However, Dana's teacher is a disciple of the late Manuel de la Torre, who taught a more classic technique based in the Ernest Jones method. In their more classic swing, there is no difference between long and short swings. I know you're wondering how that can be, especially given Kyle's explanation.

The classic swing isn't dramatically different in terms of technique, but it's a different mental approach. Perhaps the best way to explain it is to think of using a flyswatter, which is an image I use frequently. Flyswatters are very flexible, so you create more speed by "flicking" the swatter rather than trying to "hit" the fly with it. In fact, if you try to "hit" with an old metal flyswatter, you'll actually bend the handle and never hit the fly at all.

That's because you can't "flick" with power. The soft shaft requires you to do it with technique.

The classic swing, for lack of a better term, uses a softer shaft and a "flicking" motion to create clubhead speed. And as the swing lengthens, the speed of the clubhead increases. Now, here's the trick: That speed increase, coupled with the "flicking" motion, means that the conscious change Kyle is demonstrating between long and short swings is automatically created by the speed increase in a classic swing.

Modern technique requires a firmer grip and therefore less flexible wrists. You have to consciously relax your wrists at the right moment, which is why it takes so much practice to create consistency.

Classic technique, on the other hand, uses a more relaxed grip and therefore your wrists act more like unpowered hinges. The sequencing of the change of direction in a full swing is therefore different than the sequencing of the change of direction in a short swing. AUTOMATICALLY. And if that's hard to understand, don't feel bad. Like I said, it's a different mental approach and it's harder for many if not most people to understand. (It gave me problems too. But once I got it, it seemed dreadfully simple.)

Just for the record, my Quick Guides are sort of a halfway house. They use a more modern approach, but I've removed much of the exaggeration required in a modern technique. In other words, I've incorporated some very fluid Sam Snead moves into the more mechanical Hogan techniques. That way, you can get some of the benefits of both without having to relearn things. (Pure classic swing uses that slight difference in hand technique, coupled with that different mental approach which actually changes how the swing feels. I'm planning a book on it, but it's going to be a while.)

So anyway, I hope that gives you folks a start at understanding how classic swing and modern swing, while using basically the same techniques, can work so differently. I'll be doing more on this topic in the future, because we now have the equipment to use either swing effectively... but modern instruction apparently hasn't realized it yet.

Saturday, September 9, 2017

Mike Davis on Downhill Lies (Video)

GCA teacher Mike David did a short segment on how to play off a downhill lie that I found very helpful. Of course, I'm going to try and simplify it a bit.


Davis lists five primary keys to making a good shot from a downhill lie:
  1. Tilt your torso with the slope
  2. Widen your stance
  3. Ball position is a bit tricky -- imagine a line rising perpendicular from the ground to the downhill side of your face and put the ball there
  4. Swing easier
  5. No weight shift -- set up with weight on downhill leg
Okay, let's see if we can make these things a bit more instinctive.

Numbers 1, 2 and 5 can be made a bit simpler by combining them and studying the video. When you tilt your torso, you're trying to get your shoulders more in line with the slope. But if we widen our stance and set up with our weight already on our downhill side, we can effectively get these three correct by simply placing our head directly vertical over our lead foot and then moving it ever so slightly to the uphill side. That's simply a balance thing -- we don't want to lose our balance and fall down the hill when we swing! Widening our stance and setting our head almost over our downhill foot automatically creates a spine angle suitable for the slope.

To get the ball position correct (key #3), let's use the address position we just created. Instead of trying to create a line perpendicular to the slope -- we've already created several angles in our address -- let's just place the ball vertically below our UPHILL EAR. If you look at the video, you'll see that's roughly where the ball is... and you can find that place during a practice session simply by dropping a ball held beside your uphill ear and watching to see where it lands.

Finally, instead of trying to change our swing speed (key #4) let's just think of this swing as a big pitch shot. That will keep us from swinging too hard or too long, and we can just make a normal swing from about shoulder height.

Those three keys should help you duplicate the Davis setup from this video without getting too caught up in the angles you're trying to create. Addressing the ball on a downhill slope affects both your balance and your vision, so you might as well make it as simple as you can. This way, you can use gravity to help you create a consistent address position.

All you need is a little time on a slope practicing your setup. You won't need to hit balls at first -- just get familiar with the setup. As Davis says, learning to predict your distance comes with practice.

Wednesday, September 6, 2017

Charley Hull on Hitting a 6-Iron (Video)

While the LET may be having a slow year, that doesn't mean they've stopped doing things. Here's an instructional video from Charley Hull on how to hit a 6-iron. (Actually, it's down below the photo.)

Charley Hull

I don't know about you, but I've always had a problem with 6-irons. I hit my 7-iron fine, and my 5-iron as well. But for some reason, I've never had a 6-iron that looked right to me when I stood over it.


Charley is very precise with her ball position. Unlike most players who simply say "play it near the center of your stance," she specifically suggests placing the ball one clubhead length behind your lead heel. In my case, that's slightly ahead of center. (Perhaps that's been my problem!)

Her other tip is to take the club away "low and slow" for a good tempo. She says this helps her to make a more balanced finish.

It's a short video, but Charley does everything fast, doesn't she?

Friday, July 14, 2017

Getting More from Your Irons

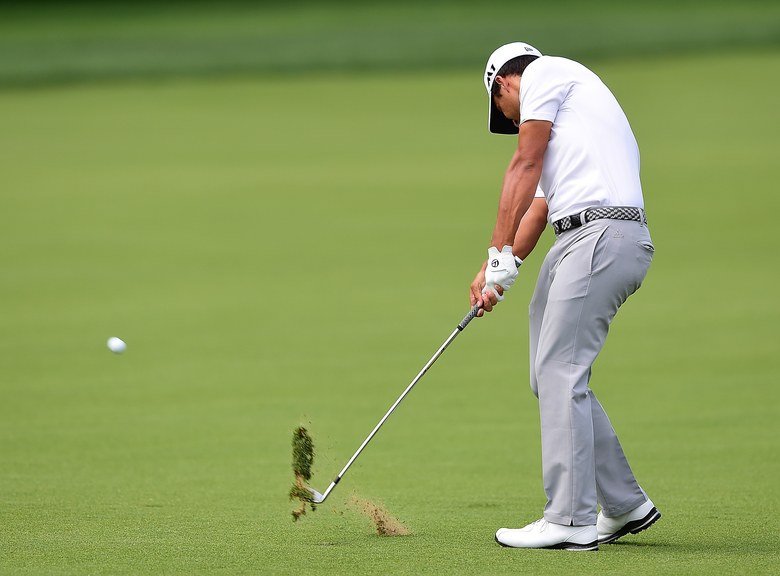
Today I've got a quick link to an iron lesson at Golf Digest about Xander Schauffele and his looooong irons. I mean long as in "he hits a loooooong way." There's a neat drill there you might want to try.

 Xander Schauffele

The article attributes much of Xander's length to (1) precise contact and (2) hitting the ball with less loft. What is different here is that you aren't given the same old advice to make sure your hands are ahead of the ball at impact. The recommended drill is what I want you to get from this article.

This is a drill for iron play, not drivers. The ball is on the turf, not a tee... but you do use a tee.

Put the tee in the ground about six inches ahead of your golf ball and just barely inside your target line, sticking up high as if you were going to hit a drive off of it. Then, simply enough, try to create a divot toward that tee when you hit your shot, a divot that is as long as you can get it. You aren't trying to hit the tee, just create a long shallow divot. The tee is to help you "aim" your divot.

The idea is simple. If you strike down too steeply on the ball, you'll get a short deep divot. If you create a long shallow divot, you'll still be hitting down on the ball -- that's how you get a divot, after all -- but you'll shallow out your attack angle enough to launch the ball a bit higher. That will translate to more distance and, according to the article, more accuracy.

That sounds like a good deal to me.

Saturday, July 1, 2017

A Drill for Crisper Irons (Video)

This GC video featuring instructor Brian Jacobs has a very simple drill to help improve your iron play. Yes, the video says it will improve your "iron power" but it's really about hitting your irons more solidly. That automatically gives you more "power" in your shots.


The drill uses a towel placed six inches behind the ball, a tee laid on the ground just in front of the ball, and two other tees placed on either side of the ball to form a "gate." The ball is placed slightly ahead of center in your stance. Your goal is to hit the front tee when you strike the ball, but without hitting the towel or either of the side tees.

In other words, you want to take a divot in front of the ball. That's nothing new.

But I like this drill, not only because it won't hurt you if you hit the towel, but also because it slows the club down enough to give you better feedback. There's no question whether you hit the towel or not! And the "gate" makes it easy to tell if you aren't hitting the ball in the center of the face -- again, better feedback.

If you're struggling with your iron play, you might find this drill very useful.

Thursday, May 11, 2017

To 3-Wood or Not to 3-Wood? That's the Question...

And it's an interesting question: Just how useful is your 3-wood, really? Teachers Butch Harmon and Mackenzie Mack appear to have a difference of opinion, and Golf Digest has two articles that contrast their thoughts.

Butch Harmon hitting a 3-wood from the fairway

The older article, from Butch Harmon, is called Bench Your 3-Wood. Butch says the only time you should use your 3-wood from the fairway is when you can reach the green. Otherwise, he says you probably won't hit it well and should probably use your 5-wood instead. (I don't carry a 5-wood. My 7-wood has always been my magic wand when I'm in need, and that's my go-to club.)

Butch does say that, if you're going to use your 3-wood, position the ball a few inches inside your lead heel -- that is, closer to the center of your stance -- and make sure you get off your trailing foot during your downswing. (But if you're swinging that hard, so you're reverse-pivoting, maybe you should just lay up to a good wedge yardage instead. That's what I think.)

The newer article, from Mackenzie Mack, is called Three Shots You've Never Used Your 3-Wood For, But Should. Ironically, Mack seems to feel that your inability to hit a 3-wood well can be an advantage! At least, his three shots never get the ball very high off the ground.

He says you can use the 3-wood off hardpan because you just want to keep the ball low and get it rolling. He even wants you to set up to the ball as if it were a putt, so that sounds a bit like Butch's setup. (Personally, I'd be using my 7-wood here. I'd be more confident with it off hardpan.)

He also recommends you use the 3-wood to get out of the trees. Even if the grass is pretty thick. That's what he says, and it's because -- again -- you don't really want the ball to get up in the air in the first place. (You might want to practice that before you try it. I understand the logic, but from thick grass? That sounds iffy to me.)

And finally, he wants you to use the 3-wood to putt from the fringe. For this shot, he wants you to set up with the ball in the back of your stance, as if you were going to chip the ball. (So why not use a shorter club like a hybrid? Still, a 3-wood chip shot is a nice one to have in your arsenal, especially for long chips.)

As you can tell, I believe you should think twice before using your 3-wood anytime it isn't teed up, unless you have practiced with it and are confident using it. Especially if a poor shot might cost you more strokes than a decent shot will gain.

And if you're having trouble breaking 80 -- or even 85 -- that poor shot probably will. Play smart!

Thursday, March 9, 2017

Tom Stickney on How to Stop Slicing Your Irons (Video)

Golf Magazine has an article called 3 Easy Keys for Sticking Your Irons... but that's not what I'm interested in today. It's not a bad article, but I'm more interested in the video tip that heads the article.

The video is called Irons: Eliminate Your Slice for Good. It's a tip from Golf Magazine Top100 Teacher Tom Stickney. I've embedded it here; you'll probably want to run it full screen.


You've probably heard this tip a hundred times -- keep your upper arm close to your body as you hit the ball. But I want to give you a new thought that might help you make more progress when using this tip.

Stickney says those sliced irons are caused by a disconnect -- your arm separates from your body -- so you want to keep your armpit tight against your body. A common drill for this, which Stickney doesn't mention here, is putting a glove or towel in your armpit and trying to hit the ball before you drop said glove or towel.

But let's look at this a bit closer.

When you hold something in your armpit, you're keeping your entire upper arm against your chest. The key here is keeping your lead elbow close to your side. Your elbow is closer to the club, so keeping your elbow close to your side should actually be easier than holding something in your armpit.

So try this drill: Make some practice swings -- half-swings are fine -- by letting your lead elbow stay close to your body all the way back, even letting it bend. (This is easier if you keep both elbows close against your body and let them both bend. That's an old Hogan drill.) Then let both elbows straighten as you swing the club down toward impact. In order to keep your lead elbow close to your side, you'll need to keep turning your body toward the target after impact and let your lead elbow bend as the club comes up. This will teach you the correct body movement to keep your lead elbow close.

You see, your lead elbow moves away from your body -- it disconnects, as Stickney says -- because you stop turning your body before you actually hit the ball. If you keep turning your upper body and hips -- because they all need to keep moving -- your lead elbow will stay closer to your body and you won't get that huge disconnect.

It shouldn't take you long to get comfortable with this drill. It will probably feel a bit weird if you haven't been turning through impact, but that won't last long. Then you can start making your regular backswing, and letting your lead elbow move closer to your side at impact. Then you can feel as if your lead elbow is bending as you finish, just as you did in the drill.

Soon you'll not only stop slicing your irons, you'll pick up some distance as well. It'll help with your woods also. It's just good technique.

Saturday, February 25, 2017

Travis Fulton on the Knockdown Wedge (Video)

Here's a tip from instructor and GC regular Travis Fulton on how to hit knockdown wedges. I always like to see new ideas on how to play common shots, but Travis mentions something you may not have heard before.


This idea of not turning your hips fully as you hit the ball goes against everything you normally hear about the golf swing these days, and there's a reason for that.

Most modern instructors have traditionally taught that you want an exaggerated hip drive and less arm action. (That's Hogan's idea.) Belief in that idea, as I have noted in many posts -- over the last few months especially -- has begun to change. To finish your swing without fully releasing your lower body, which is what Travis is teaching here, requires you to use your arms more. You have to swing your arms past your lower body -- and this is actually a natural movement for most people. You just relax your arms and hips a bit, and let your shoulders turn past your hips.

The fact is that most of you do this frequently in your daily life, whether it's sweeping with a broom or simply moving an item from one spot on the table to another. You can learn to do it with a golf club as well; it's mainly a mental thing for most players. You've trained yourself to do it the other way.

As a general rule, you don't want to restrain your hips on your followthrough. But if you reach the point where your arms and shoulders are pulling your hips through to your finish, rather than driving your hips to pull your arms through, you'll probably have fewer back problems going forward.

Friday, December 2, 2016

A Visualization Tip from John Toepel Jr.

The late John Toepel Jr. was a former PGA Tour pro and president of Concept Golf, a company in the Raleigh-Durham area of NC. I have a book he wrote called Golf Can't Be This Simple: The Swing (I also have another book by him called GCBTS: Playing the Game) that has some interesting ideas in it.

One of the coolest things in the book is a visualization tip to help players who have trouble getting the ball off the ground, especially with long clubs. The tip is simply this:
If you have trouble getting the ball off the ground, try to hit the ball no higher than knee level for about a hundred yards.
I know that sounds weird, but obviously he isn't talking about hitting the ball so it rolls along the ground. What he wants you to do is hit the ball so it flies at knee level for around a hundred yards or so.

The key here is that Toepel says it won't. Instead, you'll get a solid shot with a proper trajectory.

Doesn't sound very helpful, does it? Yet Toepel says it has helped his students. Why would it?

Think about this for a moment. As Toepel points out, many of the best ball strikers come from windy parts of the world like Texas and Scotland, where they're forced to keep the ball low.

When players try to hit the ball up in the air, they usually try to hit the ball on the upswing, the way you would hit a ball on a tee. But if the ball is sitting on the ground, an upward strike means you hit the ball thin. You want to hit the ball with a slight downward strike... and that's the natural thing to do if you try to hit the ball low.

Toepel suggests that you try to hit every club low, even if you're trying to hit a wedge over a tree. He says to set the clubface and ball position for the shot you want, but hit the ball with the idea that it will fly knee high. The loft will get the ball up, but the attempt to hit a low shot will create the necessary solid contact to get that result.

So if you're having trouble hitting solid shots that get the ball off the ground, try to hit the ball so it flies knee high for a hundred yards or so. You might be surprised how much your ball striking improves.

Sunday, November 13, 2016

Blair O'Neal on Hitting Long Irons (Video)

My, how times have changed. When I was a bit younger, if you mentioned "long irons" you were talking about 2-irons or 3-irons. In this GC video, Blair O'Neal has tips for hitting 4-irons and 5-irons... and calls them "long irons."


After reminding you to trust the iron's loft to get the ball up in the air, Blair's three tips are:
  • Move the ball a little bit forward in your stance
  • Make a sweeping swing with the iron
  • Take your time making the swing
I want to say a bit more about that last tip, since it can help you hit any club in your bag better, but especially your longer clubs.

If you've ever used a hammer to drive a nail, you know what it feels like to "wait on the hammer" as you swing it. Try to rush the change of direction, and you'll be rewarded with a sore wrist and maybe a sore thumb when you miss the nail completely! The weight of the hammer's head almost demands that you take your time, that you don't rush that change of direction.

Although a golf club isn't as heavy, the extra length of the shaft (as compared to a hammer) causes your golf swing to feel the same way. Try to rush the change of direction and you might hurt your wrists... but you'll almost certainly mis-hit the ball. If you want to compare the two, try swinging a hammer a few times and then try to duplicate the feel with a golf club. (Use short backswings to start. Once you get used to it, start lengthening your swing.) It's amazing how close the two movements feel!

Once your swing has changed direction and the club is on its way down, you can swing almost as hard as you want and you'll still have a decent chance to get a solid hit. But you have to give that change of direction enough time so you make a smooth transition from backswing to downswing. If you do, you'll hit all your clubs -- but especially the long ones -- much better.

And just for the record, that's what the old timers were talking about when they said players need to "feel the clubhead."

Saturday, September 17, 2016

Charlie Rymer on the 100-Yard Approach from the Rough (Video)

Here's a video Charlie Rymer did for Morning Drive. This is a shot not often covered in teaching videos -- the 100-yard approach shot from the rough.


Charlie gives you four steps:
  • Take a longer club. Charlie's taking one longer.
  • Open the clubface. You want to the ball to go up.
  • Put the ball forward in your stance. Same reason -- get the ball up.
  • Make a three-quarter swing at your normal full swing speed. In other words, this isn't some sort of soft shot.
As Charlie notes, your lie affects what you can do. But assuming that you have a decent lie, his pointers are a good place to start.

Friday, September 2, 2016

Jeff Ritter on Practice Swings (Video)

This is another of Jeff Ritter's Instagram videos, this one about why you keep hitting shots fat. Although he focuses on chips and pitches here, it's just as true with your sand shots and your full swings.


Did you catch that? You may be practicing hitting the ball fat with your practice swings!

Jeff's right, of course. Most players make practice swings just to loosen up, without even thinking about what they're doing, and as a result their practice swings look nothing like their real swings. But that means you're practicing a swing you never intend to use! If you want to improve your contact, you have to start thinking about what you're doing.

So what does Jeff suggest? Simply that you make sure your practice swings duplicate the shot you want to make.
  • Set up beside the ball -- not close enough to accidentally hit it, of course -- and be sure your club is brushing the ground just past the ball.
  • Make sure the bounce of your club is grazing the grass and you're not digging into the ground. Again, decide what you want to do when you actually hit the ball. Digging a bit is okay if that's what you're after, but for most short shots it's not.
And let me add this about practicing your full shots. Make sure that you're following the same procedure. Make sure your practice swing makes contact with the ground so you'll take a small divot in front of the ball. And make sure it's a small divot -- a strip of bacon, not a strip steak, to borrow a popular image.

Jeff uses the phrase a more mindful rehearsal swing. That's what you want to make. Think before you make that practice swing -- make sure you're actually rehearsing the shot you want to make -- and your actual swings will get better.

Sunday, July 10, 2016

How to Hit a Wedge Farther (video)

That's not exactly what teacher Mike Granato says in this Instagram video, but it's probably how you'll get the most use from his tip. Golf Digest featured the tip, and their article adds some helpful info.

Granato says this tip will help you when you need to hit the ball over a tree and carry a hazard behind it. But I think most of you will use this tip to hit your wedges and short irons a bit farther to hard greens, because the ball stops quicker when it comes down from a higher trajectory.

Here, take a look at the video:


In case you don't understand what Granato's suggesting, he wants you to let the last finger or two of your lead hand hang off the butt end of the club's handle. That means you won't grip the club with the last two or three fingers of your lead hand. Rather, you'll grip with the thumb, index and middle fingers of your lead hand. The last finger or two will just curl up against the butt end of the handle.

The result of this grip change is that you'll effectively get the length of a longer iron when you swing, which means you can hit the ball farther and higher. And that's why Granato recommends limiting this technique to clubs that are 7-iron or shorter -- the longer the club, the harder it will be to control your swing.

As I said, I suspect most of you will find this technique is most helpful when you're hitting to a hard green and need a higher trajectory so the ball will land softer, but the shot is a bit longer than you can normally hit your wedge. Gripping any of your wedges this way could give you another ten to fifteen yards of distance without sacrificing the height of the shot... and that should make it easier to stop the shot quickly.

But make sure you practice this shot before taking it to the course. With fewer fingers gripping the club, it's going to take some getting used to.