I think Martin has the name for this drill wrong. It's his Night School video from early June, which I think can be very useful to you... but I still think the name's wrong.
While Martin says this drill helps with your swing plane -- and it might help you get a more neutral swing plane, as opposed to an in-to-out or out-to-in plane -- I think its real value is in helping you get a fuller shoulder turn with your backswing and a fuller turn into your finish.
In order to get your lead arm to match that 45° backswing shaft, you have to get a good 90° shoulder turn on the way back. And to get your trailing arm to match that 45° finish position shaft, you need to get your upper body turning all the way through (belt buckle to the target, if you will) when you hit the ball.
Will that help your swing plane? Probably. But if it does, it's because getting your shoulders back and around so you "finish your backswing" and "swing to a full finish" primarily helps you get the ball on line better.

Showing posts with label shoulder coil. Show all posts
Showing posts with label shoulder coil. Show all posts
Sunday, July 22, 2018

Thursday, July 5, 2018
Why You Shouldn't Always Copy the Pros (Video)
In this short video from Wednesday's Morning Drive, GOLFTEC instructor Patrick Nuber shows the difference between the ways pros and amateurs use their wrists during their swing. It might convince you that the L-to-L drill isn't something you should use... but you'd be wrong. I want to show you why copying the pros isn't always a good thing, and how "the numbers" don't always tell the whole story.
The L-to-L drill gives you the same result during the backswing that his video diagrams show. There's no conflict there.
At around the 2:20 mark Nuber shows the difference between how pros and amateurs' wrists behave as they move up to the finish. His numbers show that the amateurs bend their wrists upward much more at the halfway up point. That's the position you'll get if you use the L-to-L drill. Nuber says the pros keep their wrists much straighter at the halfway point, and that this creates more clubhead speed.
There's a lot that he doesn't say here. Let me explain some of it to you.
This is one of the great problems with our reliance on numbers. Numbers may not lie, but numbers mean nothing until they are interpreted... and interpretations lie all the time. Don't try to duplicate numbers. Focus instead on learning to play golf, and in time the numbers will take care of themselves.
The L-to-L drill gives you the same result during the backswing that his video diagrams show. There's no conflict there.
At around the 2:20 mark Nuber shows the difference between how pros and amateurs' wrists behave as they move up to the finish. His numbers show that the amateurs bend their wrists upward much more at the halfway up point. That's the position you'll get if you use the L-to-L drill. Nuber says the pros keep their wrists much straighter at the halfway point, and that this creates more clubhead speed.
There's a lot that he doesn't say here. Let me explain some of it to you.
- First off, bear in mind that Nuber's diagrams are taken from a full swing, not the half swing that you use in the L-to-L drill. I don't care how strong they are, no pro will make a full-speed half swing and stop with the shaft at the angle in his diagram.
- Here's something important that you can see in the diagrams. If you look closely at the two figures -- not at the wrists, but at the upper bodies of the figures -- you'll see that the pro figure has turned his chest toward the target far more than the amateur figure. If the upper body position isn't clear to you, just look at the legs and hips -- it's VERY noticeable there. That means that the amateur figure has stopped turning, so the arms have slowed down and the wrists HAVE to bend upward. THAT'S the cause, the reason the amateur loses clubhead speed, not the wrist bend. The extra wrist bend is merely the result of his body slowing down too early.
- Here's a corollary to the last point: If you keep turning your body as you swing into the finish, your wrists won't bend upward until much later in the followthrough. In other words, the pro arm position Nuber shows will happen automatically if you turn properly.
- Did you notice that Nuber says the lesser wrist bend causes the ball to fly lower? Most amateurs are struggling to hit the ball higher and get more spin on wedge shots. The last thing they need is to consciously try and hit the ball lower. They should focus on creating as much clubhead speed as possible before they start trying to hit the ball lower.
- Finally, think about your short game. When you want to hit the ball lower AND SHORTER, you cut off the finish -- exactly what his "point the shaft" drill teaches you. If you want to increase your distance, this isn't the way to do it.
This is one of the great problems with our reliance on numbers. Numbers may not lie, but numbers mean nothing until they are interpreted... and interpretations lie all the time. Don't try to duplicate numbers. Focus instead on learning to play golf, and in time the numbers will take care of themselves.
Sunday, March 4, 2018
Brandel Chamblee on "the Magic Move" (Video)
I know many of you don't care for Brandel Chamblee, and you know I don't agree with him on everything either. But this short video he did on what he calls "the Magic Move" is a good explanation of what many successful pros have done to get distance.
I want to focus on that "straight right leg" he mentions. (And add that Arnold Palmer may have been the best example of it.) Bear in mind that you aren't necessarily "locking" that knee; it may have a slight flex in it. But it's a very slight flex -- slight enough that it almost feels locked, but without the stress you feel in a locked knee joint. It's straight enough that it doesn't bend easily.
If you let your trailing knee straighten during your backswing, it may sound as if it will limit your ability to launch into your downswing. What it actually does is stop you from "spinning out" at the top as you start down:
And as Brandel points out, it's really hard to argue with the success of the players who have used it. It's one of those techniques that I put in the "it's worth a try" category, because if it won't work with your swing, you'll know pretty quick and won't have to waste a lot of time trying it.
But if it works for you... well, Arnie had a pretty good record.
I want to focus on that "straight right leg" he mentions. (And add that Arnold Palmer may have been the best example of it.) Bear in mind that you aren't necessarily "locking" that knee; it may have a slight flex in it. But it's a very slight flex -- slight enough that it almost feels locked, but without the stress you feel in a locked knee joint. It's straight enough that it doesn't bend easily.
If you let your trailing knee straighten during your backswing, it may sound as if it will limit your ability to launch into your downswing. What it actually does is stop you from "spinning out" at the top as you start down:
- That straightness makes a fuller hip turn feel more natural, and it almost doesn't require any extra thought on your part. (Automatic moves -- when they're correct -- almost always improve your ballstriking.)
- It makes it easier to stay relatively still over the ball (no sway during your backswing) without putting extra stress on your back.
- Since you have to turn your hips to start the downswing rather than pushing hard with your thigh, it smooths out the start of your downswing.
- You don't have to "drive" forward to get a weight shift to your lead foot -- a straight trailing leg forces you to "fall onto" your lead foot. Instant weight shift!
- And once your upper body begins to turn with your hips during your downswing, your trailing knee will start to bend automatically. That puts you in position to start using the ground to push up at impact, but it keeps the "push up" under control so you don't overdo it and mis-hit the ball.
And as Brandel points out, it's really hard to argue with the success of the players who have used it. It's one of those techniques that I put in the "it's worth a try" category, because if it won't work with your swing, you'll know pretty quick and won't have to waste a lot of time trying it.
But if it works for you... well, Arnie had a pretty good record.
Wednesday, November 15, 2017
Learning from an Old Golf Swing (Video)
The swing belongs to none other than Walter Hagen. Hagen won two US Opens, four Open Championships and five PGA Championships (it was match play back then). Hagen is third on the list of all-time major winners, topped only by Nicklaus and Woods.
Why am I posting this? Because this video shows Hagen in Europe in 1928, which means he was using hickory shafts. Although the USGA okayed steel shafts in 1924, the R&A refused to allow them until 1929. That means the swing you see in this video was made with hickory shafts.
You may have seen a lot of weird-looking hickory swings, but you won't see that with Hagen. There's a lot you can learn from this sweet move!
A few notable things you might find consider:
Why am I posting this? Because this video shows Hagen in Europe in 1928, which means he was using hickory shafts. Although the USGA okayed steel shafts in 1924, the R&A refused to allow them until 1929. That means the swing you see in this video was made with hickory shafts.
You may have seen a lot of weird-looking hickory swings, but you won't see that with Hagen. There's a lot you can learn from this sweet move!
A few notable things you might find consider:
- Hagen starts his backswing with a slight forward turn of his hips. That makes the start of his backswing a reaction; he isn't starting from a "frozen" position over the ball.
- Note the full shoulder coil, almost Daly-esque in its length. There's no tension there!
- The footwork is very simple -- the lead heel comes up off the ground and is then replanted, his hips move back freely and he turns freely toward the target. There's no sway during his backswing, no exaggerated slide forward, no leaning backward at impact. He just "steps" to turn away from the target, then "steps" to turn toward the target. Very simple and natural-looking.
- Finally, just look at how relaxed he appears to be all the way through the swing. He's not straining for distance, although he was considered one of the longer hitters of his day. He just makes a long, rhythmic swing that moves pretty fast!
Tuesday, November 7, 2017
A Quick Look at Shanshan Feng's Swing (Videos)
Shanshan Feng (aka Jenny Money) has moved up to #3 in the Rolex World Rankings this week, less than a quarter point behind long-hitting Sung Hyun Park.. I thought it might be instructive to take yet another look at one of the simplest yet most effective swings in women's golf.
This first video shows her swing from straight on, and it includes a slo-mo view of her hands at impact.
And this second video shows her swing from a variety of angles.
Let me point out a few simple things you can learn from Shanshan -- simple things that you can put into action immediately.
And bear in mind that Shanshan is notorious for NOT PRACTICING. If you want a dependable swing that doesn't need a lot of attention, you could do a lot worse than copying Jenny Money!
This first video shows her swing from straight on, and it includes a slo-mo view of her hands at impact.
And this second video shows her swing from a variety of angles.
Let me point out a few simple things you can learn from Shanshan -- simple things that you can put into action immediately.
- Simple setup. Note that her lead wrist is bent a bit more than most teachers would recommend, but that's because she has the butt end of the shaft pointing at her belly button. In other words, she has the end of the shaft pointing at the center of her body, so it's pointing at her spine.
- She cocks the club a bit earlier than some players, but there's nothing contrived here. She just takes it back in a way that feels comfortable to her, so it's consistent.
- Her backswing isn't extremely long, even with a driver -- it looks more like a three-quarter swing -- but she gets a good shoulder turn and she doesn't slide away from the ball.
- Yes, she starts down by moving her hips forward... but no, she doesn't make some powerful forward thrust with her hips. Physics demand that your lower body has to move first in order to start your downswing, but Shanshan doesn't exaggerate the move. She just moves in a natural way, stepping from her trail foot to her lead foot as she turns toward the target.
- She really uses her hands, arms and shoulders, so her wrists uncock as she hits the ball. The shaft is pointing at her belly button at impact, just the way she set up to the ball. She isn't worried about getting her wrists in some special position; she just points the shaft straight at the ball.
- Her footwork is very simple during her downswing. Again, all she does is just step from her trail foot to her lead foot as her shoulders turn completely into her finish. Since she doesn't stop her shoulders from turning, the club doesn't flip over as she hits the ball. As a result, the ball flies pretty straight.
And bear in mind that Shanshan is notorious for NOT PRACTICING. If you want a dependable swing that doesn't need a lot of attention, you could do a lot worse than copying Jenny Money!
Thursday, October 26, 2017
The Art of Swatting Flies, Part 2 (Video)
About a week ago I posted a video from instructor Trent Wearner on how to create more clubhead speed with a flyswatter action. (You can click the link to see Wearner's video.) Today I want to expand on the idea a bit, try to help you feel it a bit more clearly.
In that post I also linked to another post I had done called The Wall Slap Drill. That drill should have helped you get a solid lower body action, one that would make the flyswatter action easier to create and apply to the ball.
Today I want to link to yet another post I did, this one on hitting sand shots with soft arms. The instructor, Rob Strano, likened it to the Carlton Dance -- but his video was specific to hitting sand shots. In today's post I'm going to show you how to combine that technique with the flyswatter motion and apply it to your regular shots.
First, here's the Strano video again:
Now, what you can take directly from that video is the whole "soft arms" idea, the dancing feel. But if you try to do it the way Strano suggests when you play your normal shots, you'll run into a couple of problems:
Fortunately, the adjustments aren't difficult.
The wall slap drill does more than give you a solid move into the ball. I originally designed it to help to help players extend their arms more. This is something that many of the pros say they consciously work on (Annika is one who comes to mind). That will help you get a bigger shoulder coil with a shallower angle of attack, to take better advantage of the clubhead speed created by the flyswatter motion.
The only other change you should make for regular shots is the amount of elbow bend created by the Carlton Dance feel. As you can see in the video, Strano's elbows are so soft that his elbows bend quite a bit. To create that flyswatter feel, your elbows STILL have to flex during your swing's change of direction. They just don't need to flex as much during a standard swing.
And I won't leave you to guess the amount of flex you need. You're going to bend your elbows straight up for this. (When you do the actual wall slap drill, your arms will automatically create a swing plane because of your combined shoulder coil and elbow bend. What I'm teaching you here will just keep you from exaggerating it.) Here's how you do it:
I think that's the best I can explain it right now. Learning how your swing should feel is one of the most difficult things to learn because everybody feels it a bit differently, but it's not impossible. It just takes a little imagination.
And as usual, if you have questions, just put them in the comments and I'll do my best to answer them.
In that post I also linked to another post I had done called The Wall Slap Drill. That drill should have helped you get a solid lower body action, one that would make the flyswatter action easier to create and apply to the ball.
Today I want to link to yet another post I did, this one on hitting sand shots with soft arms. The instructor, Rob Strano, likened it to the Carlton Dance -- but his video was specific to hitting sand shots. In today's post I'm going to show you how to combine that technique with the flyswatter motion and apply it to your regular shots.
First, here's the Strano video again:
Now, what you can take directly from that video is the whole "soft arms" idea, the dancing feel. But if you try to do it the way Strano suggests when you play your normal shots, you'll run into a couple of problems:
- First, you'll create an angle of attack that's much too steep for a standard shot. In a sand shot you want hit the sand first and throw the ball out of the trap, but from a normal lie you want to hit the ball first.
- Second, if you bend your elbows as much as Strano indicates, you create a very narrow swing arc -- that's why the angle of attack is so steep -- which automatically reduces your shoulder turn. That's going to cut your top clubhead speed.
Fortunately, the adjustments aren't difficult.
The wall slap drill does more than give you a solid move into the ball. I originally designed it to help to help players extend their arms more. This is something that many of the pros say they consciously work on (Annika is one who comes to mind). That will help you get a bigger shoulder coil with a shallower angle of attack, to take better advantage of the clubhead speed created by the flyswatter motion.
The only other change you should make for regular shots is the amount of elbow bend created by the Carlton Dance feel. As you can see in the video, Strano's elbows are so soft that his elbows bend quite a bit. To create that flyswatter feel, your elbows STILL have to flex during your swing's change of direction. They just don't need to flex as much during a standard swing.
And I won't leave you to guess the amount of flex you need. You're going to bend your elbows straight up for this. (When you do the actual wall slap drill, your arms will automatically create a swing plane because of your combined shoulder coil and elbow bend. What I'm teaching you here will just keep you from exaggerating it.) Here's how you do it:
- Set up for the wall slap drill and swing your arms up so they're parallel to the ground (the top of the wall slap drill). Get as close to a 90° shoulder turn as you can, which should be easier since you aren't making a full swing. Your trailing hand should point straight out to the side, at just about the height of your armpit.
- With your arms in that position, change position so your foot line is perpendicular to the wall (you start the drill with your foot line parallel) and your trailing hand's fingertips are touching the wall.
- Now, bend your lead elbow just enough that your fingertips move four to six inches higher on the wall.
- Finally, without bending your elbows any more, cock your trailing wrist just a little. This is the position you want to swing to during the drill. The sequence with a club will feel like this: (1) arms swing up to armpit height, (2) lead elbow flexes slightly as arms stop moving upward, (3) weight of club causes wrists to cock, (4) arms start down and then (5) you consciously try to smack the ball by swinging the shaft just past the ball. Yes, the flyswatter move is an actual swatting motion; you use effort (both arms and legs) to swing the clubhead through the ball! When you do the drill WITHOUT a club, this is the feel you are imagining.
I think that's the best I can explain it right now. Learning how your swing should feel is one of the most difficult things to learn because everybody feels it a bit differently, but it's not impossible. It just takes a little imagination.
And as usual, if you have questions, just put them in the comments and I'll do my best to answer them.
Wednesday, October 18, 2017
Trent Wearner on the Art of Swatting Flies (Video)
If you've read my blog for any period of time, you know I frequently use a flyswatter as my example of how your forearms and wrists work during a swing. Well, instructor Trent Wearner actually posted a video with a flyswatter drill to help you get more clubhead speed. Of course I'm going to post it!
The drill is self-explanatory. I've posted some similar drills before, but actually seeing this move made using a flyswatter with a golf grip may help some of you get a better feel for how the motion works.
The one thing I wish Wearner had done was make a "swatter swing" using both hands so you could see the actual arm motion of each arm. It may help you figure out the motion more easily if you cock your wrists upward directly in front of your body, with the shaft swinging up and down vertically. Both elbows will bend slightly as you change direction -- the bend will feel bigger than it actually is -- and to get the same feel in your normal swing you'll have to make sure you let your shoulders turn fully in your backswing.
You might find that my post called The Wall Slap Drill is useful for transferring the feel of the "swatter swing" to your regular swing.
This really isn't difficult unless you're dead set on tensing your muscles a lot during your golf swing. A flyswatter-style motion feels a lot more relaxed, and consequently a lot more natural, than most players think their swing should feel.
The drill is self-explanatory. I've posted some similar drills before, but actually seeing this move made using a flyswatter with a golf grip may help some of you get a better feel for how the motion works.
The one thing I wish Wearner had done was make a "swatter swing" using both hands so you could see the actual arm motion of each arm. It may help you figure out the motion more easily if you cock your wrists upward directly in front of your body, with the shaft swinging up and down vertically. Both elbows will bend slightly as you change direction -- the bend will feel bigger than it actually is -- and to get the same feel in your normal swing you'll have to make sure you let your shoulders turn fully in your backswing.
You might find that my post called The Wall Slap Drill is useful for transferring the feel of the "swatter swing" to your regular swing.
This really isn't difficult unless you're dead set on tensing your muscles a lot during your golf swing. A flyswatter-style motion feels a lot more relaxed, and consequently a lot more natural, than most players think their swing should feel.
Tuesday, July 25, 2017
One of Henrik Stenson's Daily Drills (Video)
I've mentioned this drill in a previous post -- I don't remember when -- but this video from Martin Hall is new to me and it demonstrates how to do it. The last couple of minutes of the video is basically an ad, so the meat of this video is in the first three minutes.
This "pressdown" drill is one way to learn a good shoulder coil. It forces you to keep your arms straight for a large part of your swing, which helps you:
This isn't the only way to accomplish these goals, but it's one of the better drills you can use.
This "pressdown" drill is one way to learn a good shoulder coil. It forces you to keep your arms straight for a large part of your swing, which helps you:
- strengthen your core
- increase your flexibility
- sync up your arms and shoulders
- learn the feel of a full finish
This isn't the only way to accomplish these goals, but it's one of the better drills you can use.
Sunday, April 2, 2017
A Different Take on a Toski Drill
Today I'm borrowing -- and altering -- a drill Bob Toski made popular in his book How to Feel a Real Golf Swing. The drill is called the "Hitchhiker Drill" and it's on page 33 of the book. Here's the illustration:

Toski uses this drill to teach proper hand motion during your swing. The drill focuses on your lead arm -- in this case, it's his left arm.
But today I want you to do this drill while focusing on your TRAILING arm. Why? Because if you do, the Hitchhiker Drill is a wonderful way to improve your footwork and help you learn to turn to a full finish.
To get your trailing hand into the same position as the illustration of Toski's lead hand, you simply MUST make a full release into your finish. For many of you, this drill will minimize your slices and hooks because you'll learn to swing your hands and arms in sequence with your body. Slicers tend to stop their swing before the clubface can square up. Hookers tend to stop their swing and then flip their wrists to square up the clubface. Two different problems with the same basic cause -- a body turn that stops too soon!
So give this variation of the Hitchhiker Drill a try. In fact, try it both ways! You might be surprised just how many problems this one little drill can help eliminate... and you don't even need a club to do it.
Toski uses this drill to teach proper hand motion during your swing. The drill focuses on your lead arm -- in this case, it's his left arm.
But today I want you to do this drill while focusing on your TRAILING arm. Why? Because if you do, the Hitchhiker Drill is a wonderful way to improve your footwork and help you learn to turn to a full finish.
To get your trailing hand into the same position as the illustration of Toski's lead hand, you simply MUST make a full release into your finish. For many of you, this drill will minimize your slices and hooks because you'll learn to swing your hands and arms in sequence with your body. Slicers tend to stop their swing before the clubface can square up. Hookers tend to stop their swing and then flip their wrists to square up the clubface. Two different problems with the same basic cause -- a body turn that stops too soon!
So give this variation of the Hitchhiker Drill a try. In fact, try it both ways! You might be surprised just how many problems this one little drill can help eliminate... and you don't even need a club to do it.
Tuesday, February 21, 2017
A Surprise Tip to Avoid "Getting Stuck"
When you study swing mechanics as much as I do, sometimes you experience a moment of serendipity. That is, two separate things that you thought had no connection suddenly slam into each other... and a little light bulb appears over your head. That happened to me Monday.
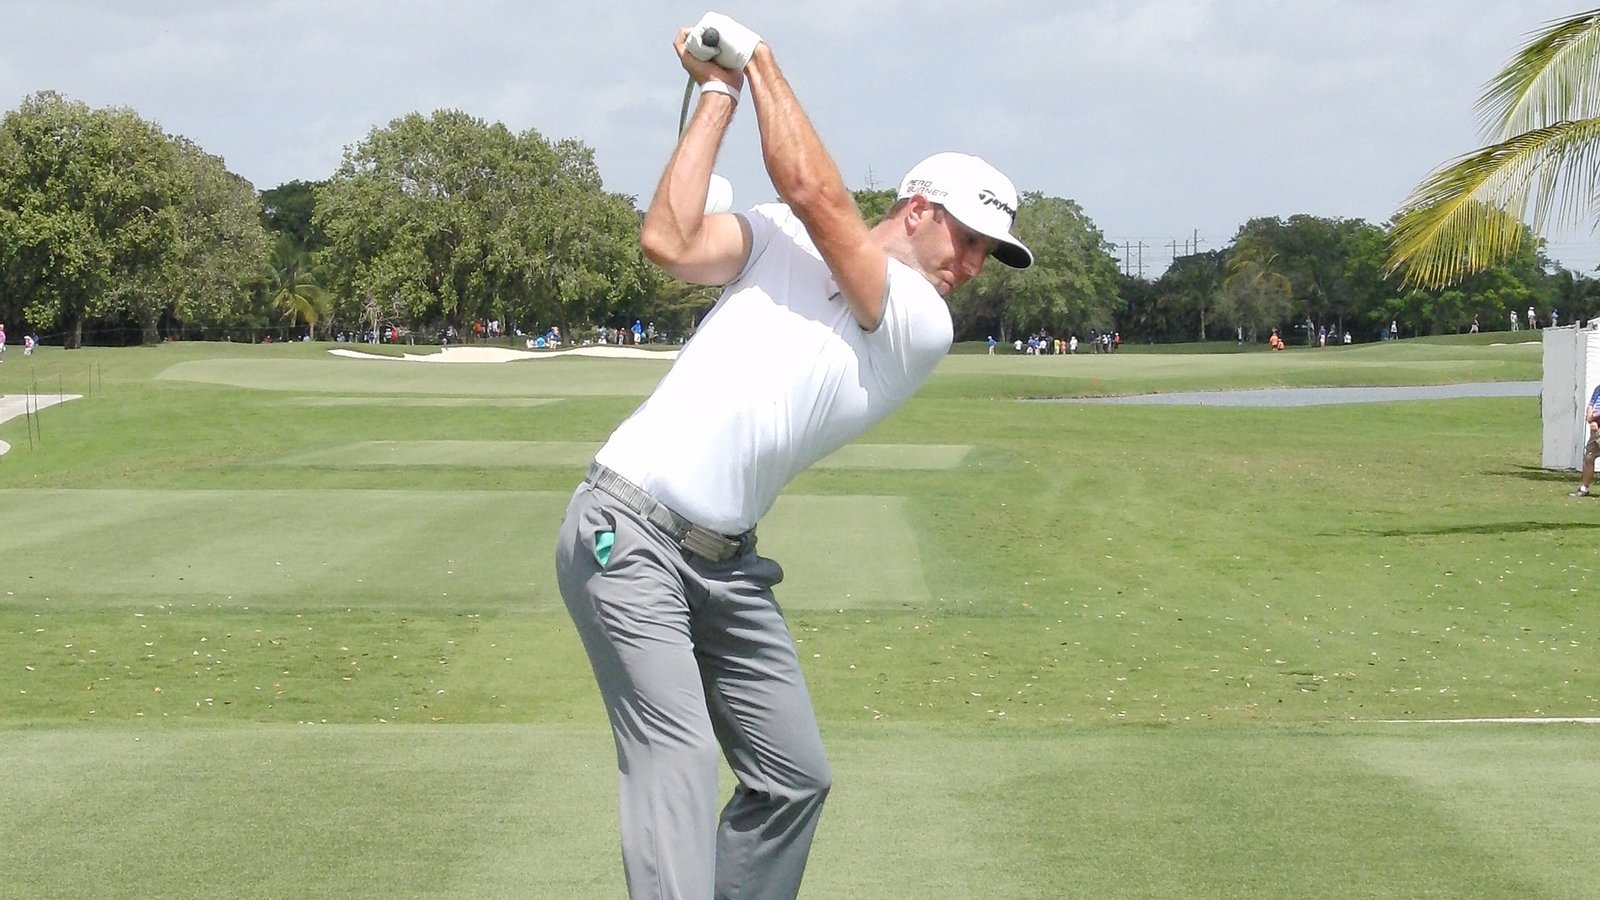
Michael Breed was on Morning Drive -- as he often is -- and was talking about DJ's change of direction at the top of his swing. Many players, Breed said, don't get a full shoulder turn like DJ. Instead, their shoulders stop and their arms just keep going, trying to make a longer swing. As a result, Breed said that their trailing elbows move too much behind them and they simply can't return them into the proper position in time to make their downswing. Their elbows literally "get stuck" behind them.
That's when my little light bulb lit up, and I decided this tip might help some of you.
In past posts I have mentioned that some players and instructors recommend pushing your trailing hand away from your head at the top of your backswing. This is supposed to help you keep more width in your swing, which should help you get more distance.
But on Monday morning I realized that, if you push your trailing hand away from your head at the top of your backswing -- that is, if you try to straighten your trailing elbow a little -- then your trailing elbow CAN'T move behind you at the top. Just try it. If you push the club away from you at the top of your backswing, your elbow HAS to move back into the proper position.
Lights suddenly went on. Voilà! No more getting stuck!
Mechanics don't get much simpler than that, folks. If you're getting stuck on your way down, just try to push your hands away from your head at the top. You'll get your trailing elbow back into position without any trouble at all. Problem solved.
I love serendipity.
The photo came from this page at golfchannel.com.
Michael Breed was on Morning Drive -- as he often is -- and was talking about DJ's change of direction at the top of his swing. Many players, Breed said, don't get a full shoulder turn like DJ. Instead, their shoulders stop and their arms just keep going, trying to make a longer swing. As a result, Breed said that their trailing elbows move too much behind them and they simply can't return them into the proper position in time to make their downswing. Their elbows literally "get stuck" behind them.
That's when my little light bulb lit up, and I decided this tip might help some of you.
In past posts I have mentioned that some players and instructors recommend pushing your trailing hand away from your head at the top of your backswing. This is supposed to help you keep more width in your swing, which should help you get more distance.
But on Monday morning I realized that, if you push your trailing hand away from your head at the top of your backswing -- that is, if you try to straighten your trailing elbow a little -- then your trailing elbow CAN'T move behind you at the top. Just try it. If you push the club away from you at the top of your backswing, your elbow HAS to move back into the proper position.
Lights suddenly went on. Voilà! No more getting stuck!
Mechanics don't get much simpler than that, folks. If you're getting stuck on your way down, just try to push your hands away from your head at the top. You'll get your trailing elbow back into position without any trouble at all. Problem solved.
I love serendipity.
The photo came from this page at golfchannel.com.
Thursday, February 9, 2017
Belen Mozo on Hitting Longer Drives
Golf Digest's article on how Belen Mozo carries the ball so far is very interesting. I just want to mention a few points from the article that I think many players will miss, simply because they're looking for something "new" instead of just something that works.

Belen talks about using a wide stance at address, but if you look at the photo in that section of the article (or even the photo above) you'll see that her "wider than shoulder width" stance isn't as wide as many of you might assume. As she says, if you get too tense, you'll cut down on your ability to turn.
When she talks about making a big arc on her backswing, she's talking about keeping "her hands in front of her." If you pay attention to what you read, you'll see that she's simply keeping her upper arms lightly against the sides of her chest on the way back and as she swings down. That's basic Hogan technique and, while I think some players overdo it and get too tense, that's what most good players do on the backswing until their hands are just below their shoulders. That's how you get a big shoulder coil, and that's what she wants you to do here.
Finally, this is the most unusual thing she says:
Belen carries the ball 240 yards off the tee vs 219 for the average guy on the weekend. If you're looking for some extra distance, this might be worth a try. It's definitely not a difficult technique to learn.
Belen talks about using a wide stance at address, but if you look at the photo in that section of the article (or even the photo above) you'll see that her "wider than shoulder width" stance isn't as wide as many of you might assume. As she says, if you get too tense, you'll cut down on your ability to turn.
When she talks about making a big arc on her backswing, she's talking about keeping "her hands in front of her." If you pay attention to what you read, you'll see that she's simply keeping her upper arms lightly against the sides of her chest on the way back and as she swings down. That's basic Hogan technique and, while I think some players overdo it and get too tense, that's what most good players do on the backswing until their hands are just below their shoulders. That's how you get a big shoulder coil, and that's what she wants you to do here.
Finally, this is the most unusual thing she says:
When I swing down, my left leg is locked and pushing hard into the ground for leverage to create more power. Also, my upper body is almost completely behind the ball's position through impact. I've shifted my weight into the left leg (that's why it's straight), but I'm putting as much body weight into the hit as I can. I'm not really swinging my fastest until the ball is struck. My swing speed is building until then.Her left (lead) leg is locked during her downswing. Do you understand that? Essentially, as soon as her lead heel is planted flat on the ground when she starts her downswing, she straightens her lead knee so she's pushing down with that foot. If you do that, you CAN'T slide your hips very far forward on the downswing! The fact that she says her upper body is still behind the ball at impact emphasizes this fact. This keeps you steady over the ball and should help your accuracy as well as your distance.
Belen carries the ball 240 yards off the tee vs 219 for the average guy on the weekend. If you're looking for some extra distance, this might be worth a try. It's definitely not a difficult technique to learn.
Tuesday, January 24, 2017
Tommy Fleetwood's Wide Shallow Swing
Golf Digest has a new article about how to make a wider, shallower swing like Tommy Fleetwood. Tommy held off Dustin Johnson this past weekend to win at Abu Dhabi.
I want to focus on how you get the feel described by instructor Shaun Webb.

Here's how Webb describes the move:
If you do this correctly, your posture will be good throughout the swing and you'll feel less pressure in your lower back. And your weight shift from your trail leg to your lead leg should happen automatically.
You can try hitting balls this way also. It actually pretty easy, although you won't hit them as far as normal. (This drill is a shorter swing.)
Remember: The point of this drill is to help you learn how to keep your trail elbow from collapsing at the top of your backswing. It can really help improve your fairway wood play once you get that feel of width at the top.
I want to focus on how you get the feel described by instructor Shaun Webb.
Here's how Webb describes the move:
"To get a better feel for this shot in your own game, take out a fairway wood and make swings feeling that your hands don't get closer to your body in transition and into the downswing," says Webb. "This will help widen your route to the ball and shallow the approach of the club. You'll start hitting them high and pure."It doesn't take much thought to realize that it can't actually happen this way -- that is, your hands HAVE TO get closer to your body during your change of direction and downswing. So how do you FEEL that your hands are doing something that can't actually happen?
- The key here is that you want to feel as if both arms remain completely straight throughout the swing. I'm sure you've heard instructors tell you that, at the top of your backswing, you want to use your trailing arm to push the club as far away from your head as you can. Annika is one player who says that's what she tries to feel during her swing. This is the feel you're after. If you try swinging the club straight up in front of you without turning your shoulders, you'll learn the basic feeling very quickly.
- Unless you're very flexible, you'll need to shorten your swing to do this drill. That's because you need a full 90° shoulder coil to get anywhere close to this position, and even then you won't be able to do it once your hands start to move above your shoulders.
- To keep both arms straight without tensing up and getting stiff, you need to feel as if both hands are doing an equal part of the work. If you were swinging a heavy weight at the end of the shaft, the way the weight would pull your arms outward is the feel you're looking for.
- Now, you try to swing the club up so your hands are shoulder height. If it was me, I'd say to stop when your hands are only about chest high because it's easier that way. You have to coordinate the shoulder coil and the swing up so both arms stay straight. If you do it correctly, it's very easy.
- To get the club above your shoulders -- and that won't be by much -- let your trailing elbow bend just a little. Got that? JUST A LITTLE. You only want it to bend enough that your hands can move slightly above your shoulders. That little bend will let your wrists cock.
- Then, when you start down, that trailing elbow starts the downswing by straightening out.
If you do this correctly, your posture will be good throughout the swing and you'll feel less pressure in your lower back. And your weight shift from your trail leg to your lead leg should happen automatically.
You can try hitting balls this way also. It actually pretty easy, although you won't hit them as far as normal. (This drill is a shorter swing.)
Remember: The point of this drill is to help you learn how to keep your trail elbow from collapsing at the top of your backswing. It can really help improve your fairway wood play once you get that feel of width at the top.
Thursday, December 29, 2016
Paula Creamer's Anti-Sway Drill
Paula Creamer posted this on her Instagram account a couple weeks back. I actually found it through this Golf Digest article, where they (with help from instructor Jason Guss) tried to figure out exactly what she was trying to learn with it.
The whole idea of standing on an unstable surface to improve your footwork and balance is nothing new, of course; you can find any number of such drills from various instructors. But you don't often hear players say that they're doing these drills to improve their shoulder coil. (Note Paula's hashtags #thatshoulderturn and #thathipturn.)
The nice thing about this version of the drill is that it's a really cheap version. Many folks have (or know someone who has) extra bits of 2x4 laying out in the garage. And if not, a 2x4 is extremely cheap at a building supply store.
So here's yet another version of the balance drill you can add to your practice arsenal.
The whole idea of standing on an unstable surface to improve your footwork and balance is nothing new, of course; you can find any number of such drills from various instructors. But you don't often hear players say that they're doing these drills to improve their shoulder coil. (Note Paula's hashtags #thatshoulderturn and #thathipturn.)
The nice thing about this version of the drill is that it's a really cheap version. Many folks have (or know someone who has) extra bits of 2x4 laying out in the garage. And if not, a 2x4 is extremely cheap at a building supply store.
So here's yet another version of the balance drill you can add to your practice arsenal.
Wednesday, December 21, 2016
Jim Flick on the TWO Pendulums in Your Swing (Videos)
The late Jim Flick was well respected in the golf community. He was one of those teachers who seemed able to help almost anybody because he used such simple images to teach the basics.
In his book Jim Flick on Golf he gave a very simple explanation of how to use your hands and arms in a golf swing to create speed. I bet you've heard this explanation before but I'd also bet you didn't really understand it. Let's see if we can change that today. Here's how Jim put it in his book:
No doubt you've heard of an 'L-to-L' swing. It's a common way to learn pitching technique. You swing your hands back to waist high (an L with the club shaft pointing straight up), then they straighten out as the clubhead hits the ball, and finally they form another L in the followthrough (again, with the shaft pointing straight up). Here's Mike Malaska, who worked closely with Jim, demonstrating how this works.
Please note that Mike isn't trying to drive his lower body when he does this. The club's motion pulls his upper body around, and then his upper body pulls his lower body around. As you gradually get out to a full swing you'll start to use your legs more, but it'll be a very natural leg drive -- you won't be thrashing at the ball. (Mike refers to this added drive late in the video when he mentions "using the ground.")
Let me anticipate a question here: When you do this drill at waist high, your wrists will cock as your hands slow down at waist high. When you make this move in a full swing, your wrists will cock as your hands slow down near the end of your swing. It's the change of direction that creates the wrist cock. Got it?
Okay, here's a bonus video with Malaska teaching you how to use the L-to-L drill to learn shot shaping. I bet A LOT of you will be working with this one!
Using the L-to-L drill will help your swing in so many ways, including improved balance, better footwork and weight shift, and eventually longer distance for less effort. This is a post you'll want to bookmark in your browser and come back to again and again.
In his book Jim Flick on Golf he gave a very simple explanation of how to use your hands and arms in a golf swing to create speed. I bet you've heard this explanation before but I'd also bet you didn't really understand it. Let's see if we can change that today. Here's how Jim put it in his book:
There are actually two pendulums at work. The first is formed by the hands and wrists cocking, uncocking, and recocking. The second is created by the forearms and upper arms swinging from the shoulder sockets.Alright, the two pendulums are the one stretching from the clubhead to your hands, and the one from your wrists to your shoulder joints. Your wrist joins the two of them together, and act as the pivot point. When your wrists are fully cocked, the clubhead-to-hands-to-shoulder-joints stretch looks like an L shape.
My former colleague from Golf Digest school days Peter Kostis called them the first swing and the second swing. I think of them as two pendulums.
What permits the two pendulums to work together is the combination of the weight in club head, centrifugal force, the good old law of gravity -- and the golfer. These pendulums supply about 80 percent of the distance in your golf shot -- provided the swinging elements of your body drive the turning elements and not vice versa.
If your grip pressure is too tight, the weight at the end of the club is restricted from doing its job.
If you try consciously to turn your shoulders and shift your weight, you destroy the natural harmony of those two pendulums.
If you try to accelerate at impact and follow through, well, you know what happens there. [NOTE: This is a reference to an earlier section in the book. If you TRY to accelerate, you interfere with the natural motion and actually lose clubhead speed.]
But if your posture is good, and your grip pressure -- fingers secure, arms relaxed -- is correct, you give those two pendulums a chance to work in harmony. (p58-59)
No doubt you've heard of an 'L-to-L' swing. It's a common way to learn pitching technique. You swing your hands back to waist high (an L with the club shaft pointing straight up), then they straighten out as the clubhead hits the ball, and finally they form another L in the followthrough (again, with the shaft pointing straight up). Here's Mike Malaska, who worked closely with Jim, demonstrating how this works.
Please note that Mike isn't trying to drive his lower body when he does this. The club's motion pulls his upper body around, and then his upper body pulls his lower body around. As you gradually get out to a full swing you'll start to use your legs more, but it'll be a very natural leg drive -- you won't be thrashing at the ball. (Mike refers to this added drive late in the video when he mentions "using the ground.")
Let me anticipate a question here: When you do this drill at waist high, your wrists will cock as your hands slow down at waist high. When you make this move in a full swing, your wrists will cock as your hands slow down near the end of your swing. It's the change of direction that creates the wrist cock. Got it?
Okay, here's a bonus video with Malaska teaching you how to use the L-to-L drill to learn shot shaping. I bet A LOT of you will be working with this one!
Using the L-to-L drill will help your swing in so many ways, including improved balance, better footwork and weight shift, and eventually longer distance for less effort. This is a post you'll want to bookmark in your browser and come back to again and again.
Sunday, December 18, 2016
In Case the Hands Drill Confused You...
After posting yesterday's post with the hands drill late on Friday night, I was laying in bed and suddenly realized that some of you might be confused by something in the one-piece takeaway drill that the hands drill was piggybacked on. Hopefully, today's post will eliminate that misunderstanding and you'll get the full value from both the OPT drill AND the hands drill.
When I design a drill with a specific purpose, sometimes I forget that the players using them may not recognize the why behind it. And while players learning an OPT may have understood the why (I mentioned it briefly in the original post), those of you who just focused the hand drill may not. So here's the explanation.
The OPT drill was designed to teach weekend players the correct feel for this position, as illustrated by the photo of Paula Creamer in the OPT drill post:

Many players have trouble getting into this position because they slide their hips away from the target. Many instructors call that a sway, and it's a bad thing. It happens when players don't brace against their trailing leg properly. Among other things, it prevents you from creating a good shoulder coil, which hurts your distance.
In addition, some players move their shoulders away from the target also, which makes them lean backwards and contributes to problems like slicing.
And both of these problems cause a faulty weight shift, which magnifies the other problems.
In order to teach a proper OPT, I needed to teach players how to maintain correct posture as they turned away from the ball. The way I did that was to have players straighten up during the OPT drill. The reason is that we turn and coil and shift weight properly every day, because we're used to doing it when standing erect.
So I had players straighten up to make their turns and then bend over again so they were in the correct takeaway position at the point Paula is demonstrating in the photo. Then, after they were used to the correct feel, they could just make a normal takeaway.
You may be wondering why I used that drill to set up the hands drill, since most of you using the hands drill weren't worried about making a correct OPT. That's a good question!
And here's your good answer:
If you make an incorrect weight shift during your takeaway, the hands drill becomes unbelievably difficult. If you want to see what I mean, forget the turn for a minute and just try to lift the club up from your address position -- as in the Bann video in the last post -- but try to lift it while bending even lower as you do. You'll have to really exaggerate the lift just to get the clubhead off the ground!
Swaying with your hips or moving your shoulders too far sideways during your takeaway creates the same sort of problem. Doing the OPT drill will prevent that.
You've been told to make a wide takeaway to keep the clubhead low to the ground and to create width in your swing. But most of you will do that by making a faulty weight shift, then you'll lose your width at the top of your swing. Width at the top of your swing is much more important than width at the start of your swing, simply because you don't hit the ball with your backswing. If you have width at the top of your backswing, you'll create width during your downswing. Stretching your arms during your takeaway doesn't create width; coiling your shoulders properly does.
Let me repeat that: If you have width at the top of your backswing, you'll create width during your downswing. Stretching your arms during your takeaway doesn't create width; coiling your shoulders properly does.
Use the OPT drill to learn the waist-high position of a correct takeaway -- which will create a proper weight shift to your trailing side -- as demonstrated by Paula in the photo. Then practice doing the hands drill from your address position to Paula's position. That will give you the most success with the least effort.
I hope that clears up any potential confusion I may have created with yesterday's post. Golf is really pretty simple; it's when you try to explain it that it gets complicated. ;-)
When I design a drill with a specific purpose, sometimes I forget that the players using them may not recognize the why behind it. And while players learning an OPT may have understood the why (I mentioned it briefly in the original post), those of you who just focused the hand drill may not. So here's the explanation.
The OPT drill was designed to teach weekend players the correct feel for this position, as illustrated by the photo of Paula Creamer in the OPT drill post:
Many players have trouble getting into this position because they slide their hips away from the target. Many instructors call that a sway, and it's a bad thing. It happens when players don't brace against their trailing leg properly. Among other things, it prevents you from creating a good shoulder coil, which hurts your distance.
In addition, some players move their shoulders away from the target also, which makes them lean backwards and contributes to problems like slicing.
And both of these problems cause a faulty weight shift, which magnifies the other problems.
In order to teach a proper OPT, I needed to teach players how to maintain correct posture as they turned away from the ball. The way I did that was to have players straighten up during the OPT drill. The reason is that we turn and coil and shift weight properly every day, because we're used to doing it when standing erect.
So I had players straighten up to make their turns and then bend over again so they were in the correct takeaway position at the point Paula is demonstrating in the photo. Then, after they were used to the correct feel, they could just make a normal takeaway.
You may be wondering why I used that drill to set up the hands drill, since most of you using the hands drill weren't worried about making a correct OPT. That's a good question!
And here's your good answer:
If you make an incorrect weight shift during your takeaway, the hands drill becomes unbelievably difficult. If you want to see what I mean, forget the turn for a minute and just try to lift the club up from your address position -- as in the Bann video in the last post -- but try to lift it while bending even lower as you do. You'll have to really exaggerate the lift just to get the clubhead off the ground!
Swaying with your hips or moving your shoulders too far sideways during your takeaway creates the same sort of problem. Doing the OPT drill will prevent that.
You've been told to make a wide takeaway to keep the clubhead low to the ground and to create width in your swing. But most of you will do that by making a faulty weight shift, then you'll lose your width at the top of your swing. Width at the top of your swing is much more important than width at the start of your swing, simply because you don't hit the ball with your backswing. If you have width at the top of your backswing, you'll create width during your downswing. Stretching your arms during your takeaway doesn't create width; coiling your shoulders properly does.
Let me repeat that: If you have width at the top of your backswing, you'll create width during your downswing. Stretching your arms during your takeaway doesn't create width; coiling your shoulders properly does.
Use the OPT drill to learn the waist-high position of a correct takeaway -- which will create a proper weight shift to your trailing side -- as demonstrated by Paula in the photo. Then practice doing the hands drill from your address position to Paula's position. That will give you the most success with the least effort.
I hope that clears up any potential confusion I may have created with yesterday's post. Golf is really pretty simple; it's when you try to explain it that it gets complicated. ;-)
Saturday, December 17, 2016
Using Your Hands in the Takeaway, Part 2
In yesterday's post we looked at the theory behind adding some hand power during your takeaway. Today I'll give you a drill that will help you apply that theory.
I hope you spent some time using your hands to position the club over your trailing shoulder WITHOUT turning your shoulders, as Manuel de la Torre explained in the book quote and Steven Bann demonstrated in the video. We'll start with that, then we'll add the rotation.
If you take your address position and just raise the club until your hands are roughly waist high and the shaft is parallel to the floor, that's a very simple move to do. If you avoid excess tension in your hands and forearms, you'll probably find that your upper arms stay pretty close to your chest and your forearms move upward and outward a little.
While de la Torre says that your wrists don't move when doing this, that's not entirely true. The reason is that your wrists actually flex downward a little at address, because of the weight of the clubhead. When you lift the club, your wrists return to more of a neutral position -- which means that, if you straightened out your fingers, you'd see them move upward so they form a straight line with your forearms. That's the natural position for your wrists when your arms and hands are relaxed.
Now, if you click on the Some Useful Post Series button up under the blog header, you'll find that one of the listings is Dexter's Coming Over-the-Top and the third post in that series is labeled as the one-piece takeaway post. (I'm just going to abbreviate one-piece takeaway as OPT from here on out.) While that post has a picture of Paula Creamer after an OPT, there is no diagram showing the drill itself.
Here are copies of the drill diagrams from my Stop Coming Over-the-Top Quick Guide, one for righties and one for lefties. This drill is intended to help you learn what the correct position feels like. But you'll notice that the first thing you do is lift the club, the way you just did when you copied Steven Bann.


You should also notice that the toe of the club still points up at the waist high position in this drill. That's intentional. Believe it or not, this position has actually rotated the clubface open just a little. You don't want much clubface rotation during your swing because the natural bending of your elbows creates more rotation than you realize.
This position matches the "lifted" position you created when you imitated Bann's video. If you use the instructions from the Dexter's Coming Over-the-Top #3 post to get used to this halfway back position, AND THEN you start swinging the club back while imitating Bann's "lift" as you turn, you'll start creating a lot of motion with your hands.
Here's an important thing to note: When you add the rotation during the drill, it should still feel as if you're lifting the club straight up, toward your head. It will probably feel weird at first, but this is how your hands SHOULD feel if you're turning and lifting correctly. (Remember, your trailing elbow bends to create the necessary rotation during a full swing. It will feel as if your forearms aren't twisting at all.) Many players rotate their forearms during the takeaway, which messes up your swing plane. The technical term is that the club gets "laid off."
You may wonder how you'll know that you're doing it correctly. It's very simple, actually. When you lifted the club without turning, the club probably started to feel heavy as the shaft became more parallel to the ground. BUT when you do this OPT drill with the hand lift, if you try to stop at the position shown in the diagrams, YOU'LL PROBABLY HAVE A LITTLE TROUBLE DOING SO. Your hands will stop but the shaft may swing on up to a 10:30 or even an 11 o'clock position. That's from the extra momentum your hands are creating.
Why is this important? There are several reasons I could give, but this one should suffice for now. Many of you have trouble keeping your club on plane during your backswing. That's because your takeaway is too slow... but the trick is that you don't increase the speed by turning faster. You create the extra speed with your hands. Practicing this drill will help you learn to do that.
It will also make the club feel lighter as you reach the top of your swing, which makes it easier to change direction at the top, which helps increase your downswing speed, which can increase your distance. But that's a whole 'nother topic, which the old-time players called "feeling the clubhead."
So there you go, Dana. That's the way you learn to use your hands properly in your takeaway. If you have more questions, just leave a comment and I'll try to give you a usable answer. ;-)
I hope you spent some time using your hands to position the club over your trailing shoulder WITHOUT turning your shoulders, as Manuel de la Torre explained in the book quote and Steven Bann demonstrated in the video. We'll start with that, then we'll add the rotation.
If you take your address position and just raise the club until your hands are roughly waist high and the shaft is parallel to the floor, that's a very simple move to do. If you avoid excess tension in your hands and forearms, you'll probably find that your upper arms stay pretty close to your chest and your forearms move upward and outward a little.
While de la Torre says that your wrists don't move when doing this, that's not entirely true. The reason is that your wrists actually flex downward a little at address, because of the weight of the clubhead. When you lift the club, your wrists return to more of a neutral position -- which means that, if you straightened out your fingers, you'd see them move upward so they form a straight line with your forearms. That's the natural position for your wrists when your arms and hands are relaxed.
Now, if you click on the Some Useful Post Series button up under the blog header, you'll find that one of the listings is Dexter's Coming Over-the-Top and the third post in that series is labeled as the one-piece takeaway post. (I'm just going to abbreviate one-piece takeaway as OPT from here on out.) While that post has a picture of Paula Creamer after an OPT, there is no diagram showing the drill itself.
Here are copies of the drill diagrams from my Stop Coming Over-the-Top Quick Guide, one for righties and one for lefties. This drill is intended to help you learn what the correct position feels like. But you'll notice that the first thing you do is lift the club, the way you just did when you copied Steven Bann.
You should also notice that the toe of the club still points up at the waist high position in this drill. That's intentional. Believe it or not, this position has actually rotated the clubface open just a little. You don't want much clubface rotation during your swing because the natural bending of your elbows creates more rotation than you realize.
This position matches the "lifted" position you created when you imitated Bann's video. If you use the instructions from the Dexter's Coming Over-the-Top #3 post to get used to this halfway back position, AND THEN you start swinging the club back while imitating Bann's "lift" as you turn, you'll start creating a lot of motion with your hands.
Here's an important thing to note: When you add the rotation during the drill, it should still feel as if you're lifting the club straight up, toward your head. It will probably feel weird at first, but this is how your hands SHOULD feel if you're turning and lifting correctly. (Remember, your trailing elbow bends to create the necessary rotation during a full swing. It will feel as if your forearms aren't twisting at all.) Many players rotate their forearms during the takeaway, which messes up your swing plane. The technical term is that the club gets "laid off."
You may wonder how you'll know that you're doing it correctly. It's very simple, actually. When you lifted the club without turning, the club probably started to feel heavy as the shaft became more parallel to the ground. BUT when you do this OPT drill with the hand lift, if you try to stop at the position shown in the diagrams, YOU'LL PROBABLY HAVE A LITTLE TROUBLE DOING SO. Your hands will stop but the shaft may swing on up to a 10:30 or even an 11 o'clock position. That's from the extra momentum your hands are creating.
Why is this important? There are several reasons I could give, but this one should suffice for now. Many of you have trouble keeping your club on plane during your backswing. That's because your takeaway is too slow... but the trick is that you don't increase the speed by turning faster. You create the extra speed with your hands. Practicing this drill will help you learn to do that.
It will also make the club feel lighter as you reach the top of your swing, which makes it easier to change direction at the top, which helps increase your downswing speed, which can increase your distance. But that's a whole 'nother topic, which the old-time players called "feeling the clubhead."
So there you go, Dana. That's the way you learn to use your hands properly in your takeaway. If you have more questions, just leave a comment and I'll try to give you a usable answer. ;-)
Friday, December 16, 2016
Using Your Hands in the Takeaway (Video)
A couple days back Dana left a comment on an old blog post from 2010 called Manuel de la Torre on Arm Swing. In the comments I had mentioned how the old hickory players used their hands to start their backswings and that I could post a drill if the commenter was interested. As it turns out, the commenter from 2010 wasn't... but Dana is. So let's take a look at it.
This post will actually spread over a couple of posts, since I have a lot more material on my blog to refer to now, material that may make the drill I mentioned easier to understand. You need to understand the basic principle at work here (today's post) before I can teach you to use the drill properly (the next post). Okay?
The original post started with the late Manuel de la Torre, who taught a swing based in some of Ernest Jones's teachings (his book was published in 1935), who in turn adapted his method to steel shafts from the old hickory shaft techniques. So let's start with what de la Torre said about the hands in his book, Understanding the Golf Swing. Let me pull something from the old post's comments that I copied from that book, simply because you need to know what he means by "hands" and "arms" to understand what he's saying.
Okay. Here's the quote from his book. Bear in mind that he's writing for right-handed players, so you lefties will need to substitute "left shoulder" for "right shoulder" in the first paragraph:
He's got some interesting stuff in here. Let's take it piece by piece.
Many instructors actually teach a version of this, although you probably didn't realize it. Have you heard teachers talk about trying to keep your trailing hand as far from your shoulder as you can at the top of your backswing? That's the same idea, except they're talking about pushing your hands away from you with your arms while de la Torre has your hands pulling your arms and shoulders around.
Likewise, when he says that everything moves together, this is what most instructors call "keeping the club in front of you" during your swing. But again, they're trying to push the club back while de la Torre has your hands pulling you around.
And that's where most of you will get tripped up as you try to wrap your mind around this. How can your hands pull your shoulders around? You can understand if another person grabs your hands and pulls them, but how can your hands pull you around when they're only attached to your arms? Hands don't just move on their own!
Here's the trick: During your swing, your hands are holding your club. Your club has weight and, if you start it swinging, the club's momentum can pull you around. And that's what he's describing in the last three paragraphs I quoted.
Here's a video I've posted more than once. Steven Bann is K.J. Choi's coach, and in the first minute or so of this video he demonstrates almost exactly what de la Torre is describing. Take a look, then I'll explain a bit more below the video:
Now this may just be the way I feel this movement, but I'd say the lifting motion Bann is making (and de la Torre is describing) is actually caused by bending the elbows ever so slightly. Some of you may feel it mostly at your shoulder joints, some may feel it at the wrists and some may even feel that the fingers are causing the lift. Technically, it's probably started by the fingers since the clubhead has to move first and your fingers are the closest part of your body to the clubhead.
At any rate, it's a very slight movement that starts the club moving upward, and then the club's momentum starts helping your arms move upward, so you feel as if you're just trying to move along with the club. That's what happens until the club shaft points straight up in the air.
de la Torre says you don't consciously cock the wrists. The wrists don't cock until you get to the top and the club starts to move from that vertical position and literally falls toward your shoulder. Gravity makes your wrists cock as your arms slow down. (They HAVE to slow down or you'd smack your shoulder with the shaft. That can be painful!)
You make the same sort of movement when you pick up a glass of water or just about anything, really. (Hopefully you aren't swinging it up over your shoulder and throwing water everywhere, but the motion is the same.)
Now, when Bann separates your backswing into an upward move and a rotational move, that's the key to letting your hands start your backswing. Tomorrow I'll teach you how to combine the two into a smooth backswing. Today, just get used to that upward move that Bann shows you, and then coil your shoulders so you can feel the position at the top of your backswing.
Yeah, you heard me. Practice taking your address position and lifting your club up over your trailing shoulder, then turn to the side. You've probably practiced stranger things before!
UPDATE: The next post in this series is here: Using Your Hands in the Takeaway, Part 2
This post will actually spread over a couple of posts, since I have a lot more material on my blog to refer to now, material that may make the drill I mentioned easier to understand. You need to understand the basic principle at work here (today's post) before I can teach you to use the drill properly (the next post). Okay?
The original post started with the late Manuel de la Torre, who taught a swing based in some of Ernest Jones's teachings (his book was published in 1935), who in turn adapted his method to steel shafts from the old hickory shaft techniques. So let's start with what de la Torre said about the hands in his book, Understanding the Golf Swing. Let me pull something from the old post's comments that I copied from that book, simply because you need to know what he means by "hands" and "arms" to understand what he's saying.
Earlier in the text (on page 51) he specifically defines the arm as "...that portion of the extremity from the shoulder to the elbow, the rest of it to the wrist is the forearm."Are you clear on that? de la Torre separates your arm into arm, forearm, wrist and hand in his teaching. So when you see ARM in this quote from his book, he's talking about your arm above the elbow. And when you see HAND he means your hand separate from your wrist. Got it?
Okay. Here's the quote from his book. Bear in mind that he's writing for right-handed players, so you lefties will need to substitute "left shoulder" for "right shoulder" in the first paragraph:
To produce the backswing, the player must swing the clubhead back with the hands (both hands) toward the right shoulder so that when the backswing is completed, the club is over the shoulder. The hands must be used because a coil has to be created in order to be able to generate the desired speed. The hands must be used exclusively to swing the clubhead from the ball to the end of the backswing, where the arms take over and swing the entire club to the end of the swing.There's more, but it gets into the downswing and such, which is more than we need for this discussion.
When your hands swing the clubhead in the backswing, be sure that as soon as the clubhead starts to move, everything moves with it. Clubhead and shoulders start together, stay together, and reach the end of the backswing together. The rest of the body will respond automatically if it is relaxed.
Notice that when referring to hands and arms, the plural is used. Both hands are used in the backswing and both arms are used in the forward swing.
If a player would take the address position and lift the club vertically to place it on the shoulder, the hands would be used to make this movement. No other part of the body would be considered.
You should make no effort to cock your wrists in the backswing. When a player attempts to cock the wrists, they must be cocked in the plane that corresponds to the club being swung. This would be just another "moving part" making the golf swing difficult to produce.
The wrists are cocked by the club being swung over the shoulder. It is a natural reaction to that motion. It just happens. (p50-51)
He's got some interesting stuff in here. Let's take it piece by piece.
- According to him, your hands make the backswing and your upper arms make the downswing. This isn't a distinction that most instructors would make, and it's probably just how he understands the motion -- you know, the way he feels it when he does it.
- He says the hands must be used in order to create a coil -- that is, a shoulder coil. He says the shoulders turn because the hands move the club. That might be a bit confusing, so it deserves a closer look.
Many instructors actually teach a version of this, although you probably didn't realize it. Have you heard teachers talk about trying to keep your trailing hand as far from your shoulder as you can at the top of your backswing? That's the same idea, except they're talking about pushing your hands away from you with your arms while de la Torre has your hands pulling your arms and shoulders around.
Likewise, when he says that everything moves together, this is what most instructors call "keeping the club in front of you" during your swing. But again, they're trying to push the club back while de la Torre has your hands pulling you around.
And that's where most of you will get tripped up as you try to wrap your mind around this. How can your hands pull your shoulders around? You can understand if another person grabs your hands and pulls them, but how can your hands pull you around when they're only attached to your arms? Hands don't just move on their own!
Here's the trick: During your swing, your hands are holding your club. Your club has weight and, if you start it swinging, the club's momentum can pull you around. And that's what he's describing in the last three paragraphs I quoted.
Here's a video I've posted more than once. Steven Bann is K.J. Choi's coach, and in the first minute or so of this video he demonstrates almost exactly what de la Torre is describing. Take a look, then I'll explain a bit more below the video:
Now this may just be the way I feel this movement, but I'd say the lifting motion Bann is making (and de la Torre is describing) is actually caused by bending the elbows ever so slightly. Some of you may feel it mostly at your shoulder joints, some may feel it at the wrists and some may even feel that the fingers are causing the lift. Technically, it's probably started by the fingers since the clubhead has to move first and your fingers are the closest part of your body to the clubhead.
At any rate, it's a very slight movement that starts the club moving upward, and then the club's momentum starts helping your arms move upward, so you feel as if you're just trying to move along with the club. That's what happens until the club shaft points straight up in the air.
de la Torre says you don't consciously cock the wrists. The wrists don't cock until you get to the top and the club starts to move from that vertical position and literally falls toward your shoulder. Gravity makes your wrists cock as your arms slow down. (They HAVE to slow down or you'd smack your shoulder with the shaft. That can be painful!)
You make the same sort of movement when you pick up a glass of water or just about anything, really. (Hopefully you aren't swinging it up over your shoulder and throwing water everywhere, but the motion is the same.)
Now, when Bann separates your backswing into an upward move and a rotational move, that's the key to letting your hands start your backswing. Tomorrow I'll teach you how to combine the two into a smooth backswing. Today, just get used to that upward move that Bann shows you, and then coil your shoulders so you can feel the position at the top of your backswing.
Yeah, you heard me. Practice taking your address position and lifting your club up over your trailing shoulder, then turn to the side. You've probably practiced stranger things before!
UPDATE: The next post in this series is here: Using Your Hands in the Takeaway, Part 2
Thursday, October 27, 2016
Jason Sedan on Blasting It Like Sadlowski (Video)
I saw this on Morning Drive yesterday and knew right then that I wanted to post this today. Their Coach of the Week, Jason Sedan, has the computer motion studies of Jamie Sadlowski's swing and it shows that restricting your lower body is NOT the way to create clubhead speed. Instead, you have to let your hips turn freely.
Look, I'm not even going to try and explain what he's talking about here. But I do want you to go back to this video I posted of Arnold Palmer's swing during his heyday. Pay particular attention to his hip turn. Look familiar?
Look, I'm not even going to try and explain what he's talking about here. But I do want you to go back to this video I posted of Arnold Palmer's swing during his heyday. Pay particular attention to his hip turn. Look familiar?
Tuesday, May 31, 2016
A Key Move from Ariya Jutanugarn
Here's a simple tip from Golf Digest and New York teacher Michael Jacobs. How does Ariya Jutanugarn create so much clubhead speed? It's actually very simple.
Why did it catch my attention? Because I've suggested this on numerous occasions, but Jacobs states it in a different way.
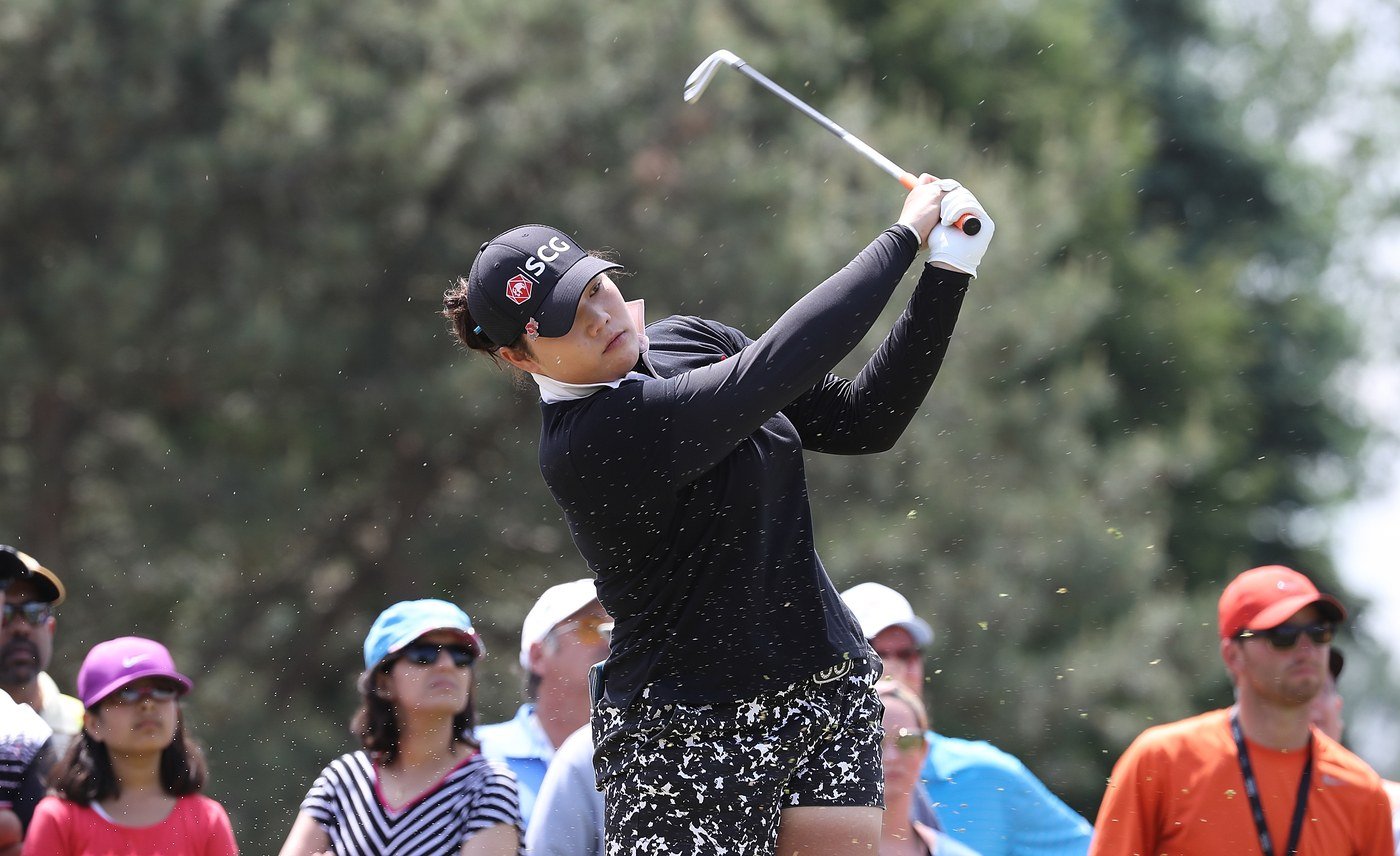
Many instructors tell you that you need to make sure your lower body makes a noticeable move to start the downswing, creating extra separation between your upper and lower body. In contrast, I have often suggested that weekend players try to feel that their upper and lower bodies start down at the same time.
Here's how Jacobs describes the move:
I'd like to see you get some separation between your shoulder coil and hip turn during your backswing -- what Jim McLean calls "the X-Factor" -- and then try to maintain that angle until you hit the ball. This may pull your lead heel off the ground a little at the top of your swing, or maybe not; it depends on how flexible you are.
But if you try to feel as if you start everything moving down at the same time, you'll tend to keep that shoulder/hip angle difference until just before you hit the ball -- it's a natural movement for most folks. Then the angle will 'close' as the club's momentum pulls your upper body through impact and into the finish.
Look, it works for Ariya. She's only 5'7" tall yet Jerry Foltz says she can hit the ball further than Lexi Thompson, who's about 5 inches taller. It's a simple thing to try, and it should help your accuracy as well as your distance.
Why did it catch my attention? Because I've suggested this on numerous occasions, but Jacobs states it in a different way.
Many instructors tell you that you need to make sure your lower body makes a noticeable move to start the downswing, creating extra separation between your upper and lower body. In contrast, I have often suggested that weekend players try to feel that their upper and lower bodies start down at the same time.
Here's how Jacobs describes the move:
"Most players change the relationship between their upper chest and stomach area all through the swing by lunging, leaning, tilting and hunching over. But when you look at Ariya, from her ribcage down to her hips is a consistent cylinder throughout the swing. She doesn't change, and that gives her a clean transfer of energy. It's also way easier on her back."Now Jacobs recommends keeping this upper/lower body relationship from address all the way through your swing. I think that's a bit extreme and can create too much lower body movement for some people... but that's better than the other extreme with an overactive lower body. (If you want to see somebody who does it the way Jacobs suggests, Rocco Mediate appears to do so. He won a major this weekend, so you could do worse than copy him!)
I'd like to see you get some separation between your shoulder coil and hip turn during your backswing -- what Jim McLean calls "the X-Factor" -- and then try to maintain that angle until you hit the ball. This may pull your lead heel off the ground a little at the top of your swing, or maybe not; it depends on how flexible you are.
But if you try to feel as if you start everything moving down at the same time, you'll tend to keep that shoulder/hip angle difference until just before you hit the ball -- it's a natural movement for most folks. Then the angle will 'close' as the club's momentum pulls your upper body through impact and into the finish.
Look, it works for Ariya. She's only 5'7" tall yet Jerry Foltz says she can hit the ball further than Lexi Thompson, who's about 5 inches taller. It's a simple thing to try, and it should help your accuracy as well as your distance.
Friday, November 6, 2015
A Lesson from (Maybe) Phil's New Teacher
By now you've all heard that Phil Mickelson and Butch Harmon are no longer working together. You've probably also heard that Phil's new teacher is rumored to be Andrew Getson, an instructor at Grayhawk Golf Club in Scottsdale and also a Cleveland Golf teaching pro. (For those of you who want all the skinny on the "breakup," you can get up to speed by reading this Matthew Rudy post and this Tim Rosaforte post, both at the Golf Digest site.)
At any rate, I thought you might like to hear the kind of stuff Getson teaches. Here's one of his Cleveland Golf videos about creating more club head speed.
Earlier in the week I did a post about the importance of shoulder turn and why all the emphasis on leg drive is misplaced. I think it's interesting that Getson takes the same position. He definitely encourages you to take a stance that will let your legs drive on the downswing but he focuses on shoulder turn and using your hands and arms to swing faster.
According to the reports, Getson helped Phil with his posture before the Presidents Cup and apparently that's part of the reason Phil played so well after such a lackluster year. Phil says he just wants to get "...some different perspectives and ideas." So I checked out several of Getson's videos on YouTube just to see what kind of stuff he teaches. I like what I've heard so far.
If this is the guy Phil's chosen, the rest of the Tour might want to prepare for a new chapter in the Mickelson saga.
At any rate, I thought you might like to hear the kind of stuff Getson teaches. Here's one of his Cleveland Golf videos about creating more club head speed.
Earlier in the week I did a post about the importance of shoulder turn and why all the emphasis on leg drive is misplaced. I think it's interesting that Getson takes the same position. He definitely encourages you to take a stance that will let your legs drive on the downswing but he focuses on shoulder turn and using your hands and arms to swing faster.
According to the reports, Getson helped Phil with his posture before the Presidents Cup and apparently that's part of the reason Phil played so well after such a lackluster year. Phil says he just wants to get "...some different perspectives and ideas." So I checked out several of Getson's videos on YouTube just to see what kind of stuff he teaches. I like what I've heard so far.
If this is the guy Phil's chosen, the rest of the Tour might want to prepare for a new chapter in the Mickelson saga.
Subscribe to:
Posts (Atom)